Adding a Lubricator (Accessory)
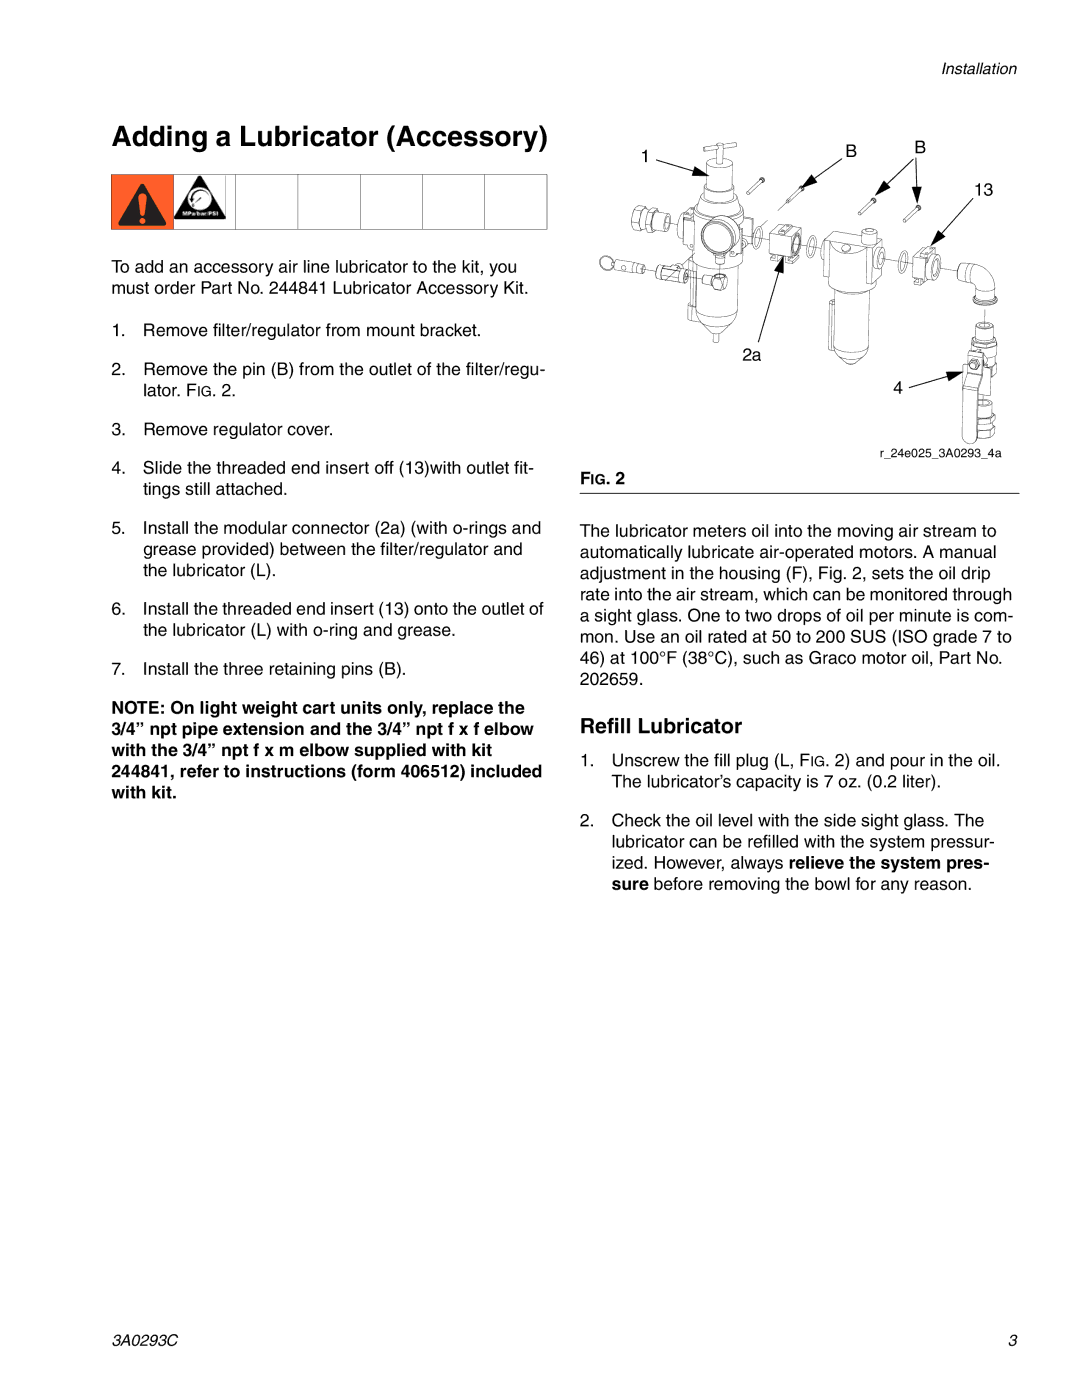
To add an accessory air line lubricator to the kit, you must order Part No. 244841 Lubricator Accessory Kit.
1.Remove filter/regulator from mount bracket.
2.Remove the pin (B) from the outlet of the filter/regu- lator. FIG. 2.
3.Remove regulator cover.
4.Slide the threaded end insert off (13)with outlet fit- tings still attached.
5.Install the modular connector (2a) (with
6.Install the threaded end insert (13) onto the outlet of the lubricator (L) with
7.Install the three retaining pins (B).
NOTE: On light weight cart units only, replace the 3/4” npt pipe extension and the 3/4” npt f x f elbow with the 3/4” npt f x m elbow supplied with kit 244841, refer to instructions (form 406512) included with kit.
Installation
1 | B | B |
|
|
13
2a
4 ![]()
r_24e025_3A0293_4a
FIG. 2
The lubricator meters oil into the moving air stream to automatically lubricate
46)at 100°F (38°C), such as Graco motor oil, Part No. 202659.
Refill Lubricator
1.Unscrew the fill plug (L, FIG. 2) and pour in the oil. The lubricator’s capacity is 7 oz. (0.2 liter).
2.Check the oil level with the side sight glass. The lubricator can be refilled with the system pressur- ized. However, always relieve the system pres- sure before removing the bowl for any reason.
3A0293C | 3 |
