Installation
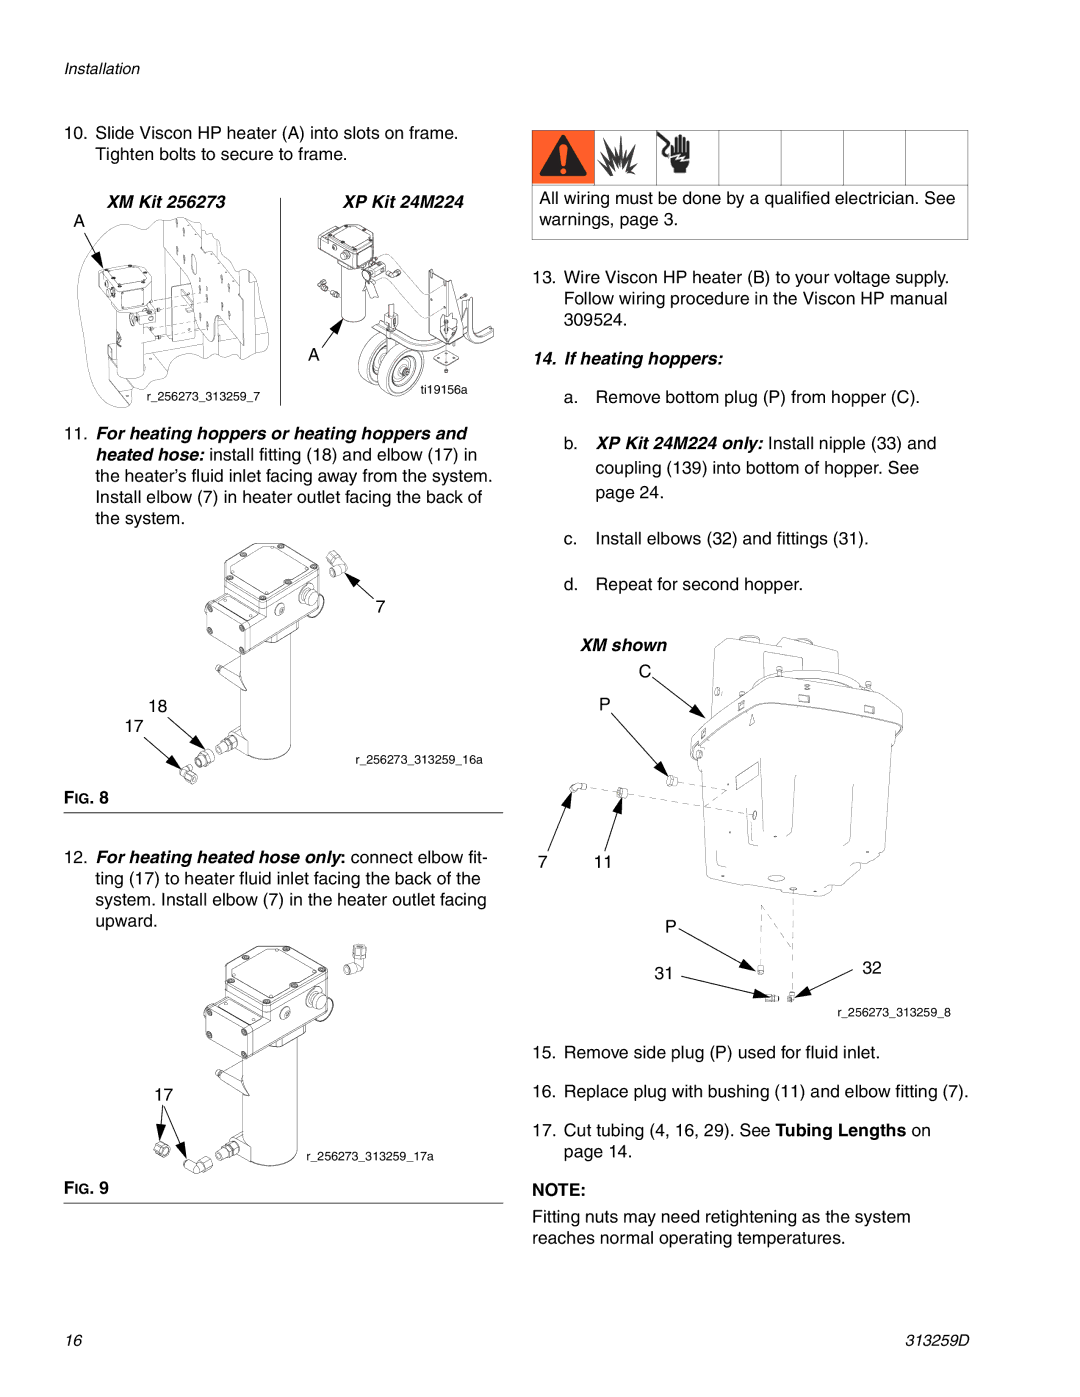
10.Slide Viscon HP heater (A) into slots on frame. Tighten bolts to secure to frame.
XM Kit 256273
A
r_256273_313259_7
XP Kit 24M224
A
ti19156a
All wiring must be done by a qualified electrician. See warnings, page 3.
13. | Wire Viscon HP heater (B) to your voltage supply. |
| Follow wiring procedure in the Viscon HP manual |
| 309524. |
14. | If heating hoppers: |
| a. Remove bottom plug (P) from hopper (C). |
11.For heating hoppers or heating hoppers and heated hose: install fitting (18) and elbow (17) in the heater’s fluid inlet facing away from the system. Install elbow (7) in heater outlet facing the back of the system.
7
18
17
r_256273_313259_16a
FIG. 8
12.For heating heated hose only: connect elbow fit- ting (17) to heater fluid inlet facing the back of the system. Install elbow (7) in the heater outlet facing upward.
17
r_256273_313259_17a
FIG. 9
b. | XP Kit 24M224 only: Install nipple (33) and |
| coupling (139) into bottom of hopper. See |
| page 24. |
c. | Install elbows (32) and fittings (31). |
d. | Repeat for second hopper. |
XM shown
C
P
7 11
P
3132
r_256273_313259_8
15.Remove side plug (P) used for fluid inlet.
16.Replace plug with bushing (11) and elbow fitting (7).
17.Cut tubing (4, 16, 29). See Tubing Lengths on page 14.
NOTE:
Fitting nuts may need retightening as the system reaches normal operating temperatures.
16 | 313259D |