Setup
Flush Spray Gun
Before running any paint through the spray gun:
1.Flush the gun with a solvent that is compatible with the fluid to be sprayed, using the lowest possible fluid pressure and grounded metal container.
2.Perform Pressure Relief Procedure; see page 11.
Install Spray Tip
1.Perform Pressure Relief Procedure; see page 11.
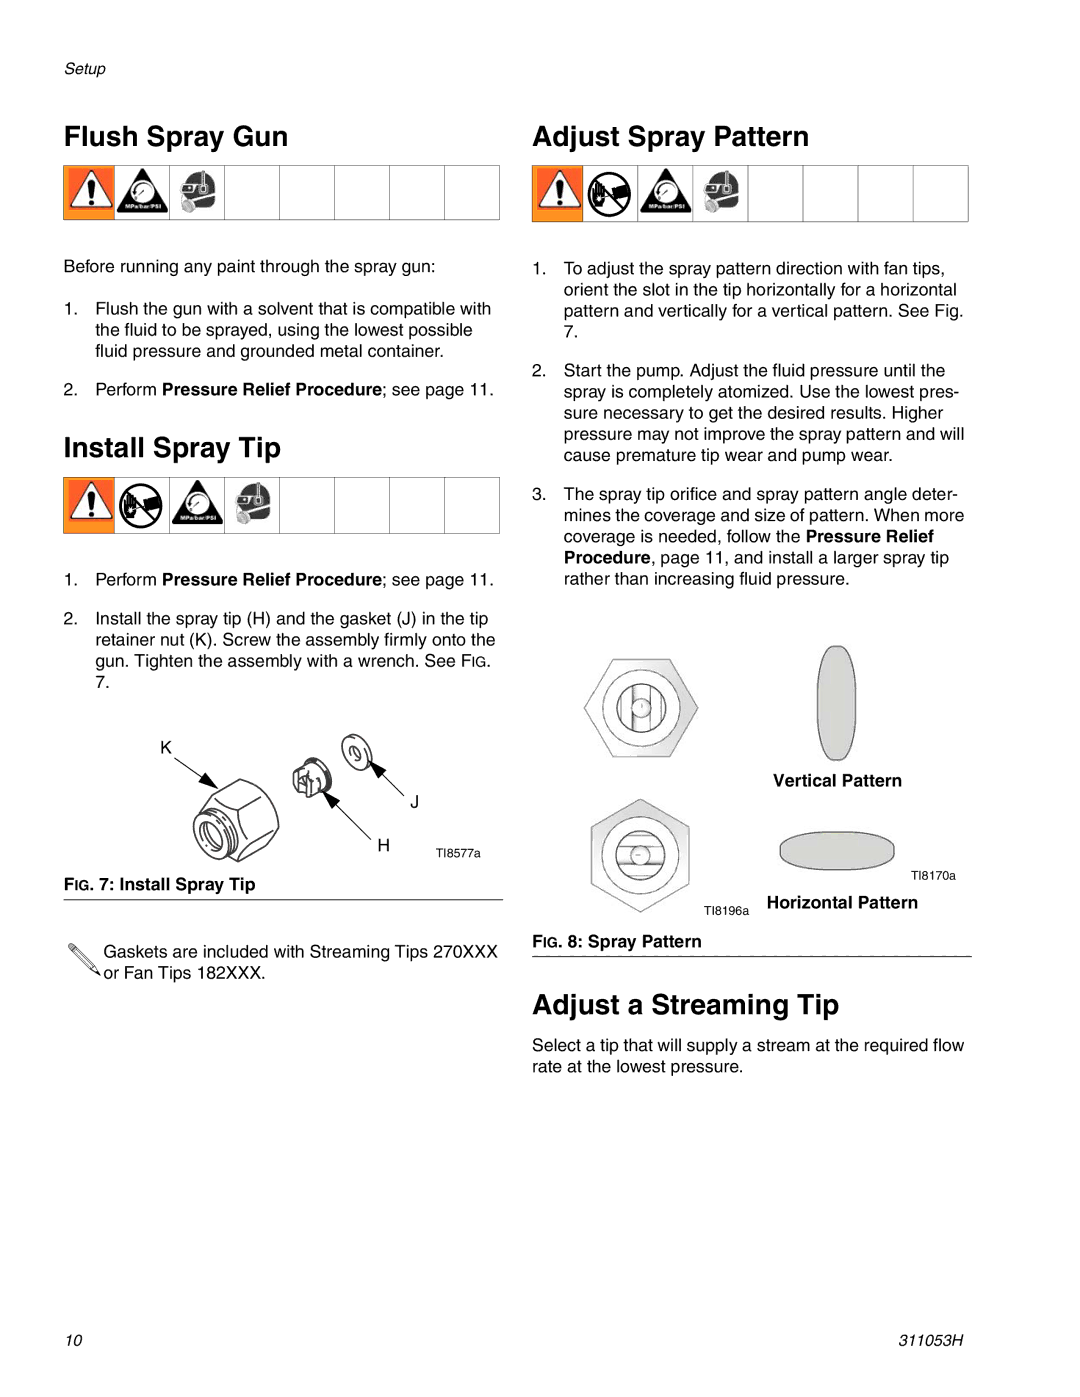
2.Install the spray tip (H) and the gasket (J) in the tip retainer nut (K). Screw the assembly firmly onto the gun. Tighten the assembly with a wrench. See FIG. 7.
K
J
H TI8577a
FIG. 7: Install Spray Tip
Gaskets are included with Streaming Tips 270XXX ![]()
![]() or Fan Tips 182XXX.
or Fan Tips 182XXX.
Adjust Spray Pattern
1.To adjust the spray pattern direction with fan tips, orient the slot in the tip horizontally for a horizontal pattern and vertically for a vertical pattern. See Fig. 7.
2.Start the pump. Adjust the fluid pressure until the spray is completely atomized. Use the lowest pres- sure necessary to get the desired results. Higher pressure may not improve the spray pattern and will cause premature tip wear and pump wear.
3.The spray tip orifice and spray pattern angle deter- mines the coverage and size of pattern. When more coverage is needed, follow the Pressure Relief Procedure, page 11, and install a larger spray tip rather than increasing fluid pressure.
Vertical Pattern
TI8170a
TI8196a Horizontal Pattern
FIG. 8: Spray Pattern
Adjust a Streaming Tip
Select a tip that will supply a stream at the required flow rate at the lowest pressure.
10 | 311053H |
