Cart Mounting
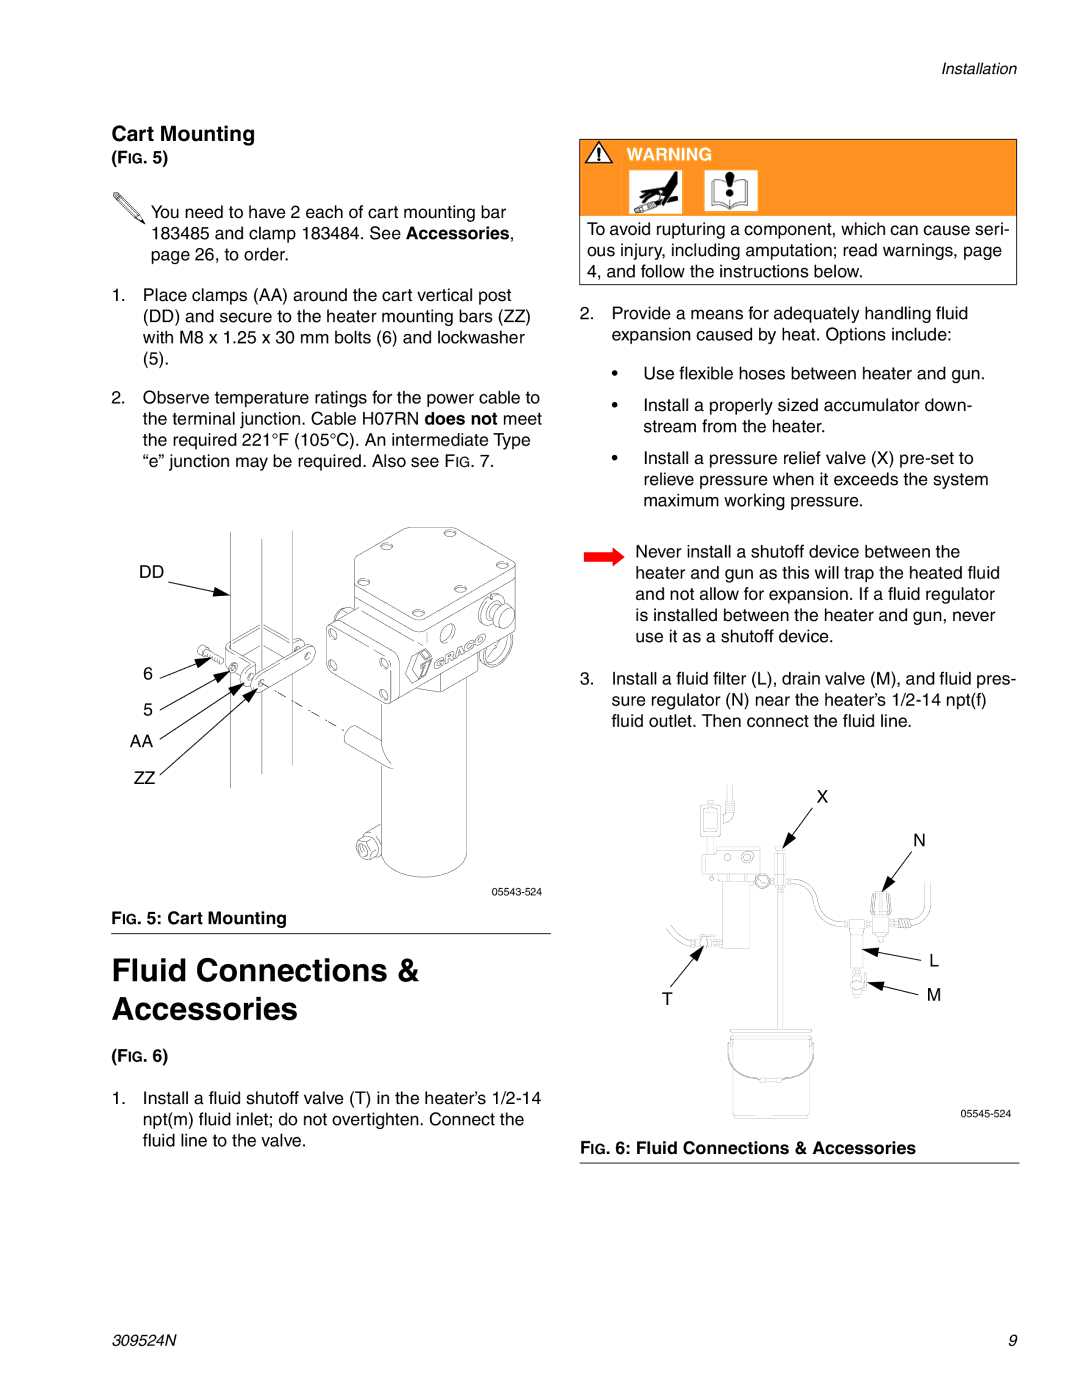
(FIG. 5)
![]() You need to have 2 each of cart mounting bar 183485 and clamp 183484. See Accessories, page 26, to order.
You need to have 2 each of cart mounting bar 183485 and clamp 183484. See Accessories, page 26, to order.
1.Place clamps (AA) around the cart vertical post (DD) and secure to the heater mounting bars (ZZ) with M8 x 1.25 x 30 mm bolts (6) and lockwasher
(5).
2.Observe temperature ratings for the power cable to the terminal junction. Cable H07RN does not meet the required 221°F (105°C). An intermediate Type “e” junction may be required. Also see FIG. 7.
Installation
![]() WARNING
WARNING
To avoid rupturing a component, which can cause seri- ous injury, including amputation; read warnings, page 4, and follow the instructions below.
2.Provide a means for adequately handling fluid expansion caused by heat. Options include:
•Use flexible hoses between heater and gun.
•Install a properly sized accumulator down- stream from the heater.
•Install a pressure relief valve (X)
DD
6 ![]()
5
AA
ZZ
FIG. 5: Cart Mounting
Fluid Connections &
Accessories
(FIG. 6)
1.Install a fluid shutoff valve (T) in the heater’s
Never install a shutoff device between the heater and gun as this will trap the heated fluid and not allow for expansion. If a fluid regulator is installed between the heater and gun, never use it as a shutoff device.
3.Install a fluid filter (L), drain valve (M), and fluid pres- sure regulator (N) near the heater’s
X
N
![]() L
L
T![]() M
M
FIG. 6: Fluid Connections & Accessories
309524N | 9 |
