Grounding
The equipment must be grounded. Grounding reduces the risk of static and electric shock by providing an escape wire for the electrical current due to static build up or in the event of a short circuit.
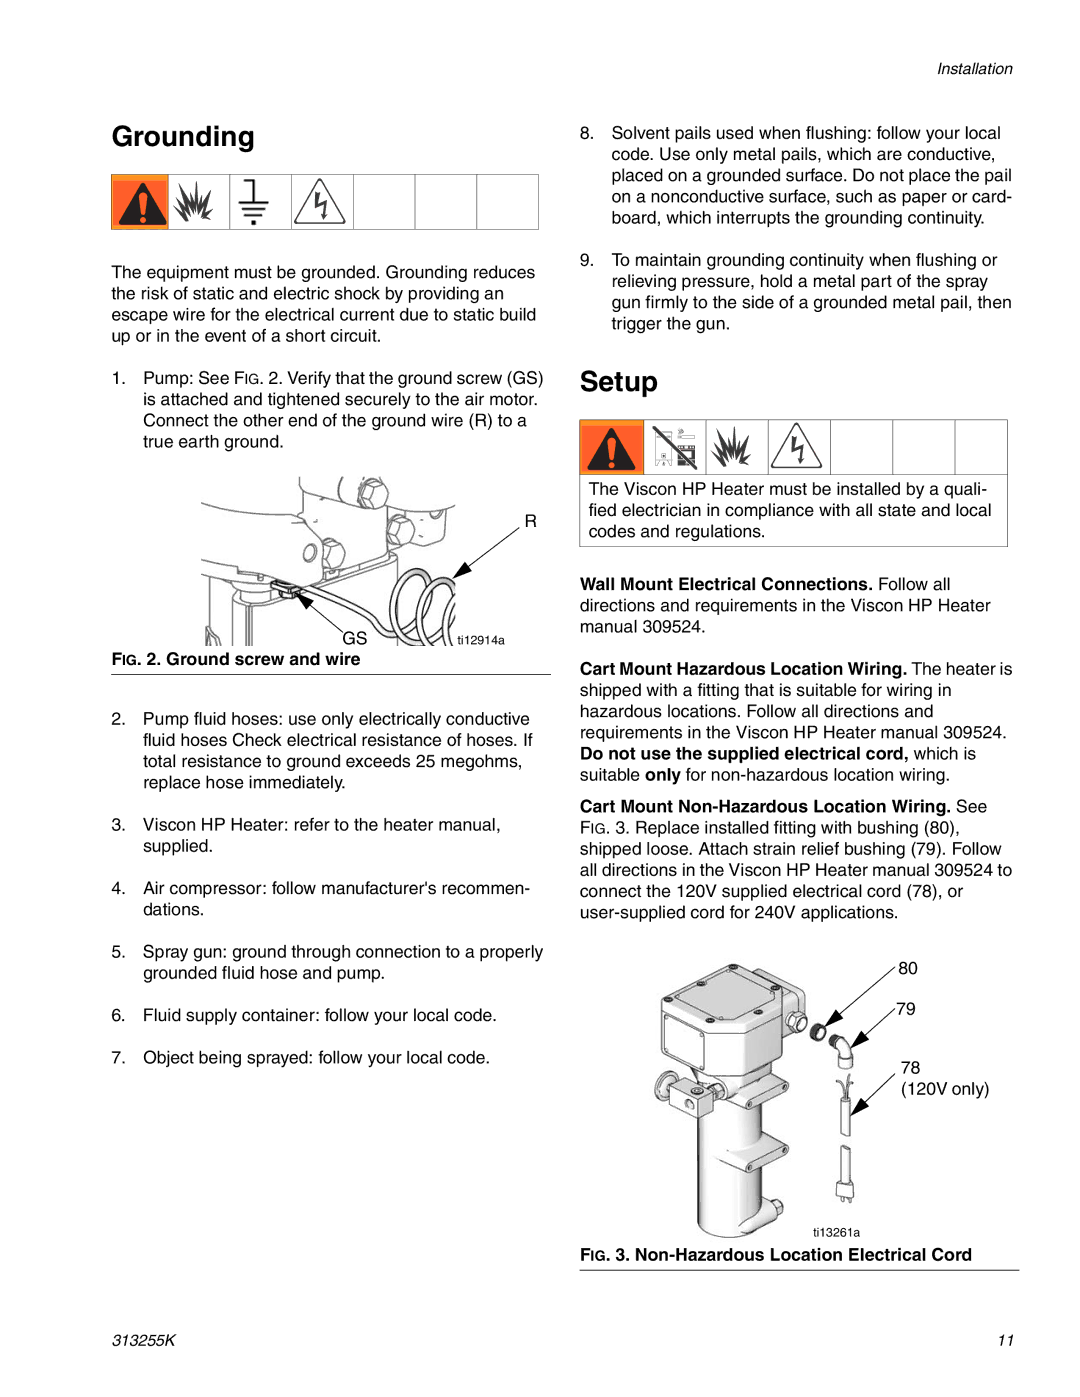
1.Pump: See FIG. 2. Verify that the ground screw (GS) is attached and tightened securely to the air motor. Connect the other end of the ground wire (R) to a true earth ground.
R
GS | ti12914a |
FIG. 2. Ground screw and wire
2.Pump fluid hoses: use only electrically conductive fluid hoses Check electrical resistance of hoses. If total resistance to ground exceeds 25 megohms, replace hose immediately.
3.Viscon HP Heater: refer to the heater manual, supplied.
4.Air compressor: follow manufacturer's recommen- dations.
5.Spray gun: ground through connection to a properly grounded fluid hose and pump.
6.Fluid supply container: follow your local code.
7.Object being sprayed: follow your local code.
Installation
8.Solvent pails used when flushing: follow your local code. Use only metal pails, which are conductive, placed on a grounded surface. Do not place the pail on a nonconductive surface, such as paper or card- board, which interrupts the grounding continuity.
9.To maintain grounding continuity when flushing or relieving pressure, hold a metal part of the spray gun firmly to the side of a grounded metal pail, then trigger the gun.
Setup
The Viscon HP Heater must be installed by a quali- fied electrician in compliance with all state and local codes and regulations.
Wall Mount Electrical Connections. Follow all directions and requirements in the Viscon HP Heater manual 309524.
Cart Mount Hazardous Location Wiring. The heater is shipped with a fitting that is suitable for wiring in hazardous locations. Follow all directions and requirements in the Viscon HP Heater manual 309524. Do not use the supplied electrical cord, which is suitable only for
Cart Mount
80
79
78
![]() (120V only)
(120V only)
ti13261a
FIG. 3. Non-Hazardous Location Electrical Cord
313255K | 11 |