To Assemble Your
Entertainer™ Activity Center
Step 1.
Turn the tray over and locate the hole that the seat lock screws into. Place the seat lock on the tray as shown and screw it to the tray. DO NOT overtighten
Step 2.
Four tabs are located behind the indentations inside the seat ring. Remove the seat ring by pulling the four tabs out from under the tray, one at a time, while lifting the seat ring.
Solid color inside
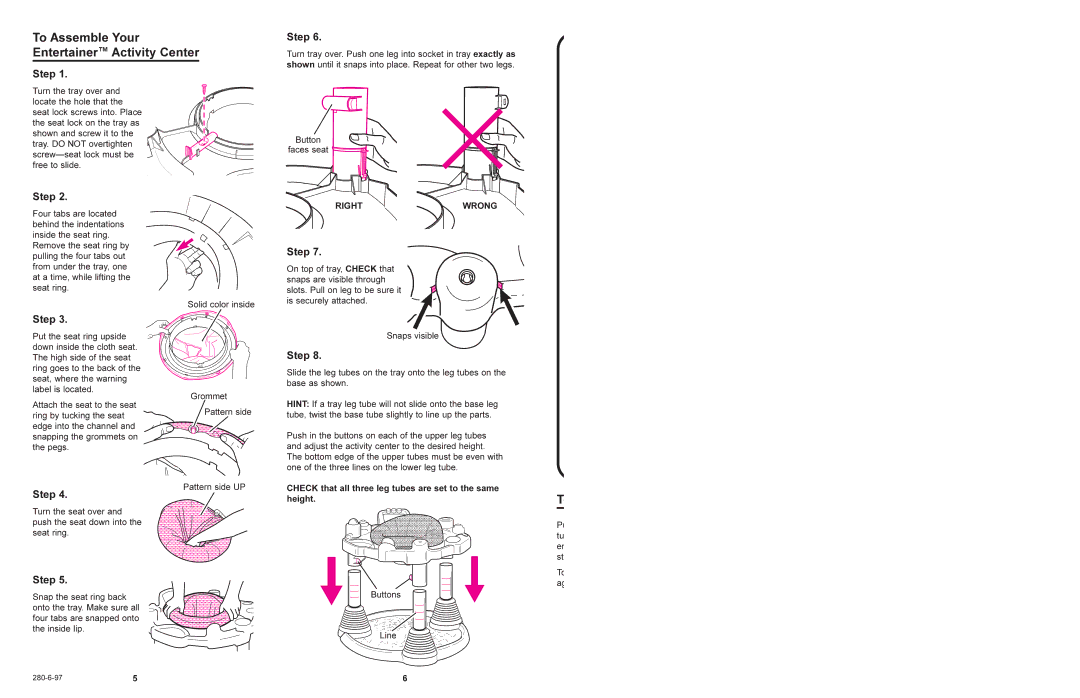
Step 6.
Turn tray over. Push one leg into socket in tray exactly as shown until it snaps into place. Repeat for other two legs.
Button ![]()
![]() faces seat
faces seat ![]()
![]()
RIGHTWRONG
Step 7.
On top of tray, CHECK that snaps are visible through slots. Pull on leg to be sure it is securely attached.
Step 3.
Put the seat ring upside down inside the cloth seat. The high side of the seat ring goes to the back of the seat, where the warning label is located.
Attach the seat to the seat ring by tucking the seat edge into the channel and snapping the grommets on the pegs.
Step 4.
Turn the seat over and push the seat down into the seat ring.
Step 5.
Snap the seat ring back onto the tray. Make sure all four tabs are snapped onto the inside lip.
Grommet
Pattern side
Pattern side UP
Snaps visible
Step 8.
Slide the leg tubes on the tray onto the leg tubes on the base as shown.
HINT: If a tray leg tube will not slide onto the base leg tube, twist the base tube slightly to line up the parts.
Push in the buttons on each of the upper leg tubes and adjust the activity center to the desired height. The bottom edge of the upper tubes must be even with one of the three lines on the lower leg tube.
CHECK that all three leg tubes are set to the same | T |
height. | |
| Pu |
| tu |
| en |
| st |
| To |
| ag |
Buttons
Line
5 | 6 |