Assembling the Headboard and Footboard
Step 1. |
| |
Legs have a small side hole near |
| |
one end. For each leg, push end | Side hole | |
with side hole firmly down into | ||
| ||
a plastic foot. Side hole must be |
| |
covered by foot. It may be |
| |
necessary to tap foot on a hard |
| |
surface to get it all the way on. |
|
Step 2.
Assemble headboard and long legs. Push open end of one long leg onto plastic plug under “knob” on one side of headboard.
Then push leg sideways so the rectangular plug on lower side of headboard goes into hole on side of the leg.
Attach other long leg in the same way to other side of the headboard.
Assemble the footboard and short legs the same way.
Step 3.
For footboard (shown at right), |
|
insert a screw into the lowest |
|
hole on each short leg and into | Screw |
plastic footboard. For head- |
|
board, insert screws into the |
|
highest hole on each long leg. |
|
Tighten screw securely with the included hex wrench, but do not
Repeat for other three legs.
CHECK that all four legs are | Hex | |
securely attached to the | ||
wrench | ||
head- and footboards by |
| |
pulling on the legs. |
|
Assembling the Frame
Step 1.
Line up the side tubes and crossbars on the floor as shown at right. It may be helpful to brace one side tube against
a wall or stationary object. Holes in side tubes must face each other.
Step 2.
Insert ends of the crossbars into holes in the side tubes.
5 | |
|
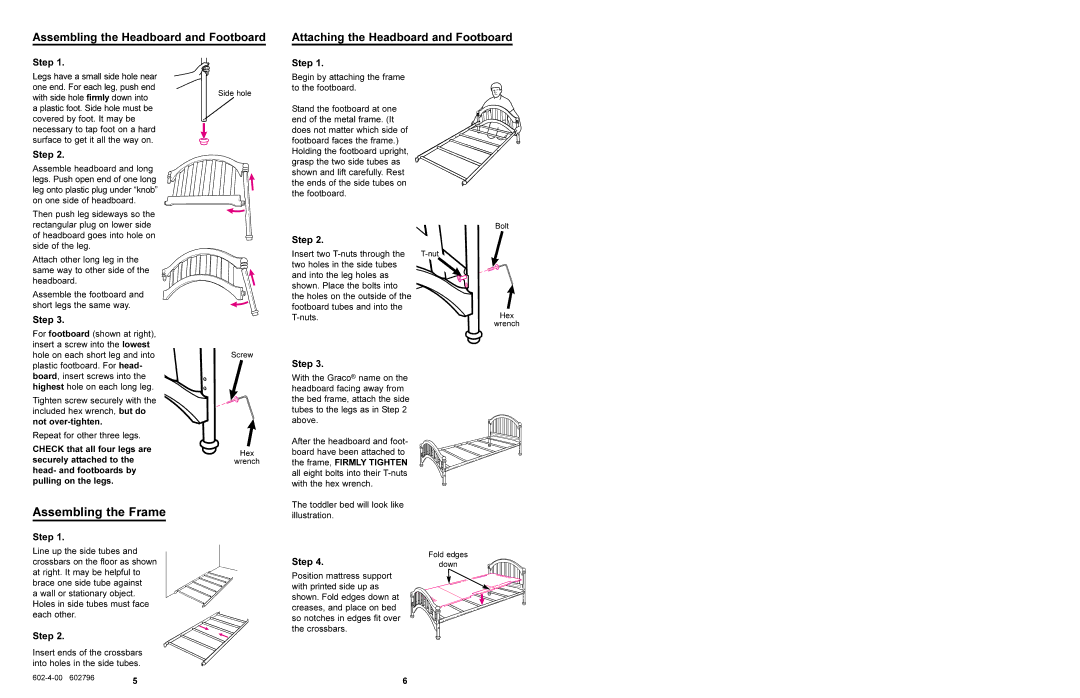
Attaching the Headboard and Footboard
Step 1.
Begin by attaching the frame to the footboard.
Stand the footboard at one end of the metal frame. (It does not matter which side of footboard faces the frame.) Holding the footboard upright, grasp the two side tubes as shown and lift carefully. Rest the ends of the side tubes on the footboard.
| Bolt |
Step 2. |
|
Insert two | |
two holes in the side tubes |
|
and into the leg holes as |
|
shown. Place the bolts into |
|
the holes on the outside of the |
|
footboard tubes and into the | Hex |
| wrench |
Step 3.
With the Graco® name on the headboard facing away from the bed frame, attach the side tubes to the legs as in Step 2 above.
After the headboard and foot- board have been attached to the frame, FIRMLY TIGHTEN all eight bolts into their
The toddler bed will look like illustration.
Step 4. | Fold edges |
down |
Position mattress support with printed side up as shown. Fold edges down at creases, and place on bed so notches in edges fit over the crossbars.
6