Replace Pilot Valves
1.Stop the pump at the middle of its stroke. Relieve the pressure. See page 9.
2.Disconnect the air line to the motor.
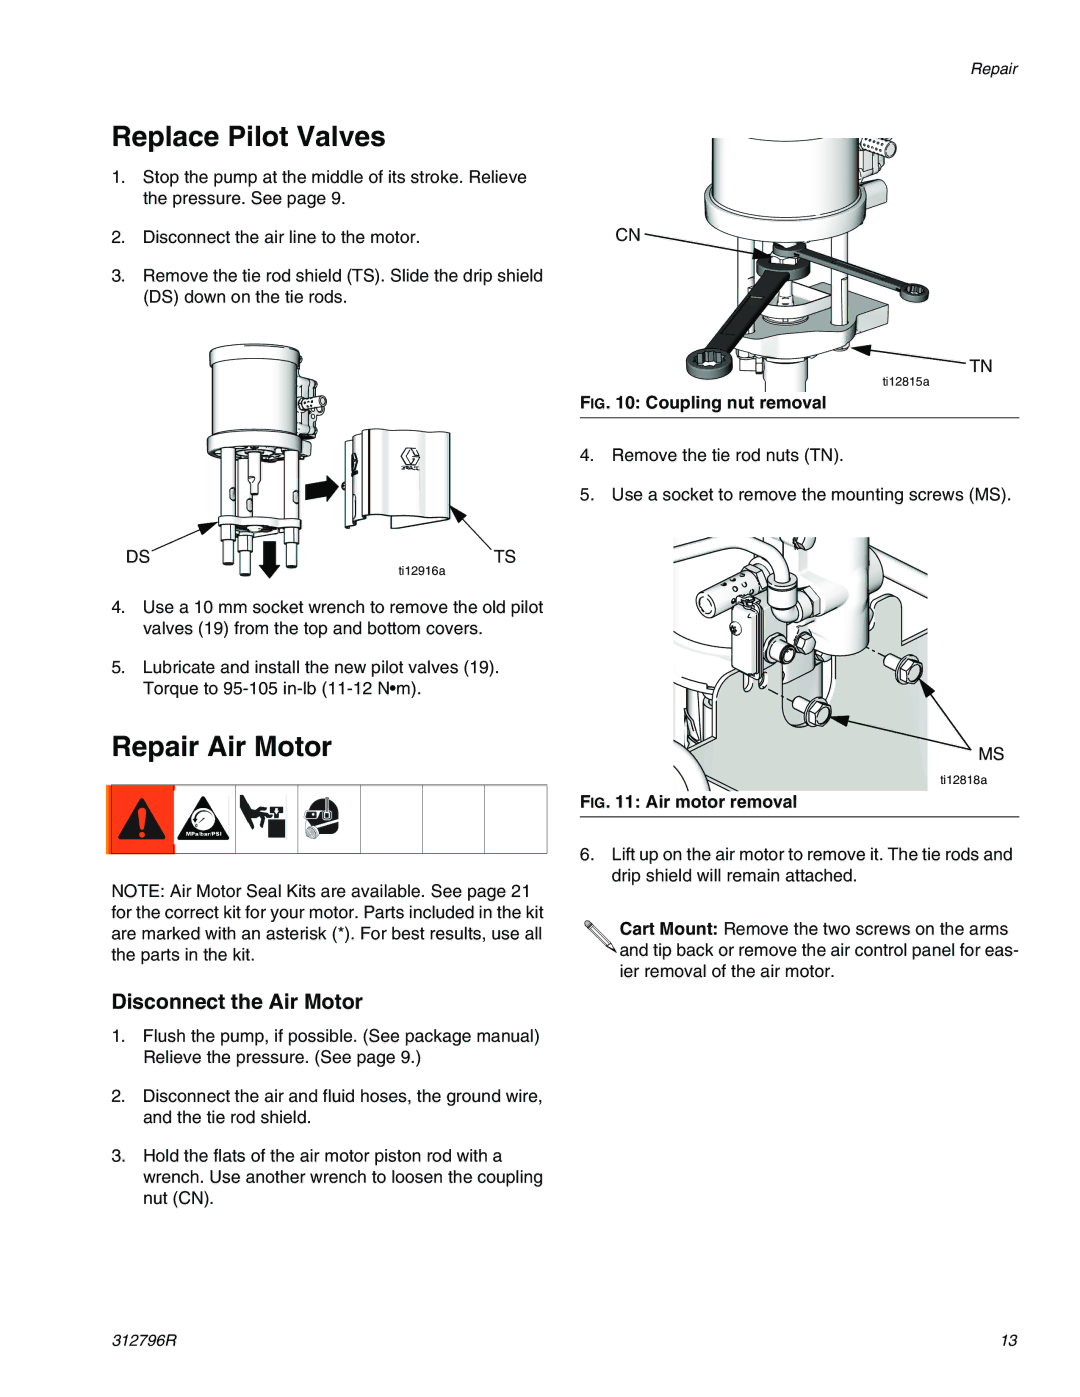
3.Remove the tie rod shield (TS). Slide the drip shield (DS) down on the tie rods.
DS | TS |
ti12916a
4.Use a 10 mm socket wrench to remove the old pilot valves (19) from the top and bottom covers.
5.Lubricate and install the new pilot valves (19). Torque to
Repair Air Motor
NOTE: Air Motor Seal Kits are available. See page 21 for the correct kit for your motor. Parts included in the kit are marked with an asterisk (*). For best results, use all the parts in the kit.
Disconnect the Air Motor
1.Flush the pump, if possible. (See package manual) Relieve the pressure. (See page 9.)
2.Disconnect the air and fluid hoses, the ground wire, and the tie rod shield.
3.Hold the flats of the air motor piston rod with a wrench. Use another wrench to loosen the coupling nut (CN).
Repair
CN ![]()
TN
ti12815a
FIG. 10: Coupling nut removal
4.Remove the tie rod nuts (TN).
5.Use a socket to remove the mounting screws (MS).
MS
ti12818a
FIG. 11: Air motor removal
6.Lift up on the air motor to remove it. The tie rods and drip shield will remain attached.
Cart Mount: Remove the two screws on the arms ![]()
![]() and tip back or remove the air control panel for eas- ier removal of the air motor.
and tip back or remove the air control panel for eas- ier removal of the air motor.
312796R | 13 |
