Series B specifications
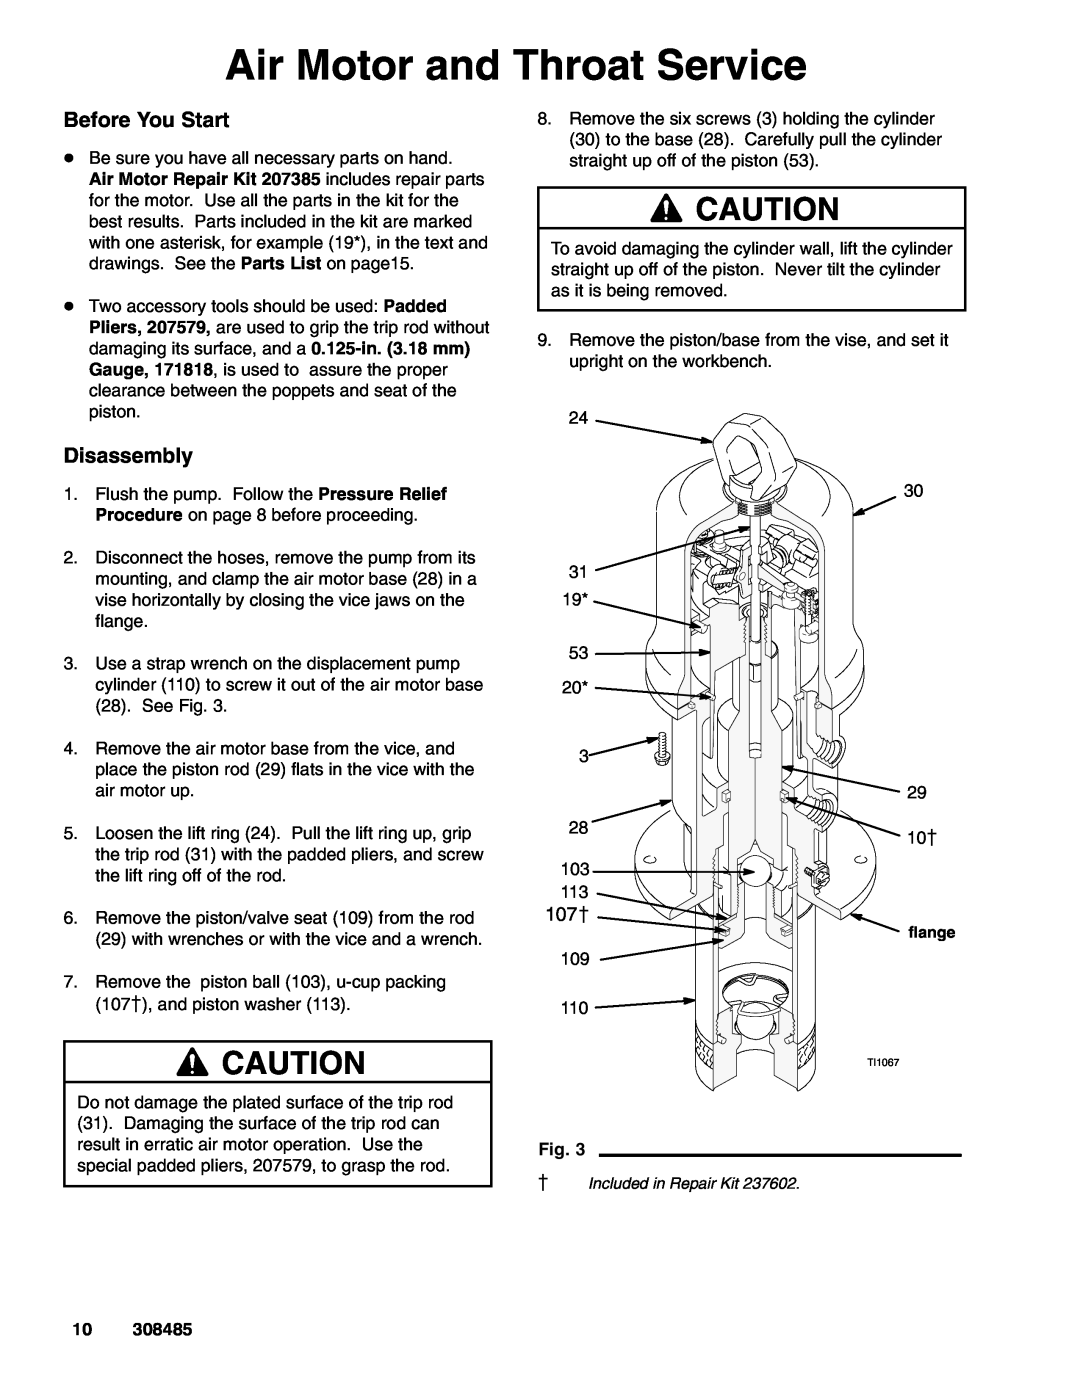
Graco Series B, 288046 is a top-tier product designed to meet the rigorous demands of various applications in industries such as manufacturing, automotive, and construction. Renowned for its reliability and efficiency, this product stands out due to its innovative features and robust technology.One of the standout features of the Graco Series B, 288046 is its advanced air-powered design. This design allows for smooth and consistent fluid transfer, minimizing downtime and enhancing productivity. The air-driven operation not only offers greater control over the flow rates but also ensures that the system can operate in situations where electric power may be unavailable or impractical. This versatility makes it ideal for various work environments.
The Series B is equipped with a high-performance motor that delivers exceptional power output while maintaining energy efficiency. This feature is particularly advantageous for businesses looking to reduce operational costs without compromising on performance. The motor is engineered to handle different fluid viscosities, making the Series B versatile for use with a wide range of materials, including paints, adhesives, and sealants.
Durability and ease of maintenance are key characteristics of the Graco Series B, 288046. Constructed from high-quality materials, the product is built to withstand harsh conditions, ensuring a long-lasting lifespan. Additionally, its modular design simplifies maintenance and repairs, allowing for quick replacements of components and minimal disruption to operations.
Safety is another paramount consideration incorporated into the Series B design. It features comprehensive safety mechanisms that protect users and equipment alike, reducing the risk of accidents during operation. This is especially crucial in environments where workers are regularly handling hazardous materials.
Graco also emphasizes user-friendly functionality. The Series B showcases intuitive controls, enabling operators to quickly familiarize themselves with the system and operate it efficiently. The product also includes adjustable pressure settings, allowing for precise application suited to specific tasks.
In conclusion, the Graco Series B, 288046 is an exemplary solution for companies seeking a reliable, efficient, and safe fluid handling system. With its advanced technologies, user-friendly features, and robust construction, it offers unmatched performance across various industries, ensuring optimal productivity and safety.
