Trigger Safety Latch
WARNING
To reduce the risk of serious bodily injury | , |
including fluid injection, splashing in the eyes or |
|
on the skin, ALWAYS engage the trigger safety |
|
latch whenever spraying stops, even for a |
|
moment. |
|
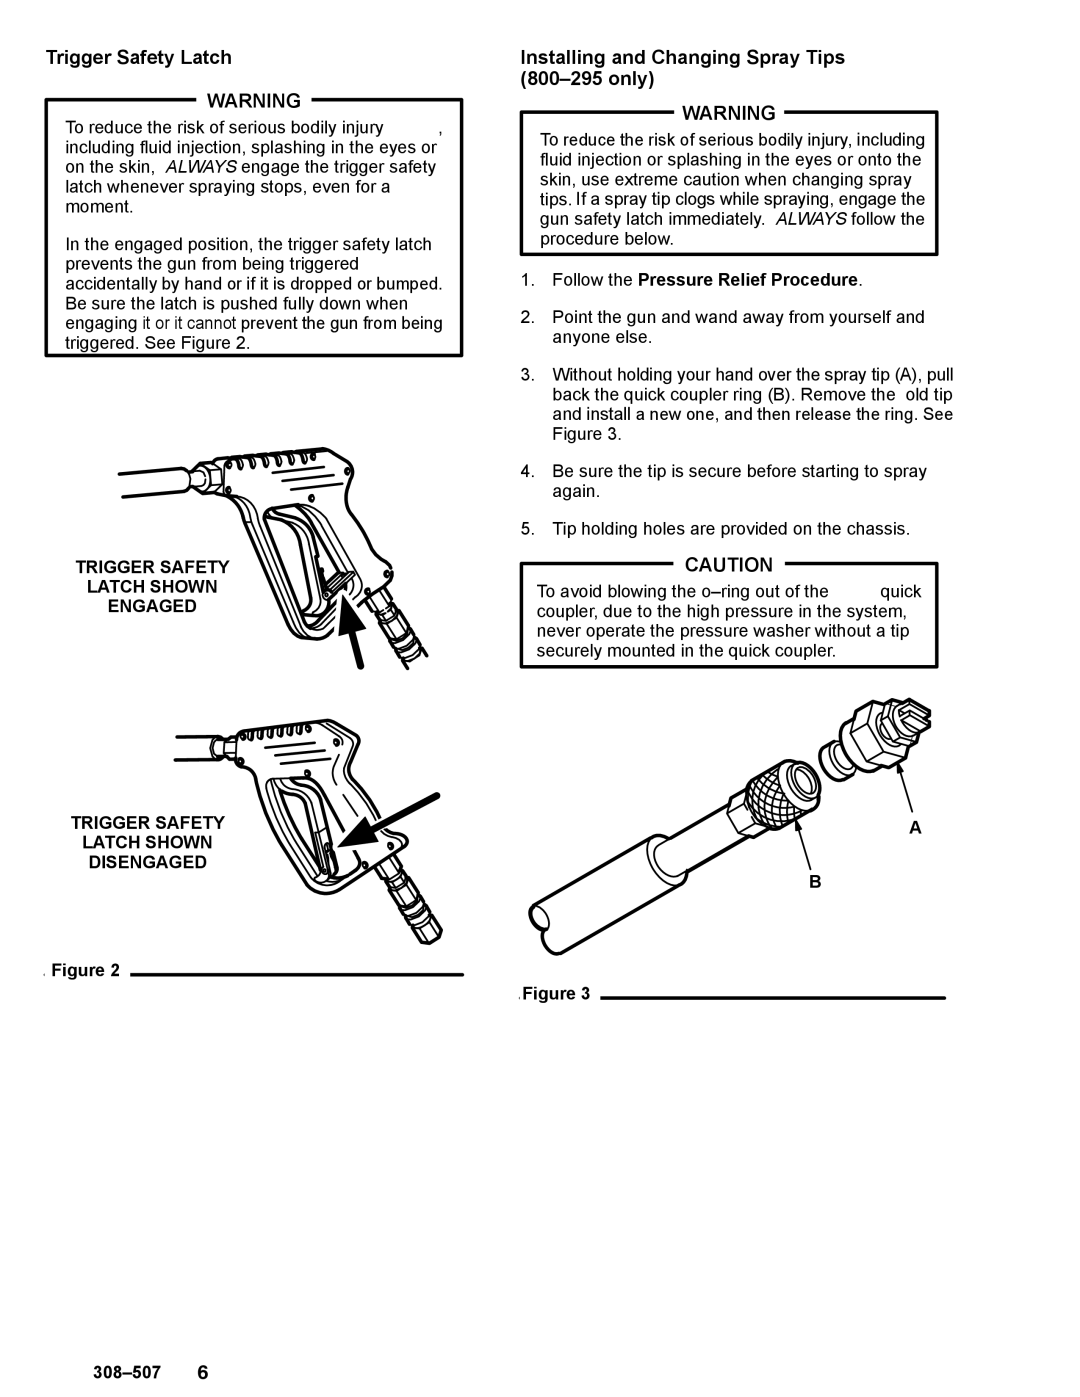
In the engaged position, the trigger safety latch prevents the gun from being triggered accidentally by hand or if it is dropped or bumped. Be sure the latch is pushed fully down when engaging it or it cannot prevent the gun from being triggered. See Figure 2.
TRIGGER SAFETY
LATCH SHOWN
ENGAGED
TRIGGER SAFETY
LATCH SHOWN
DISENGAGED
Figure 2
Installing and Changing Spray Tips (800–295 only)
WARNING
To reduce the risk of serious bodily injury, including fluid injection or splashing in the eyes or onto the skin, use extreme caution when changing spray tips. If a spray tip clogs while spraying, engage the gun safety latch immediately. ALWAYS follow the procedure below.
1.Follow the Pressure Relief Procedure.
2.Point the gun and wand away from yourself and anyone else.
3.Without holding your hand over the spray tip (A), pull back the quick coupler ring (B). Remove the old tip and install a new one, and then release the ring. See Figure 3.
4.Be sure the tip is secure before starting to spray again.
5.Tip holding holes are provided on the chassis.
CAUTION
To avoid blowing the
A
B
Figure 3
