PLEASE SAVE THESE INSTRUCTIONS FOR FUTURE USE
Info: The most current version of these instructions can be found online at www.grahamfield.com
Tools required: Phillips or blade screwdriver
![]() WARNING: Important! Read and understand these instructions before installing or using the Toilet Seat Riser. If you do not under- stand any part of these warnings, cautions or instructions, contact a healthcare professional for direction in the use of this product. If the toilet seat riser is not properly assembled and installed, person- al injury and damage to the toilet seat riser could result.
WARNING: Important! Read and understand these instructions before installing or using the Toilet Seat Riser. If you do not under- stand any part of these warnings, cautions or instructions, contact a healthcare professional for direction in the use of this product. If the toilet seat riser is not properly assembled and installed, person- al injury and damage to the toilet seat riser could result.
![]() WARNING: If components are damaged or missing, contact your dealer immediately. DO NOT use substitute parts. Use only Lumex replacement parts.
WARNING: If components are damaged or missing, contact your dealer immediately. DO NOT use substitute parts. Use only Lumex replacement parts.
![]() WARNING: This product has a weight limit of 300 lb.
WARNING: This product has a weight limit of 300 lb.
![]() WARNING: GF Health Products, Inc. assumes no responsibility for any damage or injury caused by improper assembly, installation or use of this product.
WARNING: GF Health Products, Inc. assumes no responsibility for any damage or injury caused by improper assembly, installation or use of this product.
INSTALLATION
1.Remove toilet seat riser, hardware, and armrests from carton and protec- tive packaging.
2.Install the armrests with the following steps:
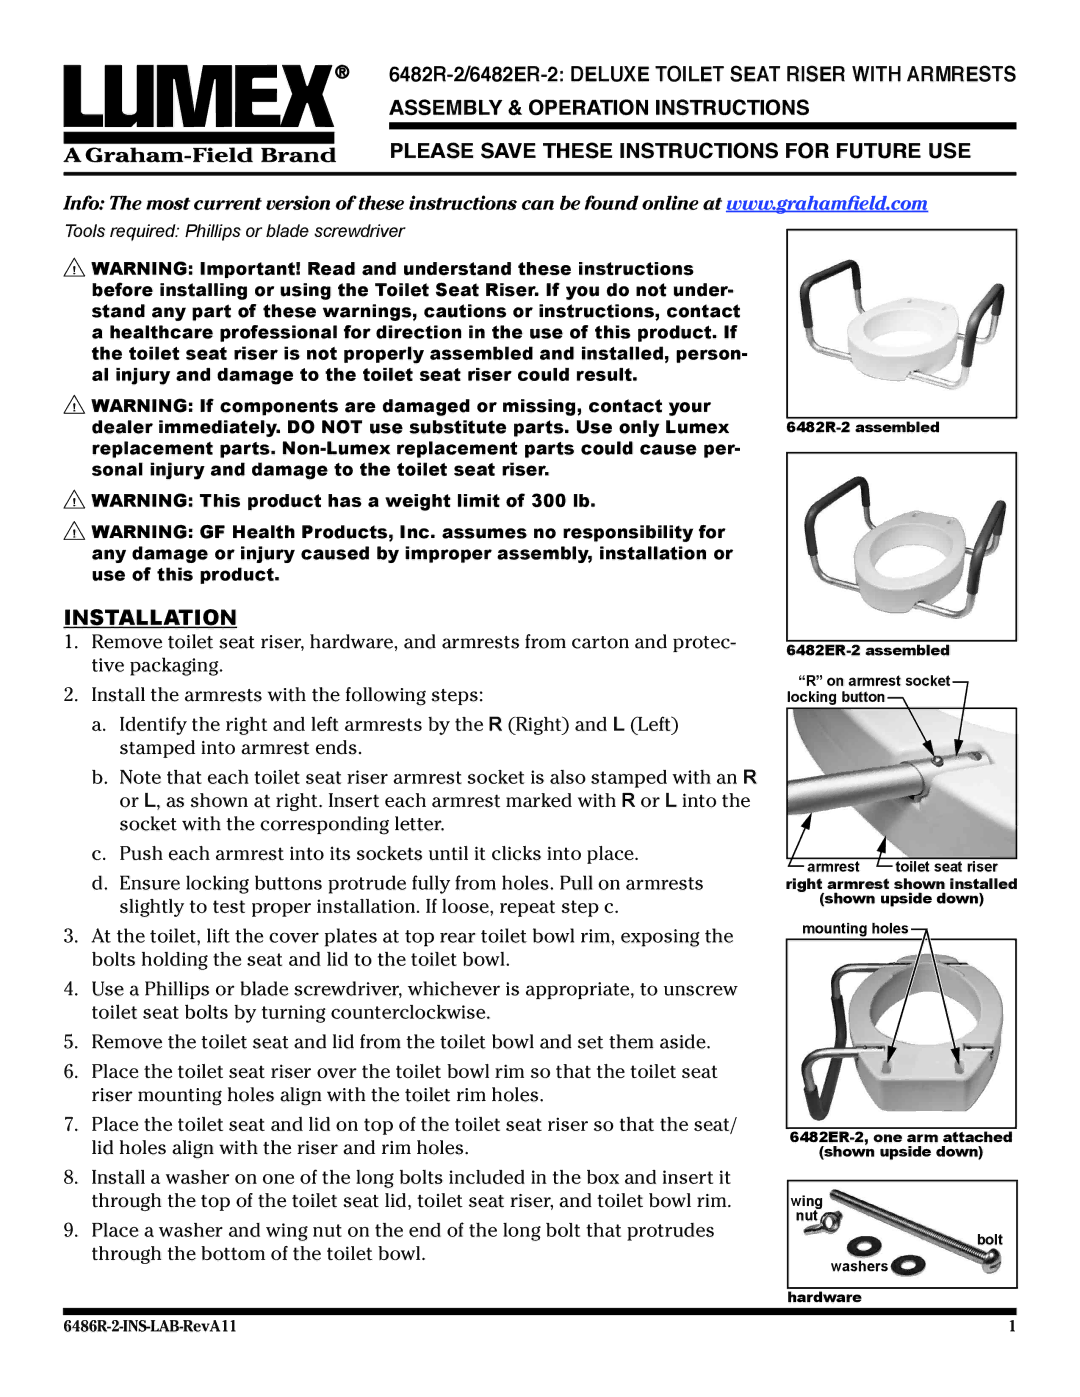
a.Identify the right and left armrests by the R (Right) and L (Left) stamped into armrest ends.
b.Note that each toilet seat riser armrest socket is also stamped with an R or L, as shown at right. Insert each armrest marked with R or L into the socket with the corresponding letter.
c.Push each armrest into its sockets until it clicks into place.
d.Ensure locking buttons protrude fully from holes. Pull on armrests slightly to test proper installation. If loose, repeat step c.
“R” on armrest socket locking button
![]() armrest
armrest ![]() toilet seat riser
toilet seat riser
right armrest shown installed
(shown upside down)
3.At the toilet, lift the cover plates at top rear toilet bowl rim, exposing the bolts holding the seat and lid to the toilet bowl.
4.Use a Phillips or blade screwdriver, whichever is appropriate, to unscrew toilet seat bolts by turning counterclockwise.
5.Remove the toilet seat and lid from the toilet bowl and set them aside.
6.Place the toilet seat riser over the toilet bowl rim so that the toilet seat riser mounting holes align with the toilet rim holes.
7.Place the toilet seat and lid on top of the toilet seat riser so that the seat/ lid holes align with the riser and rim holes.
8.Install a washer on one of the long bolts included in the box and insert it through the top of the toilet seat lid, toilet seat riser, and toilet bowl rim.
9.Place a washer and wing nut on the end of the long bolt that protrudes through the bottom of the toilet bowl.
mounting holes
(shown upside down)
wing
nut
bolt
washers
hardware
1 |