Accessories
The following accessories have been packed and shipped with
the Espresso maker.
Installation
Warning: To prevent damage to machine, boiler must be filled with water before turning main power switch "ON".
1.On models 2450 & 1750, screw on legs.
2.Connect drain hose to drain fitting located at bottom, on front of machine.
3.Place flexible drain hose into a permanent drain. Make sure there are no obstructions or kinks.
4.Install water filter supplied with unit. Failure to use
5.Turn water “ON” and allow at least one gallon of water to flow through the tubing on the outlet side of the filter. This will flush out any foreign matter that may be present. When water runs clear shut water “OFF.”
6.Connect copper tubing from filter to the flare inlet valve located underneath the machine.
7.Turn main water supply valve “ON.” Check for leaks at fittings and connection points.
8.Fully open machine valve on' " flare inlet by turning counter- clockwise.
9.Flush heat exchanger by pulling the hot water handle down and running water through the hot water spout. (Dispense approximately
10.Check to make sure main switch is “OFF” then plug machine into a grounded receptacle. Models 2450 & 1750 use 115V, 20 AMP receptacle. Q Models use 230V (3 wire plus ground) 20 AMP receptacle. E models use 230V, 15 AMP receptacles with proper plug installed.
11.Although the main switch is “OFF” when machine is plugged in, the red light labeled "AUTOFILL" will light up. Water will be heard filling the boiler for three to five minutes.
12.When the "AUTOFILL" light is no longer on, the boiler has filled.
13.Flip the main power switch to the "ON" position. (Do not turn on until machine has completely filled.)
14.Flush the group heads by turning both brew switches on. Let water run for approximately one minute.
15.When the main power switch is placed in the "ON" position, the amber indicator light
The amber light indicates that the heating element is on, heating water in the boiler to produce steam pressure. The amber light will go out when steam pressure increases to approximately 20 P.S.I.
Steam pressure decreases as steam is released to froth or steam milk, warm cups, etc. When steam pressure decreases to approximately 17 P.S.I., the heater light again becomes lit, indicating that the heating element is again heating water to increase steam pressure to approximately 20 P.S.I.
16.It will take
temperature of water source.
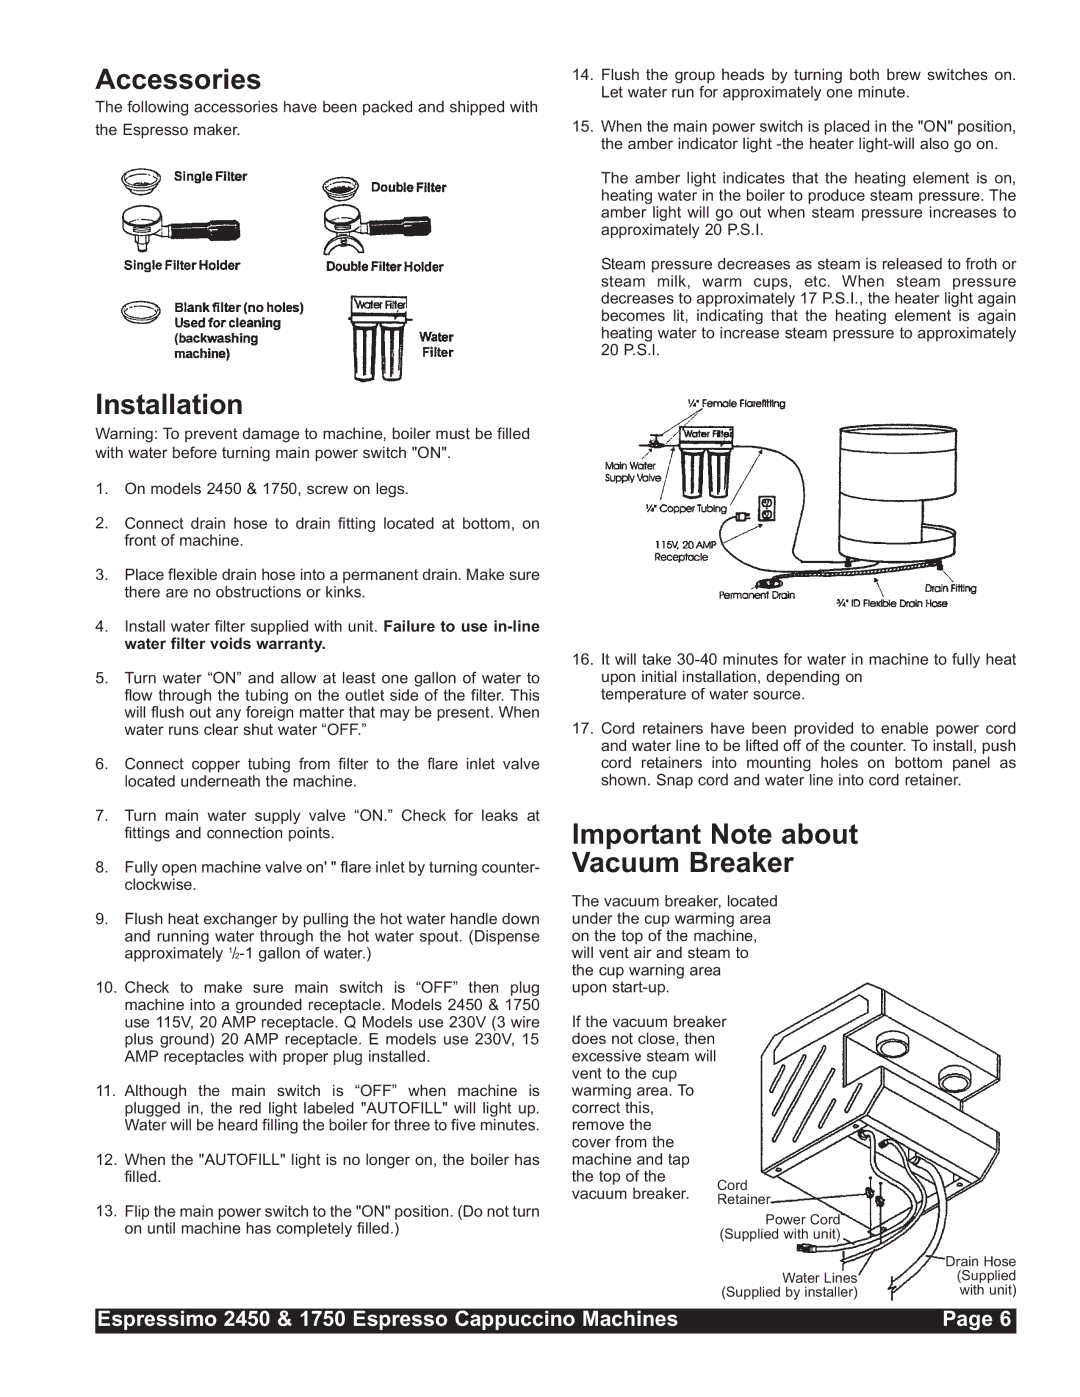
17.Cord retainers have been provided to enable power cord and water line to be lifted off of the counter. To install, push cord retainers into mounting holes on bottom panel as shown. Snap cord and water line into cord retainer.
Important Note about
Vacuum Breaker
The vacuum breaker, located under the cup warming area on the top of the machine, will vent air and steam to the cup warning area upon
If the vacuum breaker does not close, then excessive steam will vent to the cup warming area. To correct this, remove the
cover from the machine and tap the top of the vacuum breaker.
Drain Hose (Supplied with unit)
Espressimo 2450 & 1750 Espresso Cappuccino Machines | Page 6 |