Protection
The grinder is equipped with both a circuit breaker and a shear disc release to protect the motor and burrs if a foreign object, such as a nail or rock, gets into the coffee.
Grind Adjustment
Tools required: Large blade and medium Phillips head screwdrivers
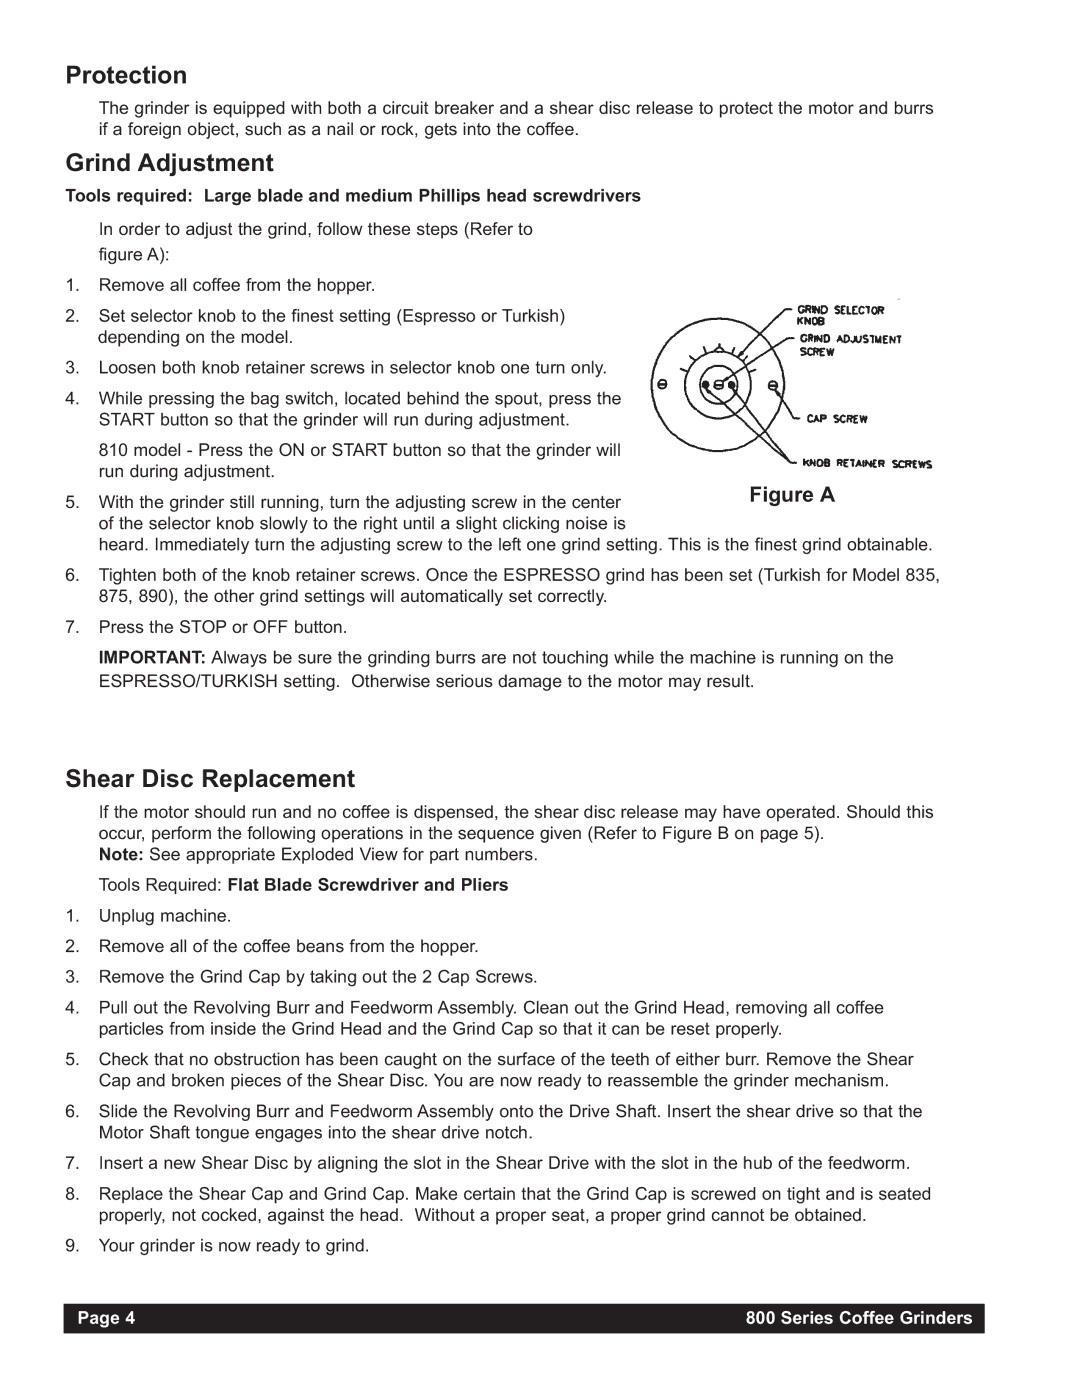
In order to adjust the grind, follow these steps (Refer to figure A):
1.Remove all coffee from the hopper.
2.Set selector knob to the finest setting (Espresso or Turkish) depending on the model.
3.Loosen both knob retainer screws in selector knob one turn only.
4.While pressing the bag switch, located behind the spout, press the START button so that the grinder will run during adjustment.
810 model - Press the ON or START button so that the grinder will run during adjustment.
5. With the grinder still running, turn the adjusting screw in the center of the selector knob slowly to the right until a slight clicking noise is
heard. Immediately turn the adjusting screw to the left one grind setting. This is the finest grind obtainable.
6.Tighten both of the knob retainer screws. Once the ESPRESSO grind has been set (Turkish for Model 835, 875, 890), the other grind settings will automatically set correctly.
7.Press the STOP or OFF button.
IMPORTANT: Always be sure the grinding burrs are not touching while the machine is running on the ESPRESSO/TURKISH setting. Otherwise serious damage to the motor may result.
Shear Disc Replacement
If the motor should run and no coffee is dispensed, the shear disc release may have operated. Should this occur, perform the following operations in the sequence given (Refer to Figure B on page 5).
Note: See appropriate Exploded View for part numbers.
Tools Required: Flat Blade Screwdriver and Pliers
1.Unplug machine.
2.Remove all of the coffee beans from the hopper.
3.Remove the Grind Cap by taking out the 2 Cap Screws.
4.Pull out the Revolving Burr and Feedworm Assembly. Clean out the Grind Head, removing all coffee particles from inside the Grind Head and the Grind Cap so that it can be reset properly.
5.Check that no obstruction has been caught on the surface of the teeth of either burr. Remove the Shear Cap and broken pieces of the Shear Disc. You are now ready to reassemble the grinder mechanism.
6.Slide the Revolving Burr and Feedworm Assembly onto the Drive Shaft. Insert the shear drive so that the Motor Shaft tongue engages into the shear drive notch.
7.Insert a new Shear Disc by aligning the slot in the Shear Drive with the slot in the hub of the feedworm.
8.Replace the Shear Cap and Grind Cap. Make certain that the Grind Cap is screwed on tight and is seated properly, not cocked, against the head. Without a proper seat, a proper grind cannot be obtained.
9.Your grinder is now ready to grind.
Page 4 | 800 Series Coffee Grinders |
|
|