4.Inflate the drum using a bicycle pump or air compressor. The maximum air pressure is 10 psi. DO NOT
Figure 3. Sanding drums installed.
5.Pull out on the switch to turn the machine on and firmly grasp the workpiece to be sanded.
6.With light and even pressure against the direction of rotation, move the workpiece back and forth on the sanding drum. Sand in the direction of the wood grain. Always wear safety glasses and a dust mask.
Never sand or buff with the workpiece on top of the wheel. The workpiece may be catch the wheel and be thrown at the oper- ator. Always process the workpiece near the bottom of the wheel!
Accessory Removal
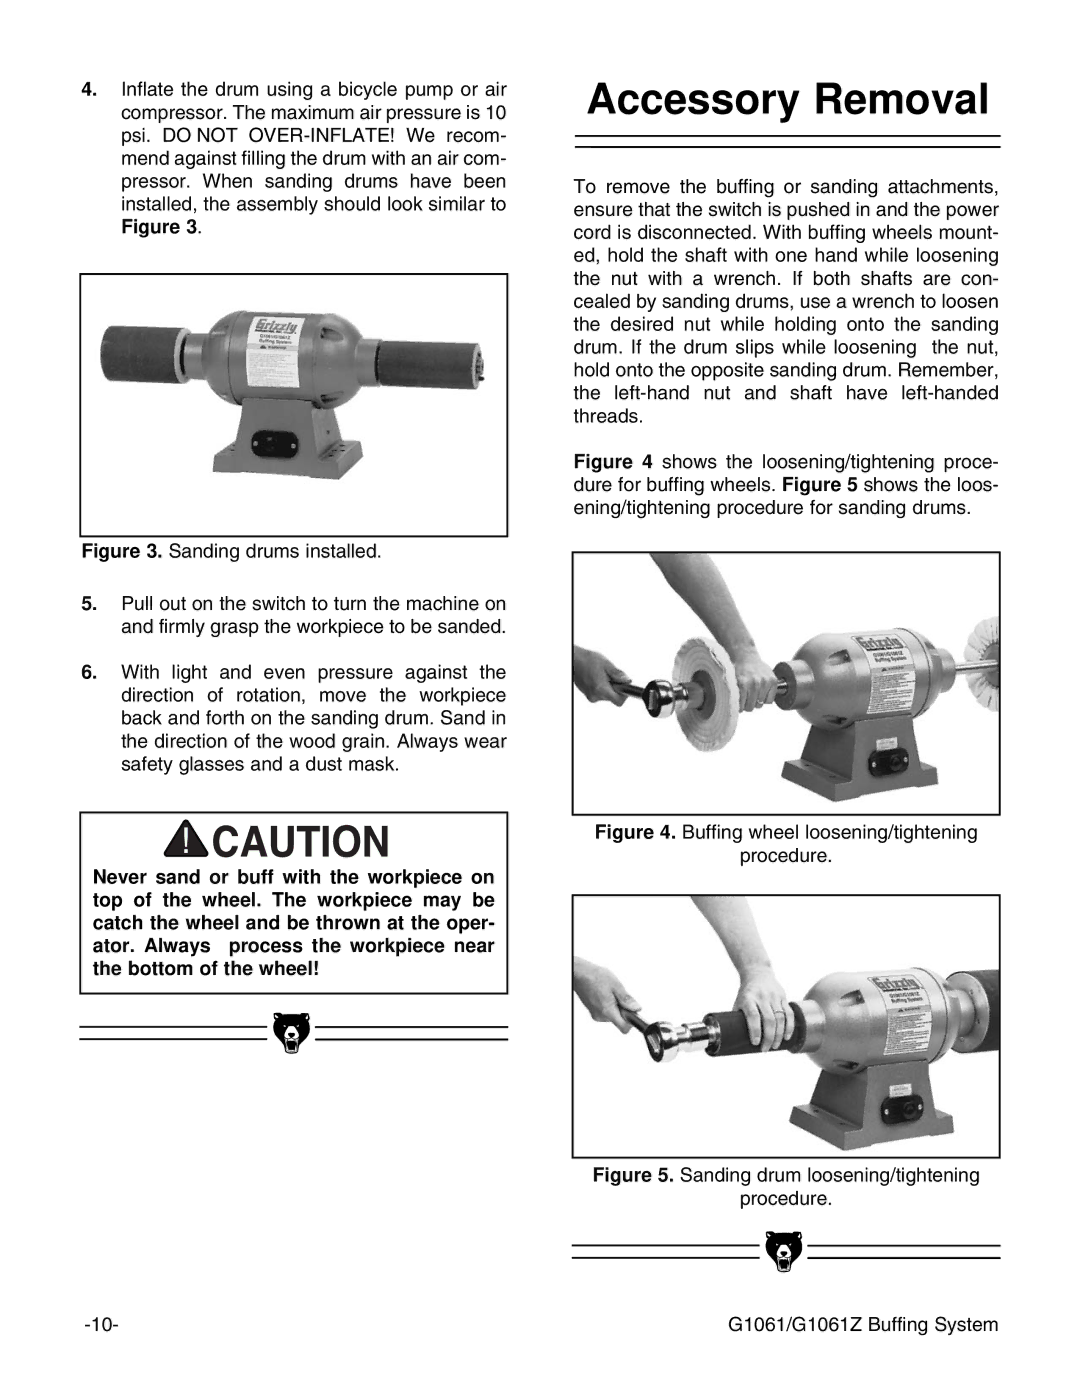
To remove the buffing or sanding attachments, ensure that the switch is pushed in and the power cord is disconnected. With buffing wheels mount- ed, hold the shaft with one hand while loosening the nut with a wrench. If both shafts are con- cealed by sanding drums, use a wrench to loosen the desired nut while holding onto the sanding drum. If the drum slips while loosening the nut, hold onto the opposite sanding drum. Remember, the
Figure 4 shows the loosening/tightening proce- dure for buffing wheels. Figure 5 shows the loos- ening/tightening procedure for sanding drums.
Figure 4. Buffing wheel loosening/tightening
procedure.
Figure 5. Sanding drum loosening/tightening
procedure.
G1061/G1061Z Buffing System |