Operation |
|
| Operation Tips | |
1. | DISCONNECT LATHE FROM POWER! |
| • Adjust the pressure in the drum to | |
|
|
|
| the firmness of the drum for sanding con- |
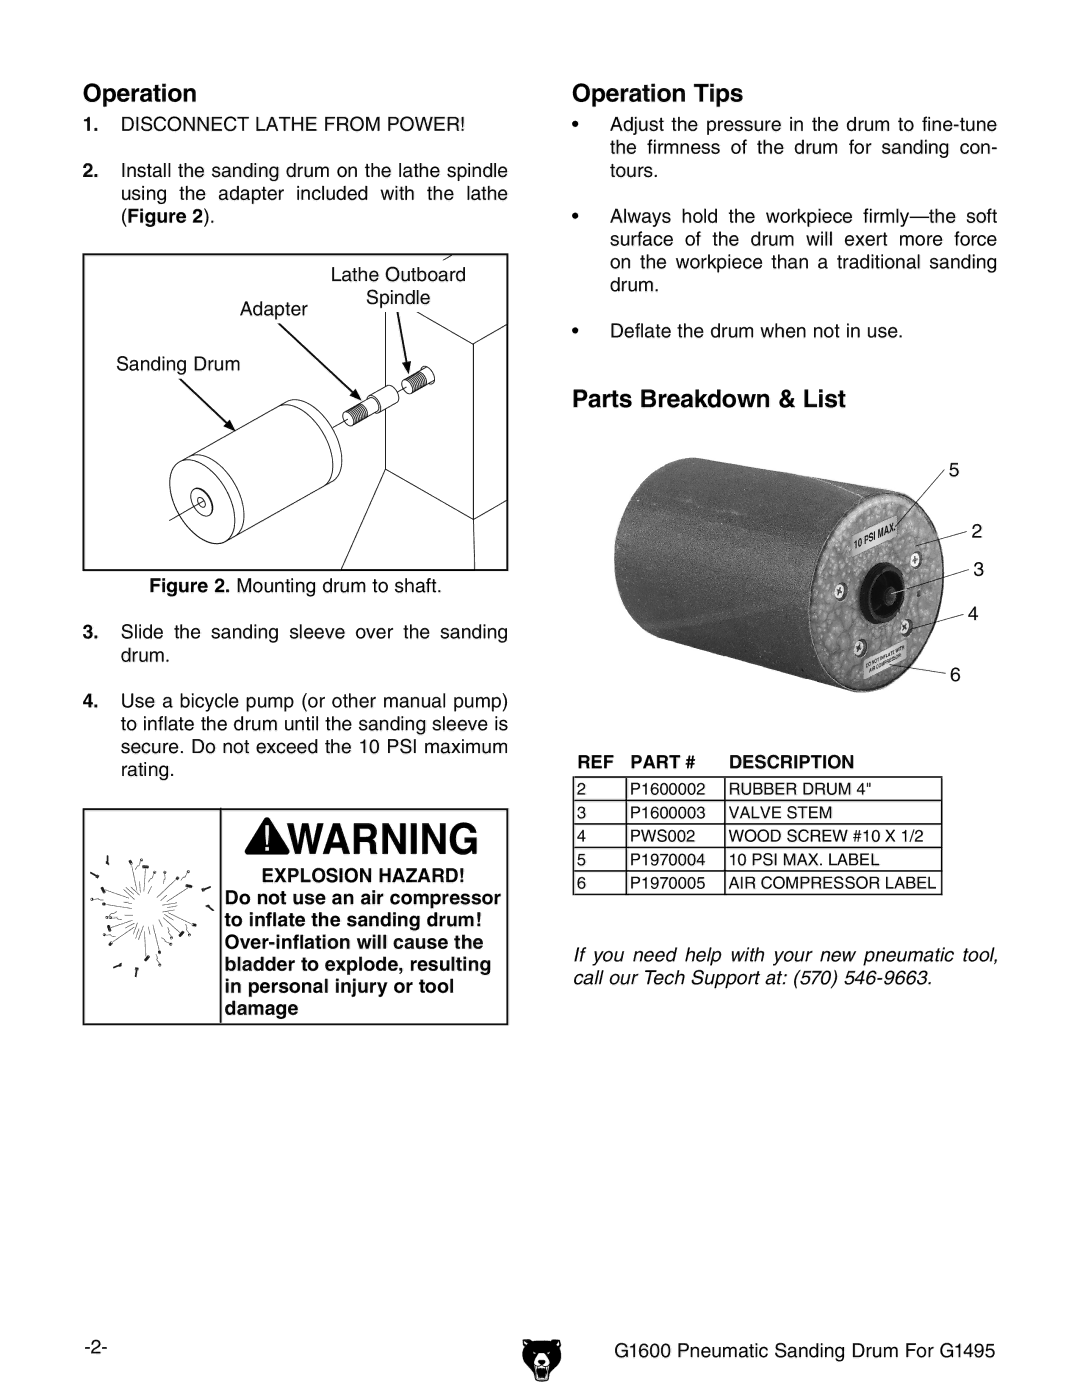
2. Install the sanding drum on the lathe spindle | tours. | |||
| using the adapter included with the | lathe |
| |
| (Figure 2). |
|
| • Always hold the workpiece |
|
|
|
| surface of the drum will exert more force |
|
| Lathe Outboard |
| on the workpiece than a traditional sanding |
|
|
| drum. | |
|
| Spindle |
| |
| Adapter |
|
| |
|
|
| • Deflate the drum when not in use. | |
|
|
|
| |
| Sanding Drum |
|
|
|
|
|
|
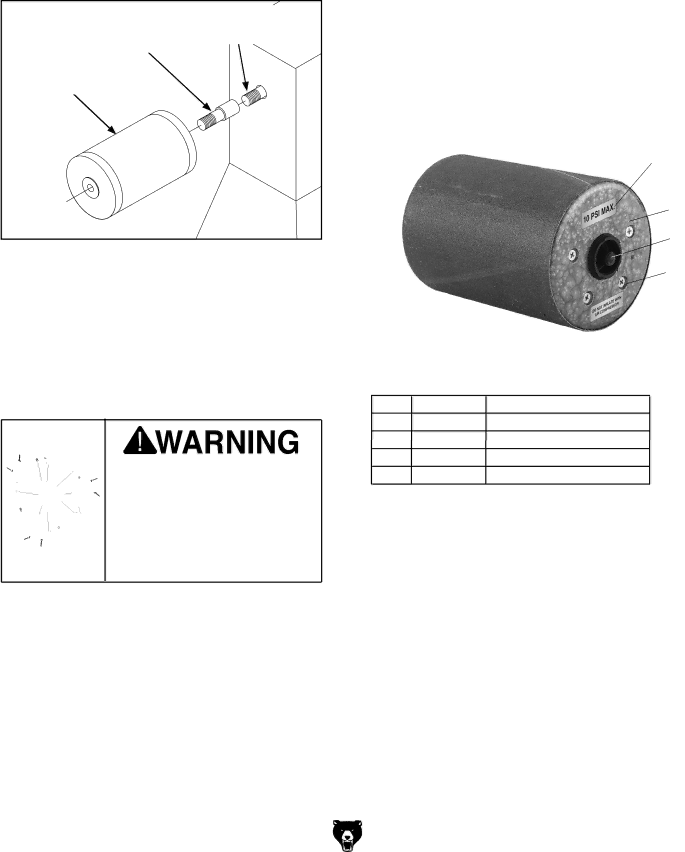
| Parts Breakdown & List |
|
|
|
| 5 |
|
|
|
| 2 |
| Figure 2. Mounting drum to shaft. |
| 3 | |
|
|
| ||
3.Slide the sanding sleeve over the sanding drum.
4.Use a bicycle pump (or other manual pump) to inflate the drum until the sanding sleeve is secure. Do not exceed the 10 PSI maximum rating.
4
![]() 6
6
REF PART # | DESCRIPTION |
![]()
![]()
![]()
![]()
![]()
![]()
![]()
![]()
![]() EXPLOSION HAZARD!
EXPLOSION HAZARD! ![]()
![]()
![]()
![]()
![]()
![]()
![]()
![]()
![]()
![]() Do not use an air compressor
Do not use an air compressor ![]()
![]()
![]()
![]()
![]()
![]()
![]()
![]() to inflate the sanding drum!
to inflate the sanding drum! ![]()
![]()
![]()
![]()
![]()
![]()
![]()
![]()
![]()
![]()
![]()
![]()
![]()
![]()
![]() bladder to explode, resulting in personal injury or tool damage
bladder to explode, resulting in personal injury or tool damage
2P1600002 RUBBER DRUM 4"
3P1600003 VALVE STEM
4PWS002 WOOD SCREW #10 X 1/2
5P1970004 10 PSI MAX. LABEL
6P1970005 AIR COMPRESSOR LABEL
If you need help with your new pneumatic tool, call our Tech Support at: (570)
G1600 Pneumatic Sanding Drum For G1495 |