EXPLOSION HAZARD! Never exceed 45 PSI when pres- surizing the tank.
Read the manual before operation. Become familiar with this tool, its safety instructions, and its operation before beginning any work. Serious personal injury may result if safety or operational information is not understood or followed.
Operation
To use the paint tank:
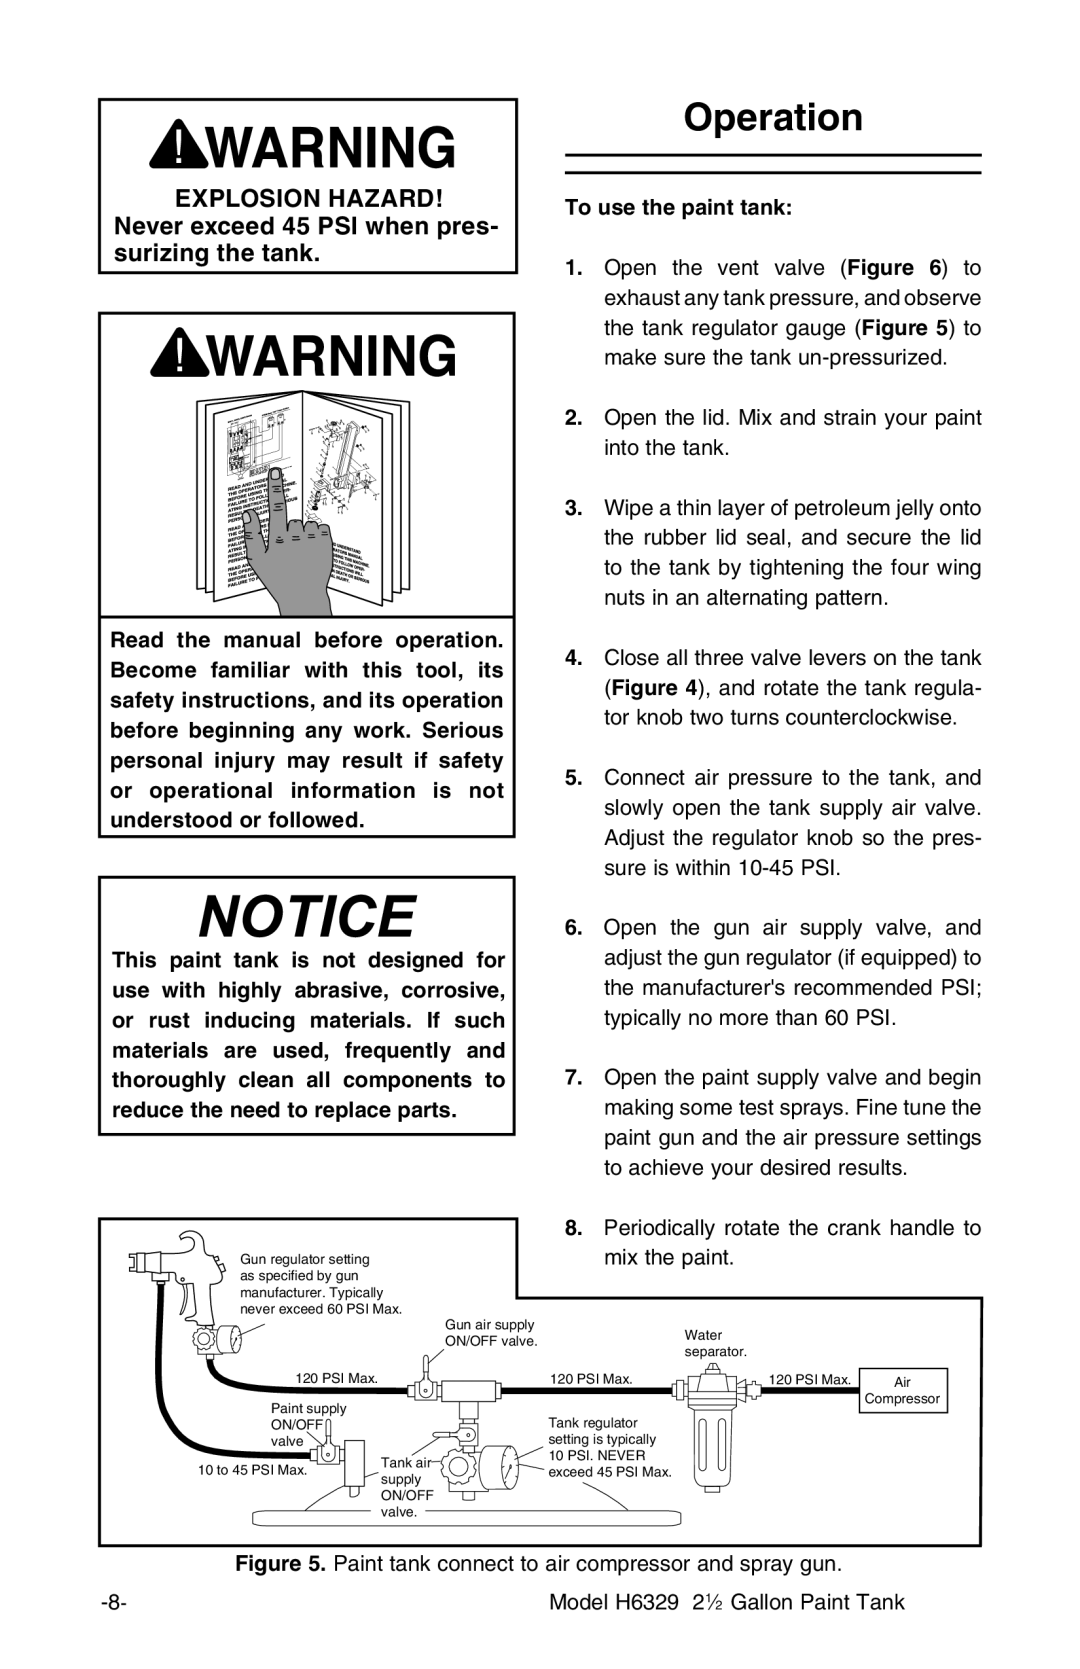
1.Open the vent valve (Figure 6) to exhaust any tank pressure, and observe the tank regulator gauge (Figure 5) to make sure the tank
2.Open the lid. Mix and strain your paint into the tank.
3.Wipe a thin layer of petroleum jelly onto the rubber lid seal, and secure the lid to the tank by tightening the four wing nuts in an alternating pattern.
4.Close all three valve levers on the tank (Figure 4), and rotate the tank regula- tor knob two turns counterclockwise.
5.Connect air pressure to the tank, and slowly open the tank supply air valve. Adjust the regulator knob so the pres- sure is within
NOTICE
This paint tank is not designed for use with highly abrasive, corrosive, or rust inducing materials. If such materials are used, frequently and thoroughly clean all components to reduce the need to replace parts.
6.Open the gun air supply valve, and adjust the gun regulator (if equipped) to the manufacturer's recommended PSI; typically no more than 60 PSI.
7.Open the paint supply valve and begin making some test sprays. Fine tune the paint gun and the air pressure settings to achieve your desired results.
Gun regulator setting as specified by gun manufacturer. Typically never exceed 60 PSI Max.
8.Periodically rotate the crank handle to mix the paint.
120 PSI Max.
Paint supply
ON/OFF valve ![]()
![]()
10 to 45 PSI Max. | Tank air | |
supply | ||
| ||
| ON/OFF | |
| valve. |
Gun air supply
ON/OFF valve.
120 PSI Max.
Tank regulator setting is typically
![]()
![]()
![]() 10 PSI. NEVER
10 PSI. NEVER ![]()
![]()
![]() exceed 45 PSI Max.
exceed 45 PSI Max.
Water separator.
120 PSI Max. | Air |
Compressor
| Figure 5. Paint tank connect to air compressor and spray gun. |
Model H6329 21⁄2 Gallon Paint Tank |
