3.Install and tighten the barbed hose fitting to the air inlet with the provided nut; or attach a female 1⁄4" NPT quick connect fitting (not included) to the air inlet for connection to an air coupler.
Note: Using a 1⁄4" NPT quick discon- nect
4.Attach the spray gun to an air hose regulated between 44 and 58 PSI.
Note: For the best results, use a hose that will be dedicated for spray use only. Do not use a hose that has been used with an
If you need additional help with this assem- bly, call our Technical Support at: (570)
Controls |
Atomizing Cap |
Cup |
Fluid Control |
Pattern Control |
Trigger |
Air Flow Control |
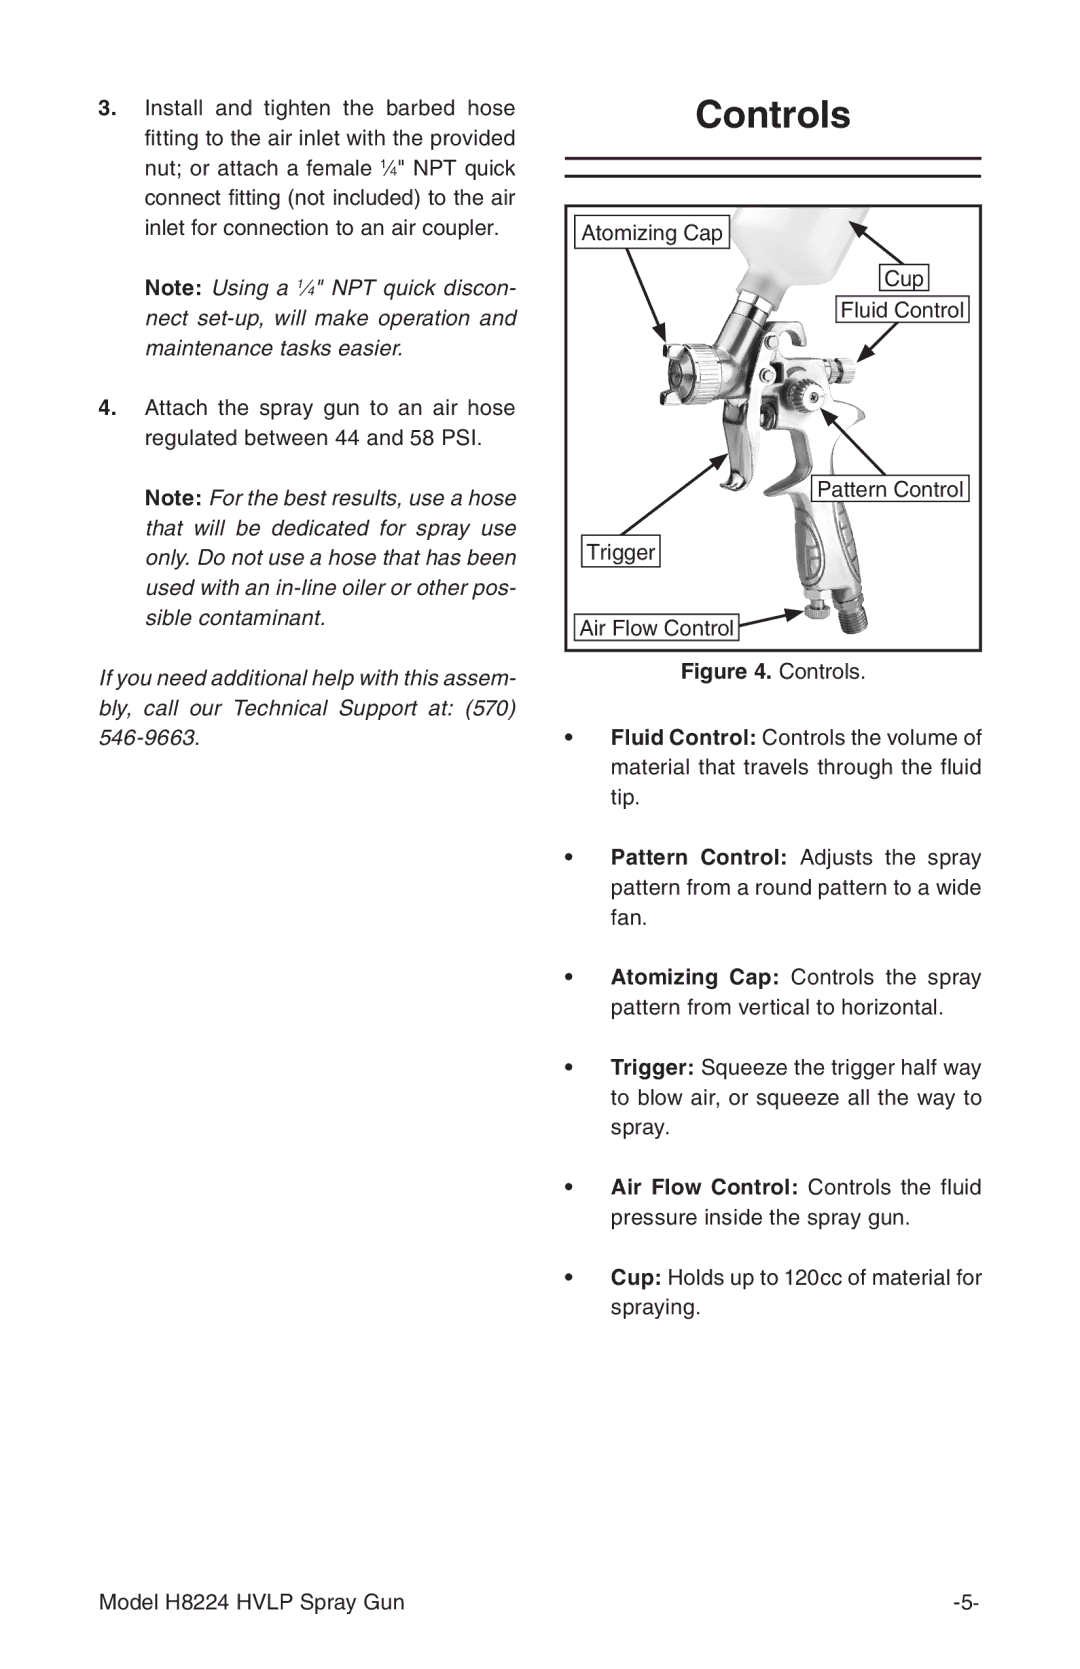
Figure 4. Controls.
•Fluid Control: Controls the volume of material that travels through the fluid tip.
•Pattern Control: Adjusts the spray pattern from a round pattern to a wide fan.
•Atomizing Cap: Controls the spray pattern from vertical to horizontal.
•Trigger: Squeeze the trigger half way to blow air, or squeeze all the way to spray.
•Air Flow Control: Controls the fluid pressure inside the spray gun.
•Cup: Holds up to 120cc of material for spraying.
Model H8224 HVLP Spray Gun |
