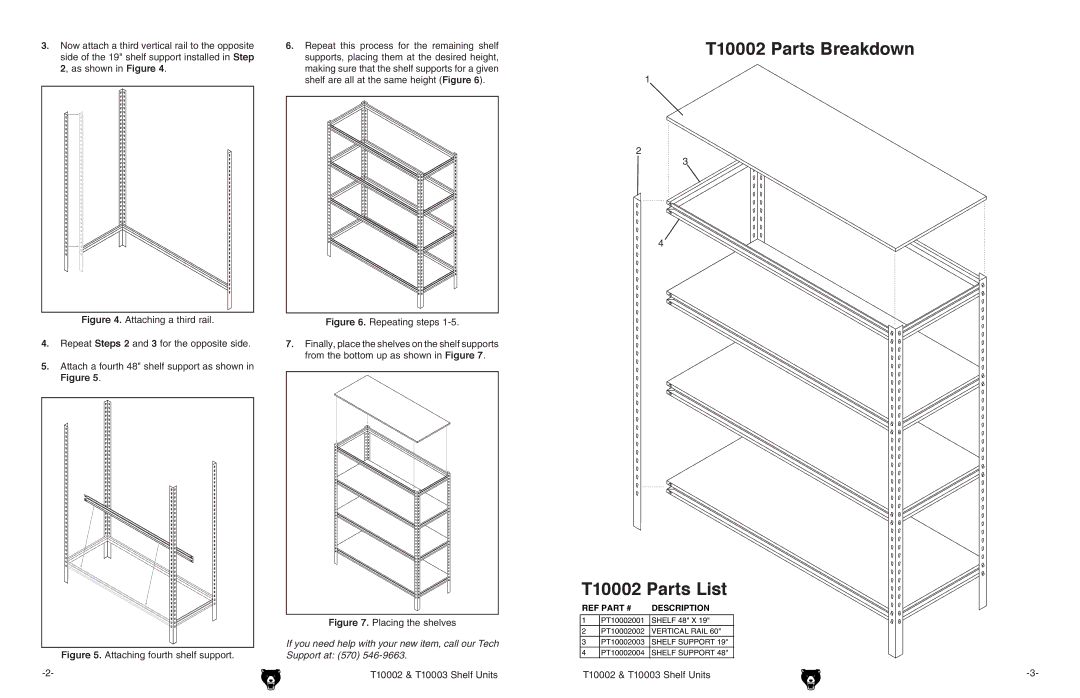
3.Now attach a third vertical rail to the opposite side of the 19" shelf support installed in Step 2, as shown in Figure 4.
Figure 4. Attaching a third rail.
4.Repeat Steps 2 and 3 for the opposite side.
5.Attach a fourth 48" shelf support as shown in Figure 5.
Figure 5. Attaching fourth shelf support.
6.Repeat this process for the remaining shelf supports, placing them at the desired height,
making sure that the shelf supports for a given shelf are all at the same height (Figure 6).
Figure 6. Repeating steps 1-5.
7.Finally, place the shelves on the shelf supports from the bottom up as shown in Figure 7.
Figure 7. Placing the shelves
If you need help with your new item, call our Tech Support at: (570)
T10002 & T10003 Shelf Units
T10002 Parts Breakdown
1
2
3
4
T10002 Parts List
REF PART # | DESCRIPTION |
| |
1 | PT10002001 | SHELF 48" X 19" |
|
2 | PT10002002 | VERTICAL RAIL 60" |
|
3 | PT10002003 | SHELF SUPPORT 19" |
|
4 | PT10002004 | SHELF SUPPORT 48" |
|
T10002 & T10003 Shelf Units | |||
