09 electrolux outdoor unit
Outdoor Unit
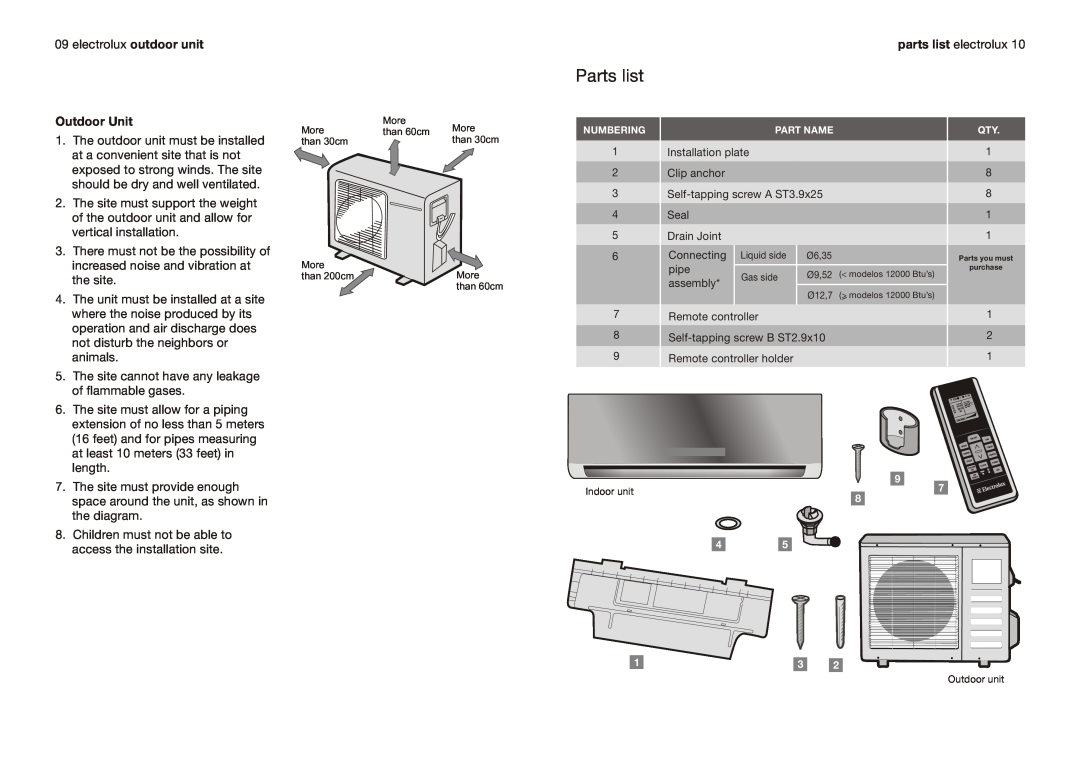
More |
parts list electrolux 10
Parts list
1. | The outdoor unit must be installed |
| at a convenient site that is not |
| exposed to strong winds. The site |
| should be dry and well ventilated. |
2. | The site must support the weight |
| of the outdoor unit and allow for |
| vertical installation. |
3. | There must not be the possibility of |
| increased noise and vibration at |
| the site. |
4. | The unit must be installed at a site |
| where the noise produced by its |
| operation and air discharge does |
| not disturb the neighbors or |
| animals. |
5. | The site cannot have any leakage |
| of flammable gases. |
6. | The site must allow for a piping |
| extension of no less than 5 meters |
| (16 feet) and for pipes measuring |
| at least 10 meters (33 feet) in |
| length. |
7. | The site must provide enough |
| space around the unit, as shown in |
| the diagram. |
8. | Children must not be able to |
More | than 60cm | More |
than 30cm |
| than 30cm |
More
than 200cmMore than 60cm
NUMBERING
1
2
3
4
5
6
7
8
9
Indoor unit
PART NAME
Installation plate
Clip anchor
Seal
Drain Joint
Connecting Liquid side | Ø6,35 | ||
pipe | Gas side | Ø9,52 (< modelos 12000 Btu’s) | |
assembly* | |||
| Ø12,7 (> modelos 12000 Btu’s) | ||
|
| ||
Remote controller
Remote controller holder
9
8 7
8
QTY.
1
8
8
1
1
Parts you must
purchase
1
2
1
access the installation site. |
45
1 | 3 | 2 |
Outdoor unit