
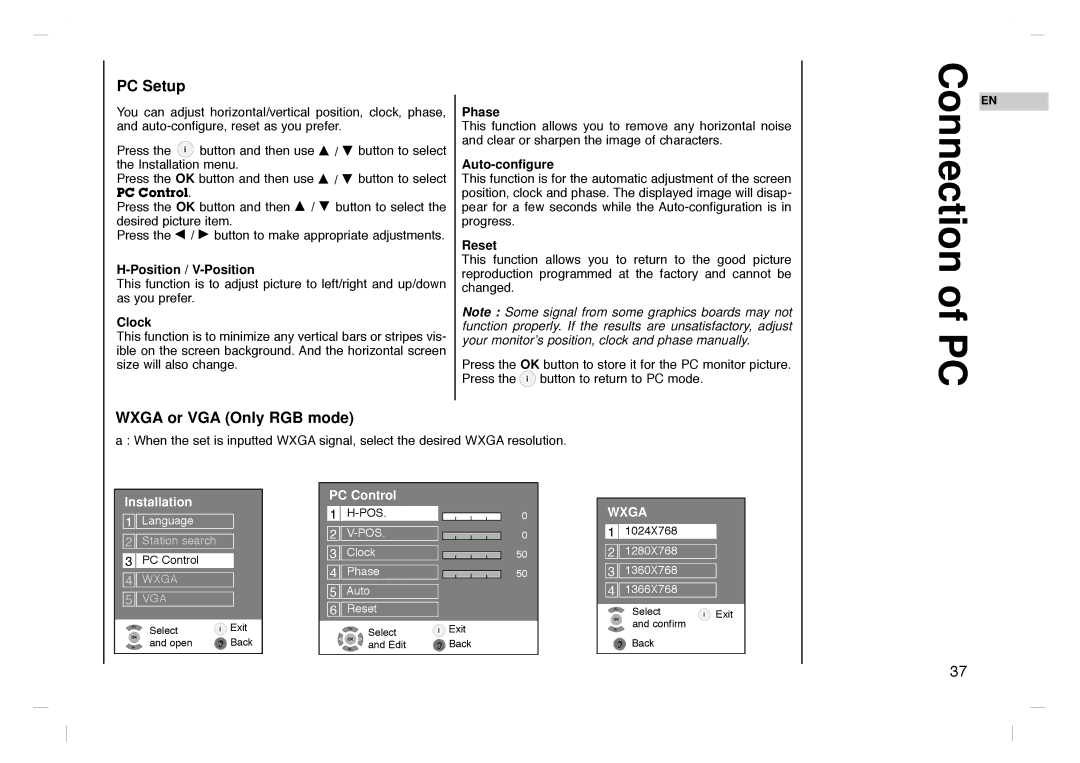
GLCD4000HD, GLCD4600HD specifications
The Grundig GLCD4000HD and GLCD4600HD are part of Grundig’s impressive lineup of high-definition LCD televisions, known for their sleek designs and advanced features. Both models deliver stunning picture quality and an array of smart technologies, making them suitable for various viewing environments.The GLCD4000HD sports a 40-inch screen with a resolution of 1920 x 1080 pixels, ensuring sharp images and vibrant colors. This TV utilizes LED backlighting, which provides excellent brightness levels while maintaining low power consumption. The model is characterized by its ultra-slim profile, making it a stylish addition to any living space.
On the other hand, the GLCD4600HD offers a larger 46-inch display, also featuring Full HD resolution. With increased screen real estate, this model is perfect for larger rooms where immersive viewing experiences are paramount. The LED technology employed in both models enhances contrast and minimizes energy use, making them eco-friendly choices.
One of the standout features of both TVs is their Smart TV capabilities. They come equipped with an intuitive interface, offering access to various streaming services and apps, allowing users to enjoy their favorite content from platforms like Netflix, YouTube, and more. The inclusion of Wi-Fi connectivity enables seamless internet browsing and easy content sharing.
In terms of audio performance, the GLCD4000HD and GLCD4600HD are equipped with powerful stereo speakers, featuring Dolby Digital technology that enhances sound quality. Users can enjoy a cinema-like auditory experience right in their homes. Both models also include multiple HDMI and USB ports for convenient connectivity with external devices, such as gaming consoles, sound systems, and storage devices.
The Grundig GLCD4000HD and GLCD4600HD prioritize user experience with features like electronic program guide (EPG), and a built-in media player that supports a range of video formats. Their energy-efficient design and user-friendly remote controls make these TVs perfect for everyday use, combining functionality with modern aesthetics.
In conclusion, the Grundig GLCD4000HD and GLCD4600HD represent a blend of style, functionality, and advanced technology, making them excellent choices for anyone looking to upgrade their home entertainment systems. With their high-definition displays, smart capabilities, and robust sound performance, these television models are designed to meet the evolving needs of modern viewers.