Using Method
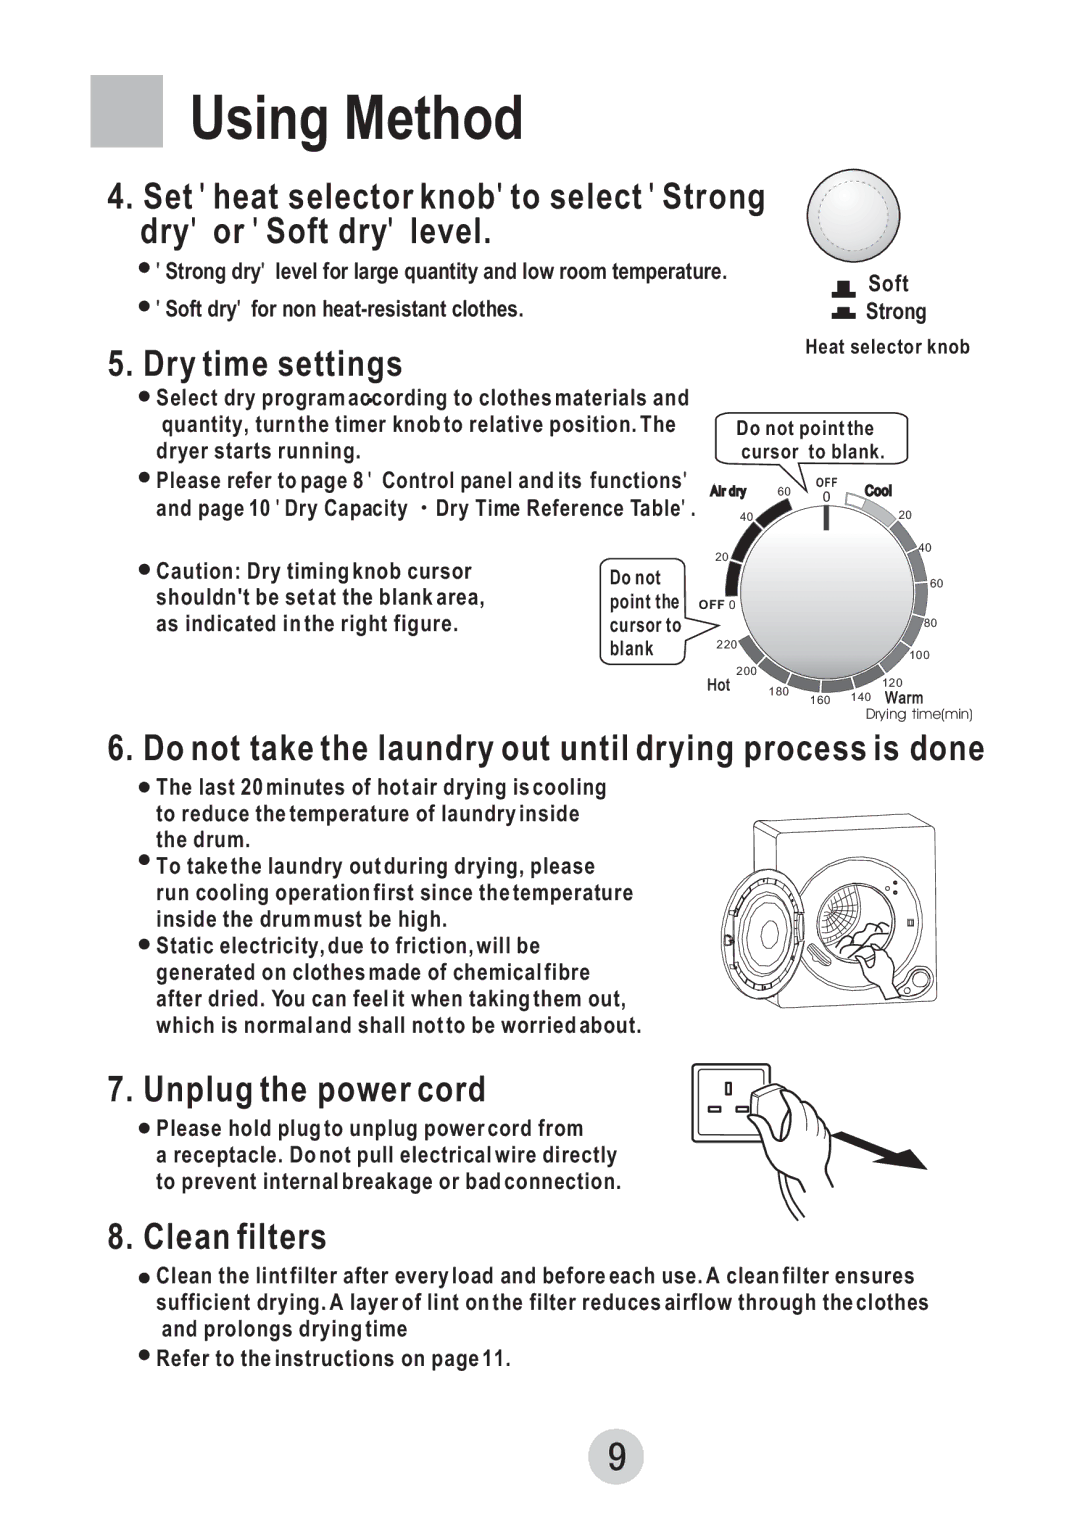
4.Set ' heat selector knob' to select ' Strong dry' or ' Soft dry' level.
![]() ' Strong dry' level for large quantity and low room temperature.
' Strong dry' level for large quantity and low room temperature.
![]() ' Soft dry' for non
' Soft dry' for non
Soft
Strong
Heat selector knob
5. Dry time settings
![]() Select dry program according to clothes materials and quantity, turn the timer knob to relative position. The dryer starts running.
Select dry program according to clothes materials and quantity, turn the timer knob to relative position. The dryer starts running.
![]() Please refer to page 8 ' Control panel and its functions' and page 10 ' Dry Capacity
Please refer to page 8 ' Control panel and its functions' and page 10 ' Dry Capacity ![]() Dry Time Reference Table' .
Dry Time Reference Table' .
Caution: Dry timing knob cursor | Do not |
shouldn't be set at the blank area, | point the |
as indicated in the right figure. | cursor to |
| blank |
Do not point the
cursor | to blank. | |||
Air dry | 60 | OFF | Cool | |
0 | ||||
|
|
| ||
40 |
|
| 20 | |
40
20
60
OFF 0
80
220
|
| 100 | |
Hot | 200 | 120 | |
180 | |||
140 Warm | |||
| 160 |
Drying time(min)
6. Do not take the laundry out until drying process is done
![]() The last 20 minutes of hot air drying is cooling
The last 20 minutes of hot air drying is cooling
to reduce the temperature of laundry inside the drum.
To take the laundry out during drying, please run cooling operation first since the temperature inside the drum must be high.
![]() Static electricity, due to friction, will be generated on clothes made of chemical fibre after dried. You can feel it when taking them out, which is normal and shall not to be worried about.
Static electricity, due to friction, will be generated on clothes made of chemical fibre after dried. You can feel it when taking them out, which is normal and shall not to be worried about.
7. Unplug the power cord
![]() Please hold plug to unplug power cord from
Please hold plug to unplug power cord from
a receptacle. Do not pull electrical wire directly to prevent internal breakage or bad connection.
8. Clean filters
![]() Clean the lint filter after every load and before each use. A clean filter ensures sufficient drying. A layer of lint on the filter reduces airflow through the clothes and prolongs drying time
Clean the lint filter after every load and before each use. A clean filter ensures sufficient drying. A layer of lint on the filter reduces airflow through the clothes and prolongs drying time
![]() Refer to the instructions on page 11.
Refer to the instructions on page 11.
