Installation

Positioning the Appliance

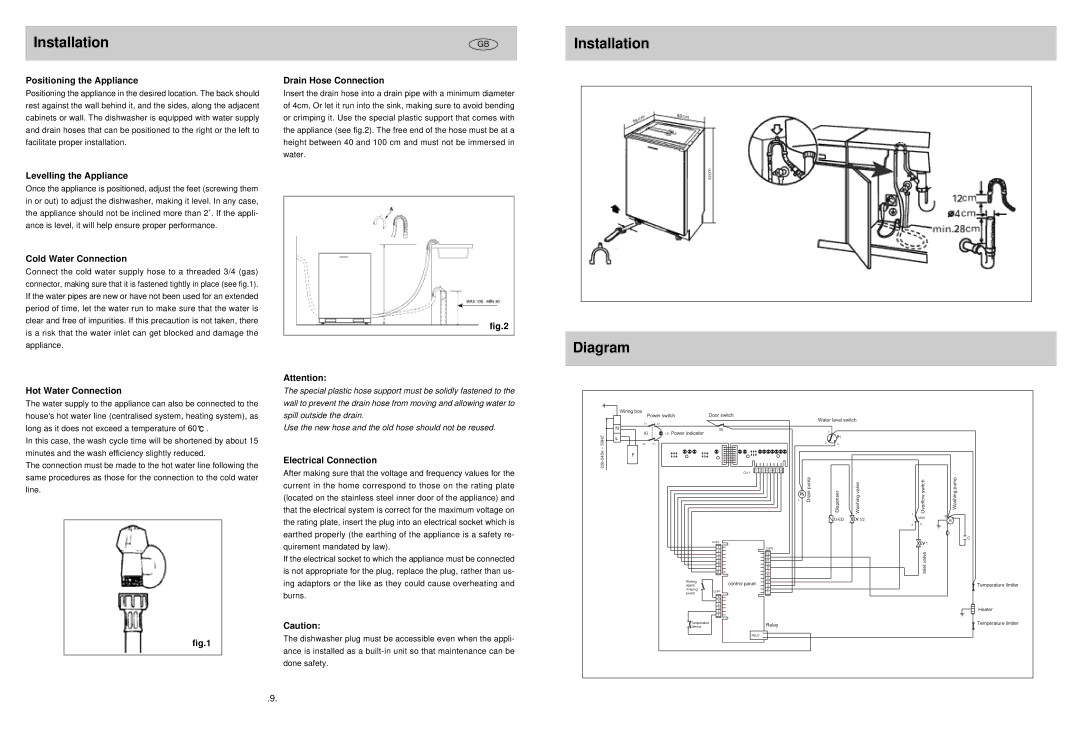
Positioning the appliance in the desired location. The back should rest against the wall behind it, and the sides, along the adjacent cabinets or wall. The dishwasher is equipped with water supply and drain hoses that can be positioned to the right or the left to facilitate proper installation.

GB

Drain Hose Connection

Insert the drain hose into a drain pipe with a minimum diameter of 4cm, Or let it run into the sink, making sure to avoid bending or crimping it. Use the special plastic support that comes with the appliance (see fig.2). The free end of the hose must be at a height between 40 and 100 cm and must not be immersed in water.

Installation

Levelling the Appliance

Once the appliance is positioned, adjust the feet (screwing them in or out) to adjust the dishwasher, making it level. In any case, the appliance should not be inclined more than 2˚. If the appli- ance is level, it will help ensure proper performance.

Cold Water Connection

Connect the cold water supply hose to a threaded 3/4 (gas) connector, making sure that it is fastened tightly in place (see fig.1). If the water pipes are new or have not been used for an extended period of time, let the water run to make sure that the water is clear and free of impurities. If this precaution is not taken, there is a risk that the water inlet can get blocked and damage the appliance.

Hot Water Connection

The water supply to the appliance can also be connected to the house's hot water line (centralised system, heating system), as

fig.2

Attention:

The special plastic hose support must be solidly fastened to the wall to prevent the drain hose from moving and allowing water to spill outside the drain.

Diagram

Wiring box

Power switch

Door switch

3(1)

1(2)


Water level switch

long as it does not exceed a temperature of 60￿.

In this case, the wash cycle time will be shortened by about 15 minutes and the wash efficiency slightly reduced.

The connection must be made to the hot water line following the same procedures as those for the connection to the cold water line.

Use the new hose and the old hose should not be reused.

Electrical Connection

After making sure that the voltage and frequency values for the current in the home correspond to those on the rating plate (located on the stainless steel inner door of the appliance) and that the electrical system is correct for the maximum voltage on the rating plate, insert the plug into an electrical socket which is earthed properly (the earthing of the appliance is a safety re-

220-240V ~ 50HZ

N

IS

IG

LS Power indicator

L


4(2)

2(1)

F


CnL1

1 2 3 4 5 6 7 8

L

Drain pump

1

1

2 3

Dispenser

Washing valve

D-ED 1/2

1

Overflow switch

Washing pump

IAQS

M


ML


2

3


S


C

quirement mandated by law).

If the electrical socket to which the appliance must be connected is not appropriate for the plug, replace the plug, rather than us- ing adaptors or the like as they could cause overheating and burns.

Caution:

CnP3

1

2

3

4

5

6

7

8

Rinsing agent

missing

switchCnP1

6

5

4

3

2

1

Temperature

Sensor

control panel

CnP2

12

11

10

9

8

7

6

5

4

3

2

1

Relay

1

Inlet valve

Temperature limiter

Heater

Temperature limiter

fig.1

The dishwasher plug must be accessible even when the appli- ance is installed as a built-in unit so that maintenance can be done safety.

RELE’

.9.

Page 6
Image 6
Haier HDW700BI manual Installation, Diagram

HDW700BI specifications

The Haier HDW700BI is a high-performance built-in dishwasher designed to elevate kitchen convenience and efficiency. With its sleek and modern design, this appliance not only enhances the aesthetics of any kitchen but also promises outstanding cleaning capabilities.

One of the standout features of the HDW700BI is its spacious interior, which can accommodate up to 16 place settings. This makes it an ideal choice for families or anyone who frequently entertains guests. The adjustable racks and foldable tines provide flexibility, allowing users to customize the interior space to fit larger pots and pans, which is often a challenge in many dishwashers.

The Haier HDW700BI is equipped with multiple wash cycles, providing users with options tailored to specific needs. From a quick wash for lightly soiled dishes to a heavy-duty cycle for stubborn grime, this dishwasher ensures optimal cleaning performance every time. Additionally, the delicate wash cycle is perfect for fragile items, offering peace of mind while washing glassware and china.

Energy efficiency is another key characteristic of the HDW700BI. With its Energy Star certification, this dishwasher not only reduces energy consumption but also contributes to lower utility bills. The eco-mode further enhances its efficiency by using less water and energy during cycles, making it an environmentally friendly choice for conscious consumers.

The innovative noise reduction technology in the Haier HDW700BI allows it to operate quietly, making it suitable for open-concept living spaces. With a noise level of just 45 dB, users can enjoy conversations or watch television without the distraction of a loud dishwasher running in the background.

Moreover, the HDW700BI features a delay start option, giving users the flexibility to set the washing cycle according to their convenience. With a sleek control panel that is user-friendly, selecting the desired cycle and options is straightforward and intuitive.

In summary, the Haier HDW700BI is a versatile, efficient, and stylish built-in dishwasher. Its generous capacity, various wash cycles, energy-saving technologies, and quiet operation make it an excellent choice for modern kitchens, ensuring that dishwashing becomes a hassle-free task. Whether you're a busy family or someone who enjoys entertaining, the HDW700BI delivers performance and convenience to meet all your dishwashing needs.