Operation
Operation
In the manual, the OSD (on screen display) may be different from your TV`s, because it is just an example to help you with the TV operation.
There are several options you might need to set up in order for your TV to work properly. Read the instructions that follow.
Initial Setup: Set according to the screen display.
Switching On/Off the TV set
1. First, connect power cord correctly.
2. Select the viewing source by using INPUT button on
the remote control.
3. When finished using the TV, press POWER button on
the remote control. The TV reverts to standby mode.
4. If you intend to be away on vacation, disconnect the
power plug from the wall power outlet.
Note
If the TV in power on , the screen show information according the type of input signal . the information will disappear. If there is no signal , No Signal will display on the screen.
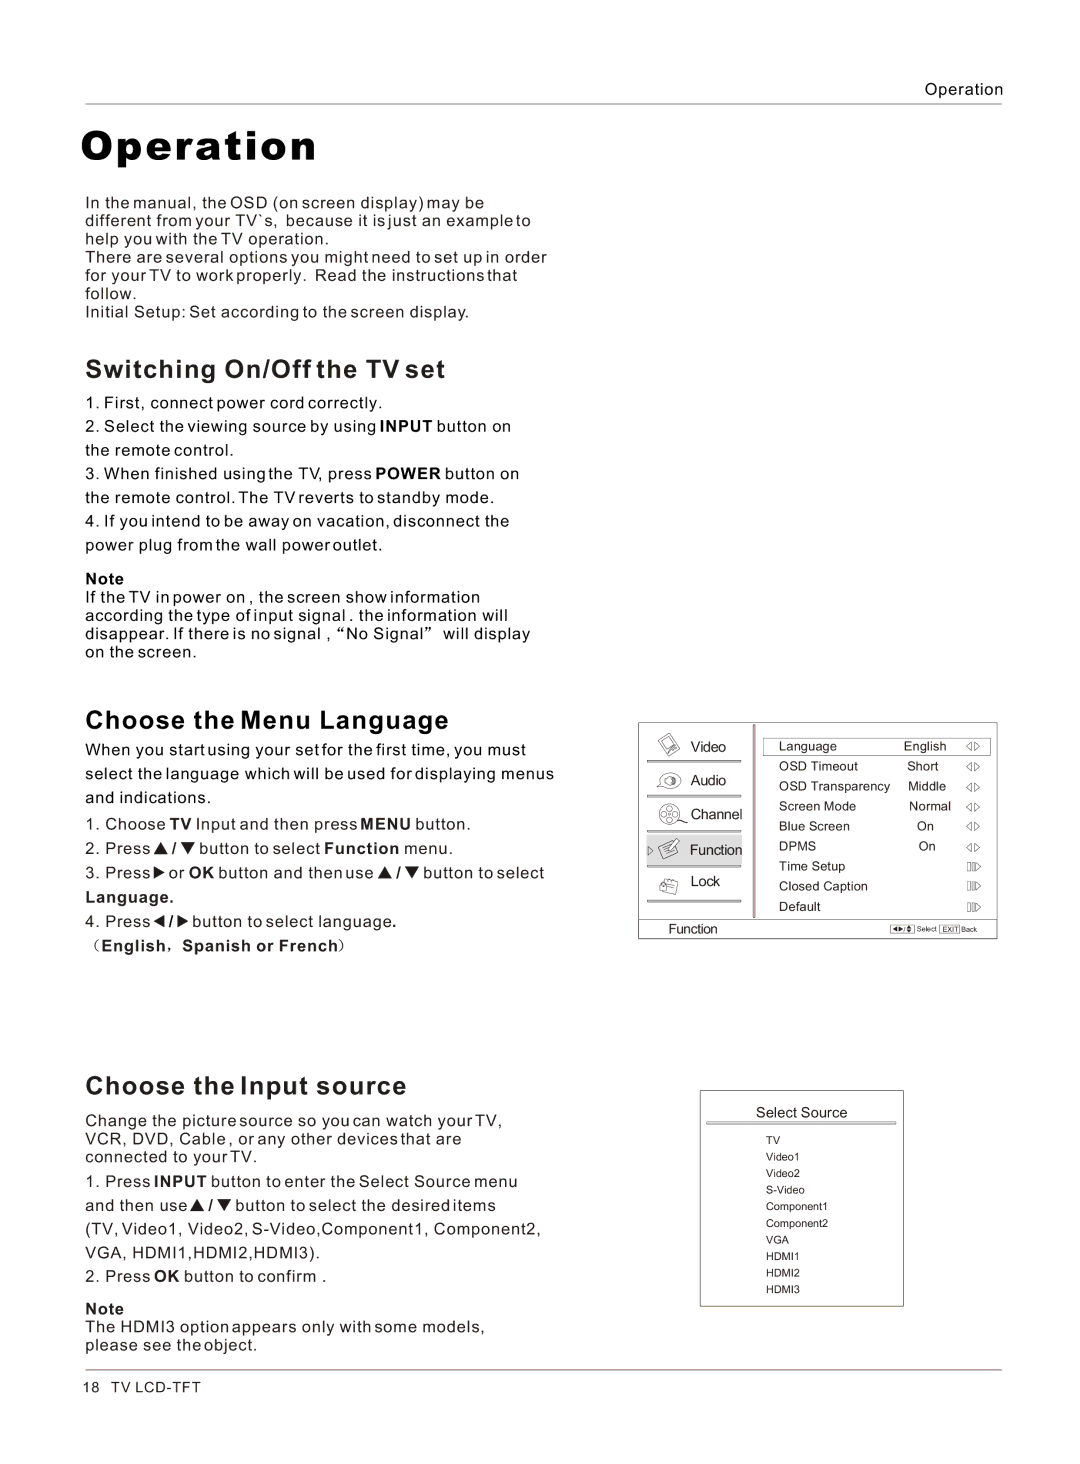
Choose the Menu Language
When you start using your set for the first time, you must
select the language which will be used for displaying menus
and indications.
1.Choose TV Input and then press MENU button.
2.Press ![]() /
/ ![]() button to select Function menu.
button to select Function menu.
3.Press ![]() or OK button and then use
or OK button and then use ![]() /
/ ![]() button to select
button to select
Language.
4.Press ![]() /
/ ![]() button to select language.
button to select language. ![]() English
English ![]() Spanish or French
Spanish or French![]()
Video | Language | English | |
Audio | OSD Timeout |
| Short |
OSD Transparency |
| Middle | |
|
| ||
Channel | Screen Mode |
| Normal |
Blue Screen |
| On | |
|
| ||
Function | DPMS |
| On |
Lock | Time Setup |
|
|
Closed Caption |
|
| |
| Default |
|
|
Function |
| / | Select EXIT Back |
Choose the Input source
Change the picture source so you can watch your TV, VCR, DVD, Cable , or any other devices that are connected to your TV.
1.Press INPUT button to enter the Select Source menu and then use ![]() /
/ ![]() button to select the desired items (TV, Video1, Video2,
button to select the desired items (TV, Video1, Video2,
2.Press OK button to confirm .
Note
The HDMI3 option appears only with some models, please see the object.
Select Source
TV
Video1
Video2
Component1
Component2
VGA
HDMI1
HDMI2
HDMI3
18 TV
