INSTALLATION
Front panel | Side panel |
|
|
3
SOURCE | 1 |
MENU | 2 |
1
2
![]()
![]()
![]()
![]() CH+
CH+![]()
![]()
![]()
![]()
![]()
![]() CH-
CH- ![]()
![]()
![]()
![]()
![]()
![]() VOL+
VOL+![]()
![]()
![]()
![]() VOL-
VOL- ![]()
3
4
30 30
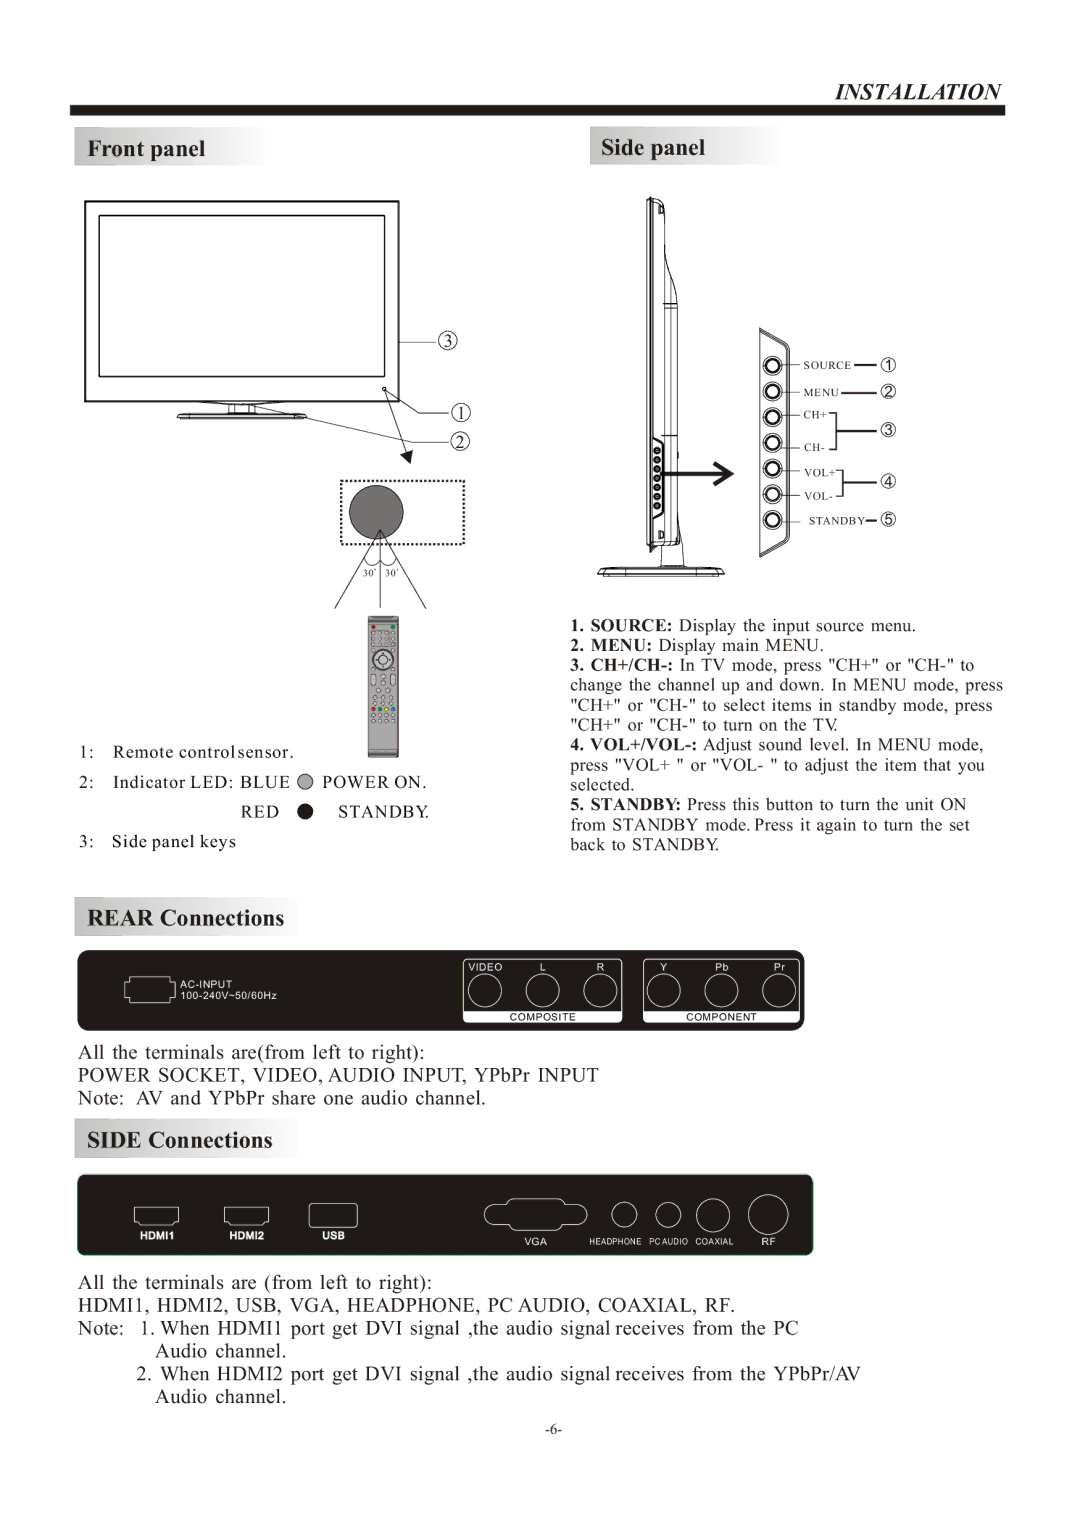
1: Remote control sensor.
2:Indicator LED: BLUE ![]() POWER ON.
POWER ON.
RED  STANDBY.
3:Side panel keys
STANDBY 5
1.SOURCE: Display the input source menu.
2.MENU: Display main MENU.
3.
4.
5.STANDBY: Press this button to turn the unit ON from STANDBY mode. Press it again to turn the set back to STANDBY.
REAR Connections
VIDEO LRYPbPr
COMPOSITECOMPONENT
All the terminals are(from left to right):
POWER SOCKET, VIDEO, AUDIO INPUT, YPbPr INPUT
Note: AV and YPbPr share one audio channel.
SIDE Connections
HDMI1 | HDMI2 | USB | HEADPHONE PC AUDIO COAXIAL | RF |
|
| VGA |
All the terminals are (from left to right):
HDMI1, HDMI2, USB, VGA, HEADPHONE, PC AUDIO, COAXIAL, RF.
Note: 1. When HDMI1 port get DVI signal ,the audio signal receives from the PC Audio channel.
2.When HDMI2 port get DVI signal ,the audio signal receives from the YPbPr/AV Audio channel.