Manuals
/
Hamilton Beach
/
Kitchen Appliance
/
Coffeemaker
Hamilton Beach
43253
warranty
Conservez Ces Instuctions, Coffeemaker Cafetière Cafetera
Models:
43253
1
1
2
2
Download
2 pages
38.65 Kb
1
2
Safety
Page 1
Image 1
Page 1
Page 2
Page 1
Image 1
Page 1
Page 2
Contents
IMPORTANT SAFEGUARDS
CONSERVEZ CES INSTUCTIONS
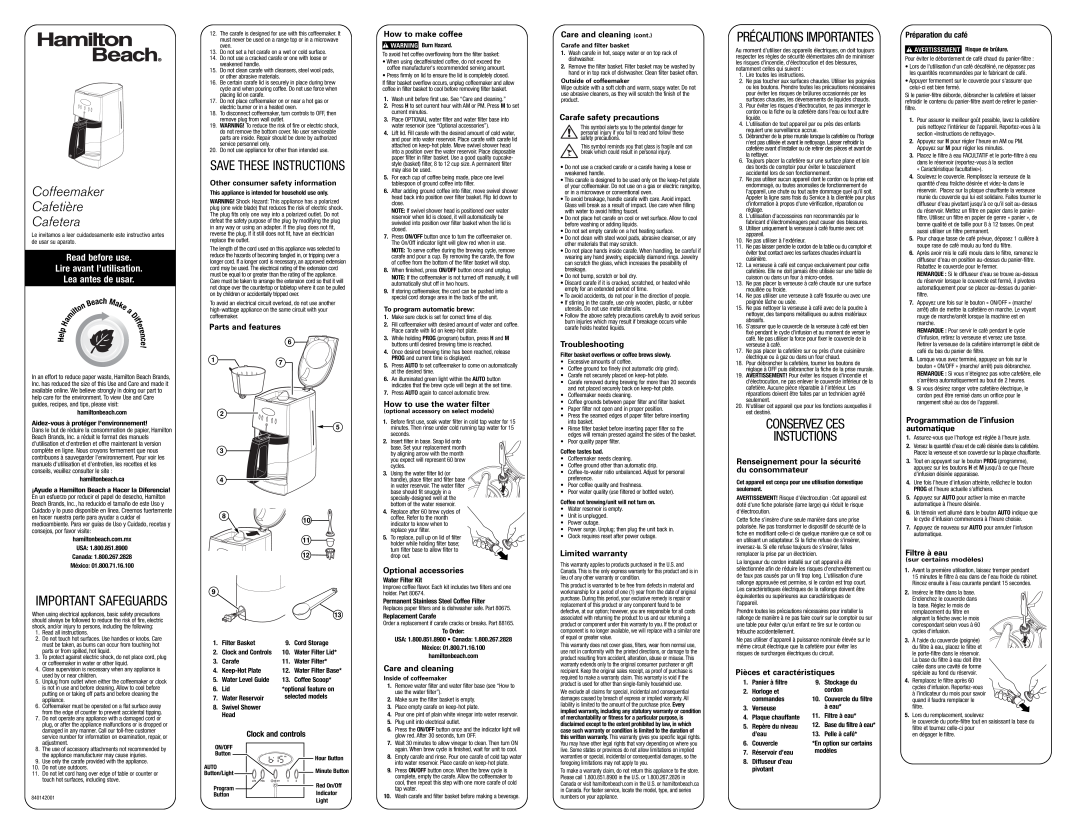
Coffeemaker Cafetière Cafetera
SAVE THESE INSTRUCTIONS
GUARDE ESTAS INSTRUCCIONES
SALVAGUARDIAS IMPORTANTES
Top
Page
Image
Contents