840107700 Ev02.qxd 12/5/02 2:38 PM Page 4
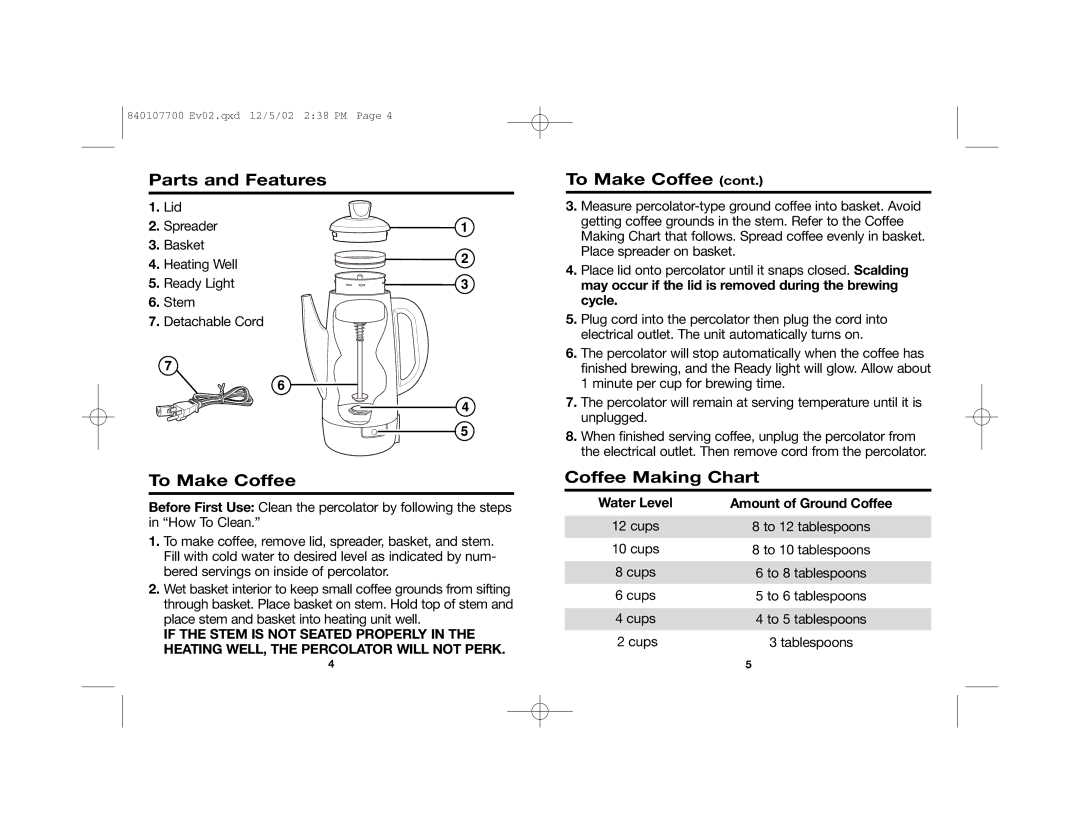
Parts and Features
1. Lid
2. Spreader
3.Basket
4. Heating Well
5. Ready Light
6.Stem
7. Detachable Cord
To Make Coffee
Before First Use: Clean the percolator by following the steps in “How To Clean.”
1.To make coffee, remove lid, spreader, basket, and stem. Fill with cold water to desired level as indicated by num- bered servings on inside of percolator.
2.Wet basket interior to keep small coffee grounds from sifting through basket. Place basket on stem. Hold top of stem and place stem and basket into heating unit well.
IF THE STEM IS NOT SEATED PROPERLY IN THE HEATING WELL, THE PERCOLATOR WILL NOT PERK.
To Make Coffee (cont.)
3.Measure
4.Place lid onto percolator until it snaps closed. Scalding may occur if the lid is removed during the brewing cycle.
5.Plug cord into the percolator then plug the cord into electrical outlet. The unit automatically turns on.
6.The percolator will stop automatically when the coffee has finished brewing, and the Ready light will glow. Allow about 1 minute per cup for brewing time.
7.The percolator will remain at serving temperature until it is unplugged.
8.When finished serving coffee, unplug the percolator from the electrical outlet. Then remove cord from the percolator.
Coffee Making Chart
Water Level | Amount of Ground Coffee |
|
|
12 cups | 8 to 12 tablespoons |
|
|
10 cups | 8 to 10 tablespoons |
|
|
8 cups | 6 to 8 tablespoons |
6 cups | 5 to 6 tablespoons |
|
|
4 cups | 4 to 5 tablespoons |
2 cups | 3 tablespoons |
4 | 5 |
