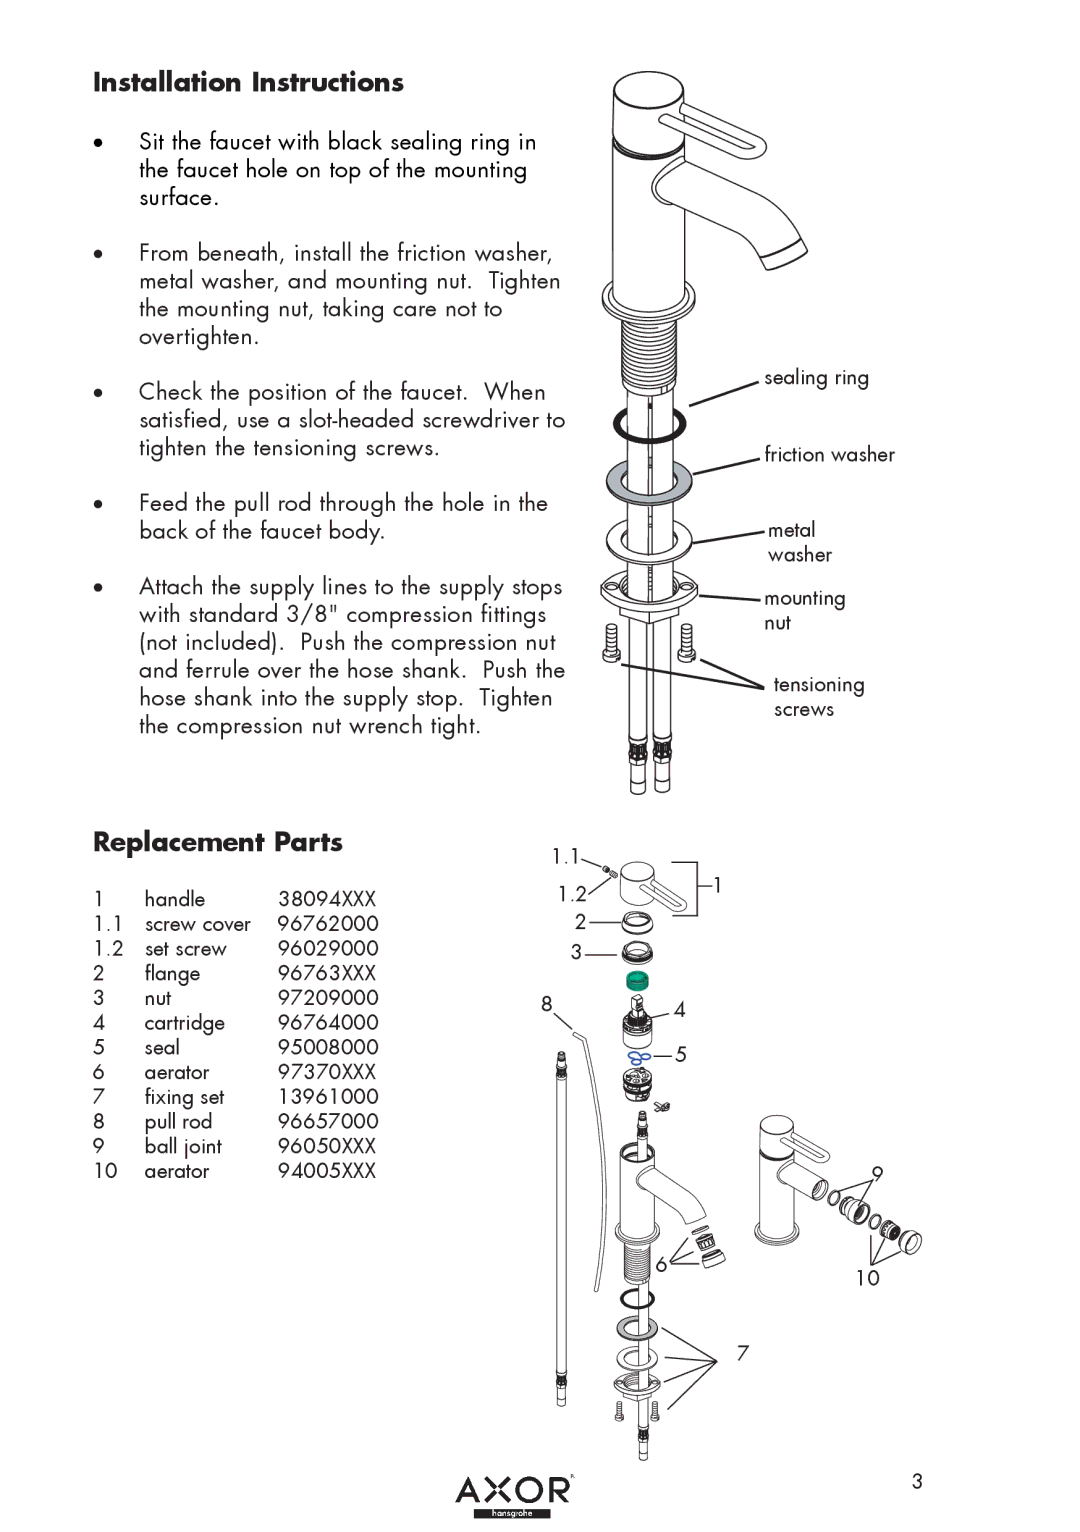
Installation Instructions
•Sit the faucet with black sealing ring in the faucet hole on top of the mounting surface.
•From beneath, install the friction washer, metal washer, and mounting nut. Tighten the mounting nut, taking care not to overtighten.
•Check the position of the faucet. When satisfied, use a
•Feed the pull rod through the hole in the back of the faucet body.
•Attach the supply lines to the supply stops with standard 3/8" compression fittings (not included). Push the compression nut and ferrule over the hose shank. Push the hose shank into the supply stop. Tighten the compression nut wrench tight.
Replacement Parts | 1.1 | ||
|
|
| |
1 | handle | 38094XXX | 1.2 |
1.1 | screw cover | 96762000 | 2 |
1.2 | set screw | 96029000 | 3 |
2 | flange | 96763XXX |
|
3 | nut | 97209000 | 8 |
4 | cartridge | 96764000 |
|
5 | seal | 95008000 |
|
6 | aerator | 97370XXX |
|
7 | fixing set | 13961000 |
|
8 | pull rod | 96657000 |
|
9 | ball joint | 96050XXX |
|
10 | aerator | 94005XXX |
|
sealing ring
friction washer
metal washer
mounting nut
tensioning screws
1
4
5
9
610
7
3