Warning:The warnings, cautions, and instructions discussed in this instruction manual cannot cover all possible conditions and situations that may occur. It must be understood by the operator that common sense and caution are fac- tors which cannot be built into this product, but must be supplied by the opera- tor.
Unpacking
When unpacking, check to make sure all parts listed on Page 6 are included.
If any parts are missing or broken, please call Harbor Freight Tools at the number on the cover of this manual.
Assembly
All parts numbered and listed refer to those in the Assembly Diagram and Parts List on Pages
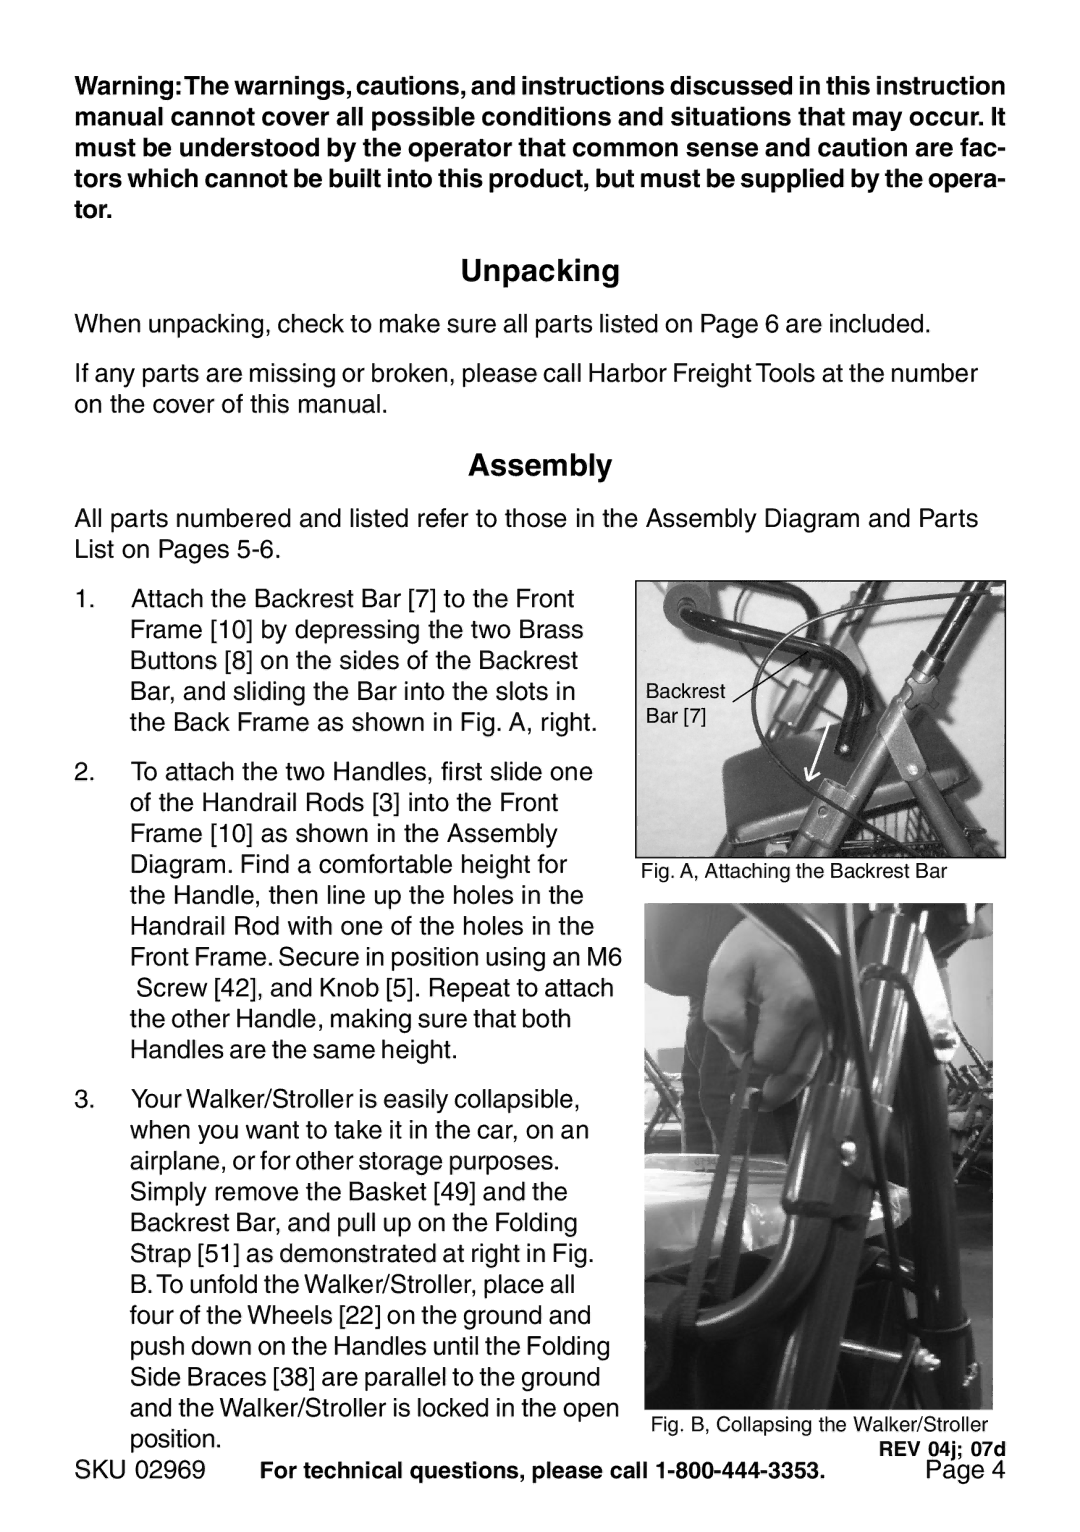
1.Attach the Backrest Bar [7] to the Front Frame [10] by depressing the two Brass Buttons [8] on the sides of the Backrest Bar, and sliding the Bar into the slots in the Back Frame as shown in Fig. A, right.
2.To attach the two Handles, first slide one of the Handrail Rods [3] into the Front Frame [10] as shown in the Assembly Diagram. Find a comfortable height for the Handle, then line up the holes in the Handrail Rod with one of the holes in the Front Frame. Secure in position using an M6 Screw [42], and Knob [5]. Repeat to attach the other Handle, making sure that both Handles are the same height.
3.Your Walker/Stroller is easily collapsible, when you want to take it in the car, on an airplane, or for other storage purposes.
Simply remove the Basket [49] and the Backrest Bar, and pull up on the Folding Strap [51] as demonstrated at right in Fig. B. To unfold the Walker/Stroller, place all four of the Wheels [22] on the ground and push down on the Handles until the Folding Side Braces [38] are parallel to the ground and the Walker/Stroller is locked in the open position.
SKU 02969
Backrest
Bar [7]
Fig. A, Attaching the Backrest Bar
Fig. B, Collapsing the Walker/Stroller
REV 04j; 07d
Page 4