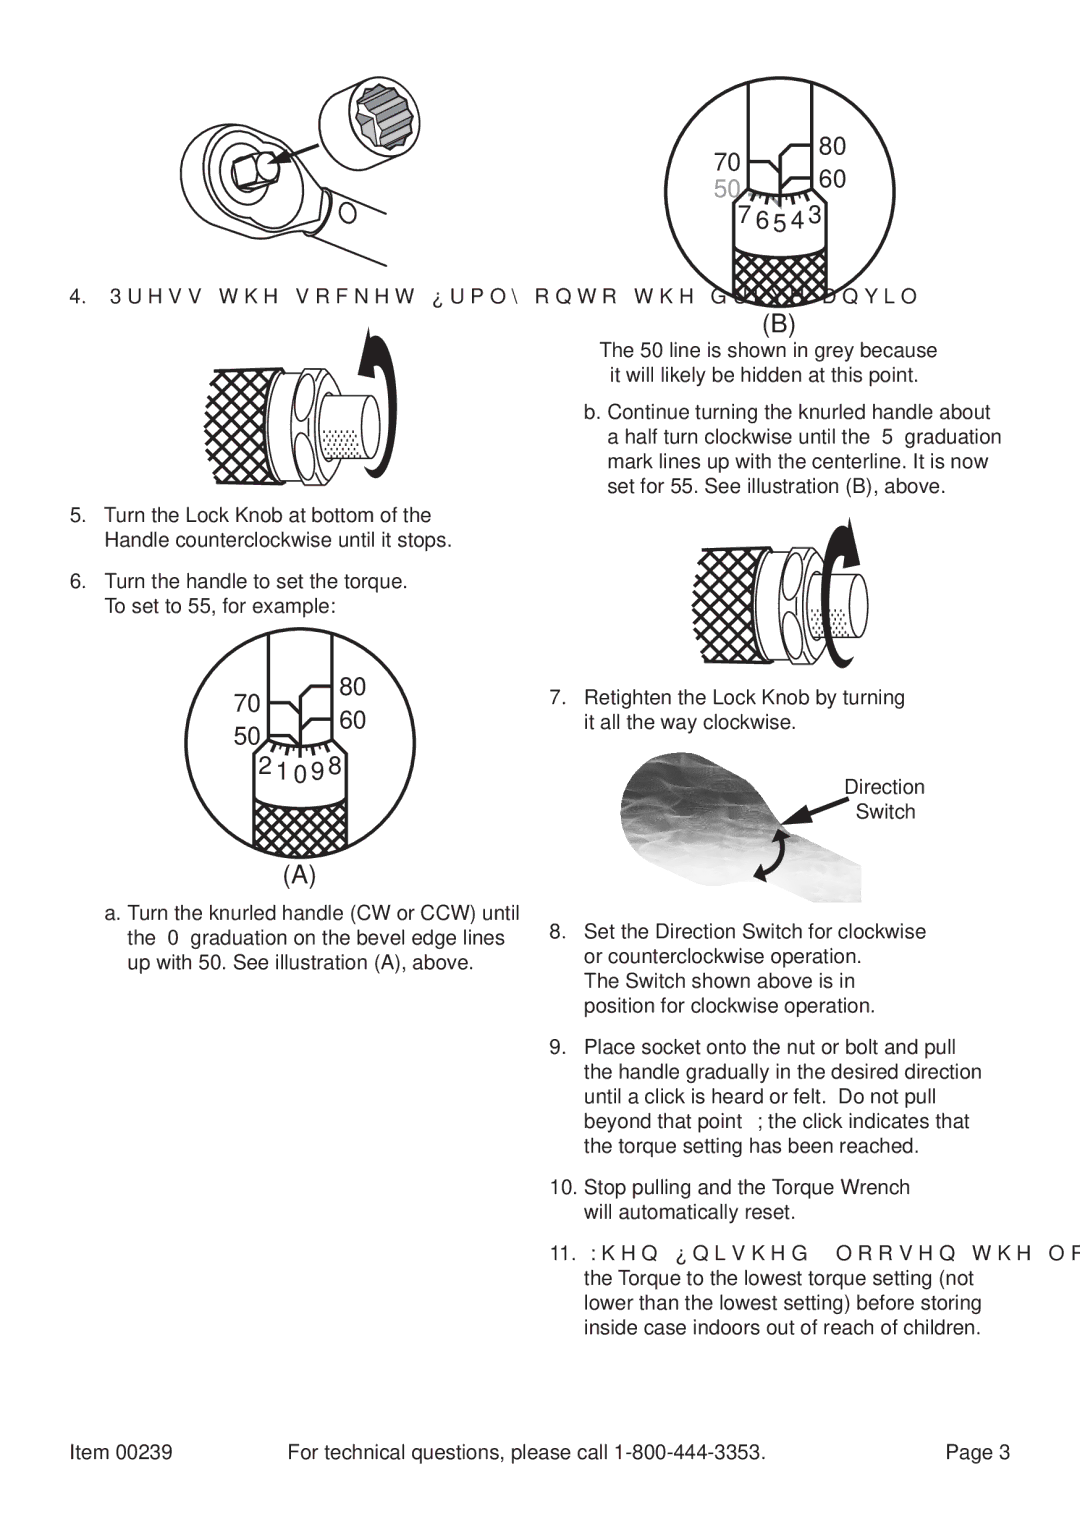
4.Press the socket firmly onto the drive anvil.
5.Turn the Lock Knob at bottom of the Handle counterclockwise until it stops.
6.Turn the handle to set the torque. To set to 55, for example:
70 | 80 | |
60 | ||
50 | ||
| ||
2 1 0 9 8 | ||
(A)
a. Turn the knurled handle (CW or CCW) until the “0” graduation on the bevel edge lines up with 50. See illustration (A), above.
7080
5060
7 6 5
5  4 3
4 3
(B)
The 50 line is shown in grey because it will likely be hidden at this point.
b. Continue turning the knurled handle about a half turn clockwise until the “5” graduation mark lines up with the centerline. It is now set for 55. See illustration (B), above.
7.Retighten the Lock Knob by turning it all the way clockwise.
Direction
 Switch
8.Set the Direction Switch for clockwise or counterclockwise operation.
The Switch shown above is in position for clockwise operation.
9.Place socket onto the nut or bolt and pull the handle gradually in the desired direction until a click is heard or felt. Do not pull beyond that point; the click indicates that the torque setting has been reached.
10.Stop pulling and the Torque Wrench will automatically reset.
11.When finished, loosen the lock knob and set the Torque to the lowest torque setting (not lower than the lowest setting) before storing inside case indoors out of reach of children.
Item 00239 | For technical questions, please call | Page 3 |
