
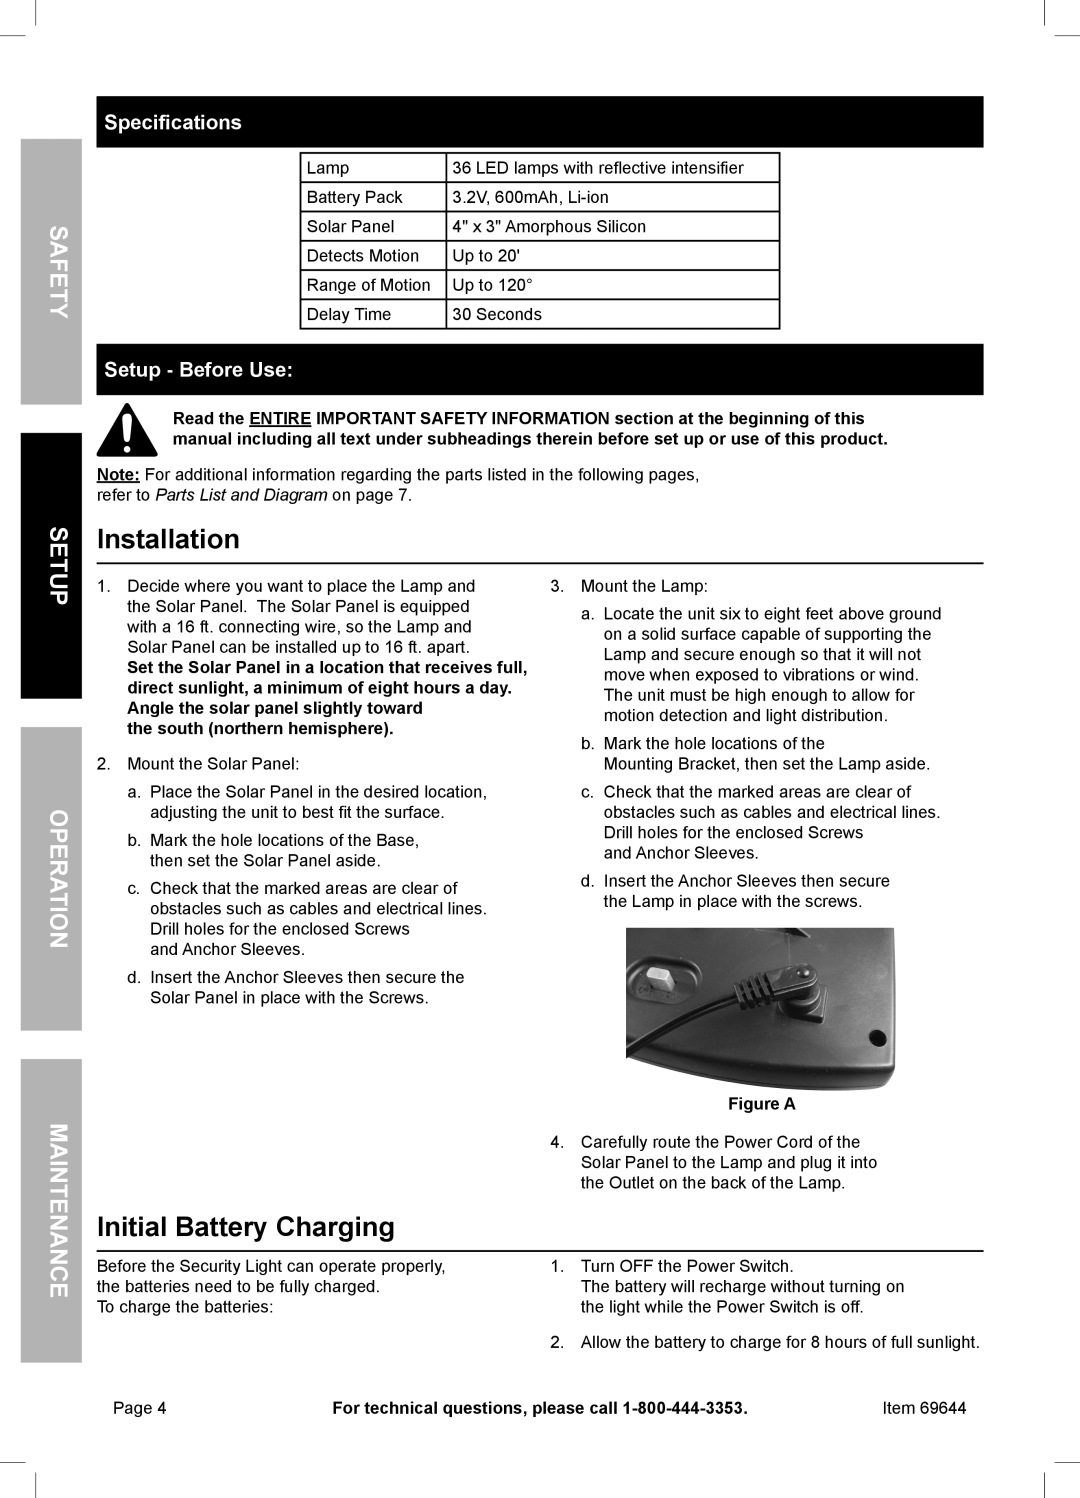
36 specifications
Harbor Freight Tools, a well-known retailer of quality tools and equipment at affordable prices, has made a significant mark in the industry with its diverse range of products. Among its extensive inventory is the Harbor Freight Tools 36, a tool that stands out for its exceptional features and practical applications. This versatile tool is designed for both professional tradespeople and DIY enthusiasts, making it an essential addition to any workshop.One of the most striking features of the Harbor Freight Tools 36 is its robust construction. Engineered with durability in mind, it is made from high-quality materials that can withstand heavy usage. This ensures that it remains reliable over time, eliminating the need for frequent replacements. The tool's design also emphasizes ease of use, incorporating ergonomic elements that enhance comfort during operation, thereby reducing user fatigue.
The Harbor Freight Tools 36 boasts cutting-edge technology that sets it apart from competitors. It incorporates advanced safety features designed to protect users from accidents, making it ideal for those who may be novice users. The tool also includes precision engineering that allows for accurate results, ensuring that tasks are completed efficiently and effectively.
Another noteworthy characteristic of the Harbor Freight Tools 36 is its versatility. It can be employed in a wide range of applications, from simple home repairs to complex construction tasks. This adaptability makes it a favorite among users who appreciate multifunctional tools that maximize their investment.
Portability is another advantage of the Harbor Freight Tools 36. Lightweight yet sturdy, it can be easily transported to various job sites without compromising performance. This is particularly beneficial for tradespeople who require reliable tools on the go.
Moreover, Harbor Freight Tools has a reputation for offering products at competitive prices, making high-quality tools accessible to a broader audience. The cost-effectiveness of the Harbor Freight Tools 36 means that users can invest in reliable equipment without breaking the bank.
In summary, the Harbor Freight Tools 36 is a remarkable tool that embodies durability, safety, versatility, and affordability. Its cutting-edge technology and user-friendly design make it a valuable asset for anyone looking to tackle projects with confidence and precision. Whether you're a seasoned professional or a hobbyist, the Harbor Freight Tools 36 is a tool worth considering for your toolkit.