ASSEMBLY INSTRUCTIONS FOR BACK WHEELS
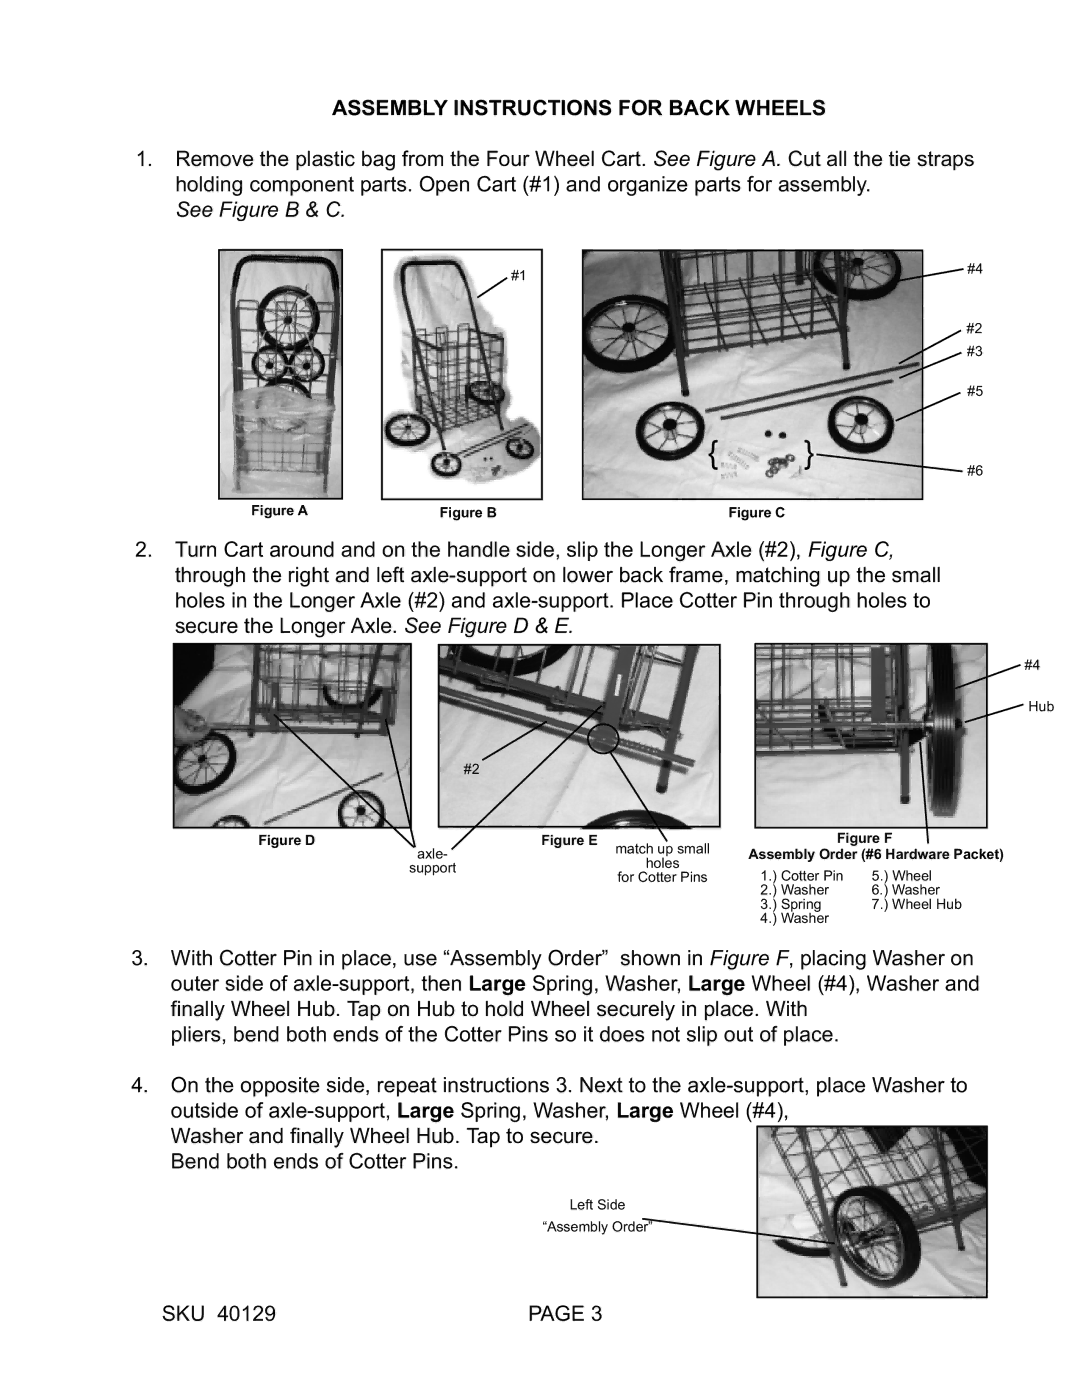
1.Remove the plastic bag from the Four Wheel Cart. See Figure A. Cut all the tie straps holding component parts. Open Cart (#1) and organize parts for assembly.
See Figure B & C.
#1
Figure A | Figure B |
|
| #4 |
|
| #2 |
|
| #3 |
|
| #5 |
{ | } | #6 |
|
| |
|
|
|
| Figure C | |
2.Turn Cart around and on the handle side, slip the Longer Axle (#2), Figure C, through the right and left
|
| #2 |
|
|
|
|
|
Figure D |
| Figure E | match up small |
| axle- |
| |
support | holes | |
for Cotter Pins | ||
|
![]() #4
#4
![]() Hub
Hub
Figure F
Assembly Order (#6 Hardware Packet)
1.) | Cotter Pin | 5.) Wheel |
2.) | Washer | 6.) Washer |
3.) | Spring | 7.) Wheel Hub |
4.) | Washer |
|
3.With Cotter Pin in place, use “Assembly Order” shown in Figure F, placing Washer on outer side of
pliers, bend both ends of the Cotter Pins so it does not slip out of place.
4.On the opposite side, repeat instructions 3. Next to the
Washer and finally Wheel Hub. Tap to secure. Bend both ends of Cotter Pins.
Left Side
“Assembly Order”
SKU 40129 | PAGE 3 |