Troubleshooting Continued
Problem 7: Ice accumulating in the dryer, and/or a pressure loss through the unit.
Reason: This may be caused by the formation of ice inside.
Solution: The Hot Gas Bypass Valve (not shown in the Parts List or Assembly Diagram) needs to be adjusted. This adjustment should only be done after consultation with our technical support service at:
Maintenance
Note: Maintenance must be performed by an authorized service technician.
Never attempt to adjust the temperature; this adjustment should only be done by an autho- rized service technician.
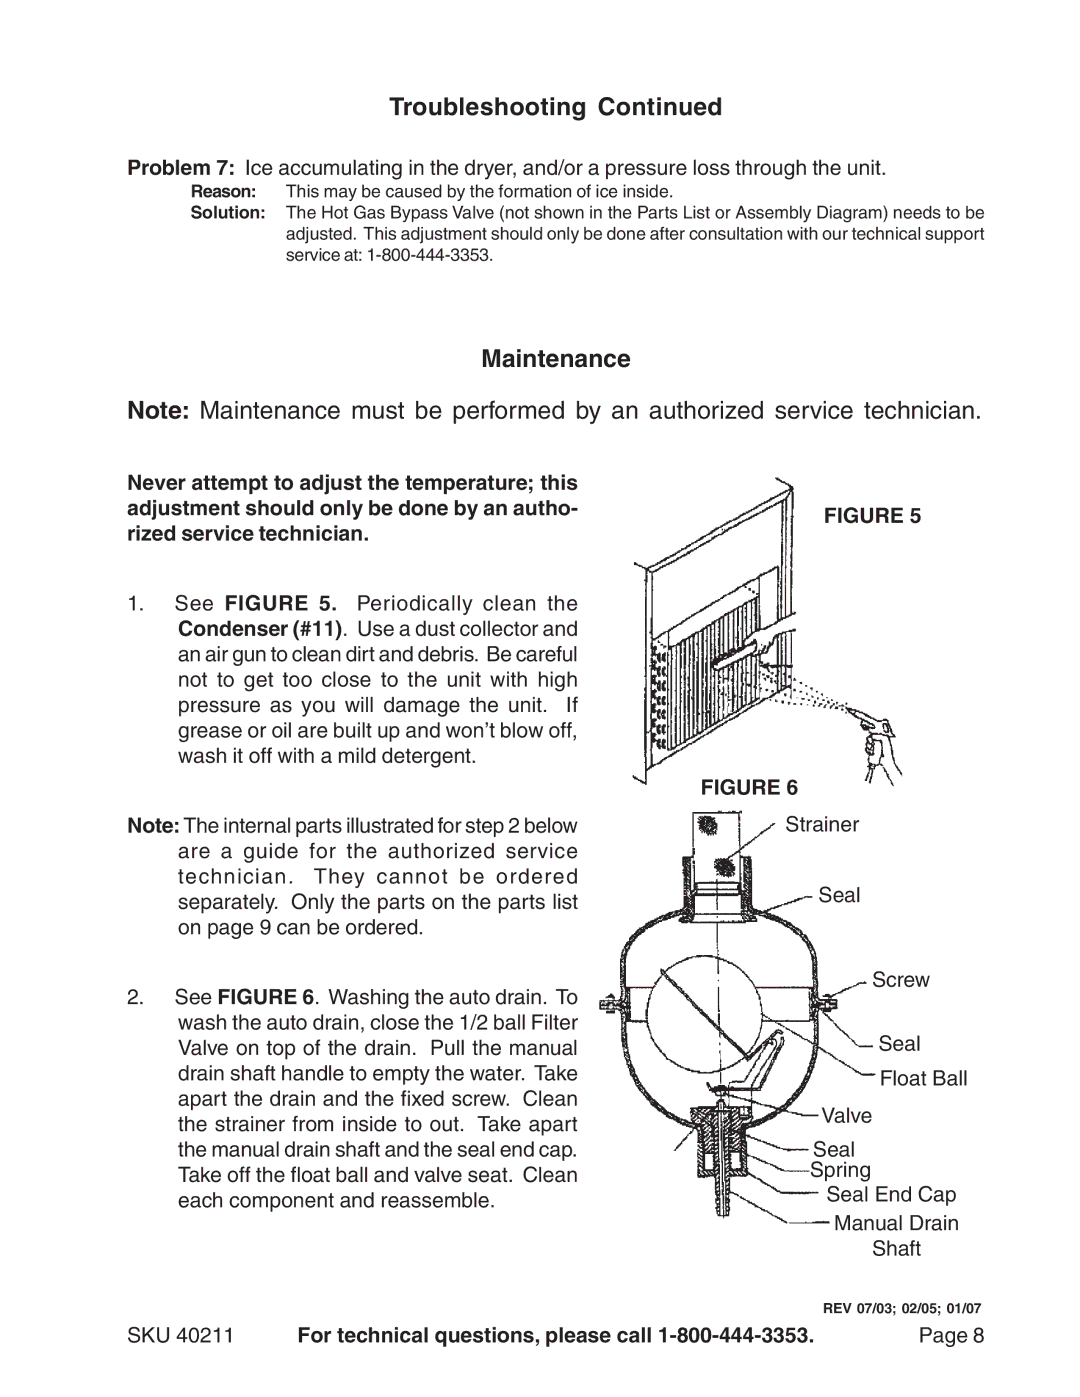
1.See FIGURE 5. Periodically clean the Condenser (#11). Use a dust collector and an air gun to clean dirt and debris. Be careful not to get too close to the unit with high pressure as you will damage the unit. If grease or oil are built up and won’t blow off, wash it off with a mild detergent.
Note: The internal parts illustrated for step 2 below are a guide for the authorized service technician. They cannot be ordered separately. Only the parts on the parts list on page 9 can be ordered.
2.See FIGURE 6. Washing the auto drain. To wash the auto drain, close the 1/2 ball Filter Valve on top of the drain. Pull the manual drain shaft handle to empty the water. Take apart the drain and the fixed screw. Clean the strainer from inside to out. Take apart the manual drain shaft and the seal end cap. Take off the float ball and valve seat. Clean each component and reassemble.
FIGURE 5
FIGURE 6
Strainer
Seal
Screw
Seal
Float Ball
Valve
Seal
Spring
Seal End Cap
Manual Drain
Shaft
REV 07/03; 02/05; 01/07
SKU 40211 | For technical questions, please call | Page 8 |