ASSEMBLY
Read the entire RULES FOR SAFE OPERATION section at the beginning of this manual including all text under subheadings therein before set up or use of this product.
To prevent serious injury
from accidental operation or electric shock: Before assembly, cleaning or adjustment, make sure OFF key is pressed and the cord is unplugged.
Note: For additional information regarding parts listed, refer to Assembly Dia- gram at back of manual.
28
41
30
29
33
34
Figure A
1.Using Screws (30) and Washers (31, 32), attach Lower Shaft (41) to Upper Cross Stand (33) and Lower Cross Stand (34). See Figure A, above.
2.Unthread and remove Height Adjust- ment Knob (28) from Lower Shaft. Slide Base Cover (29) down Shaft until it covers intersection of Upper and Lower Cross Stands.
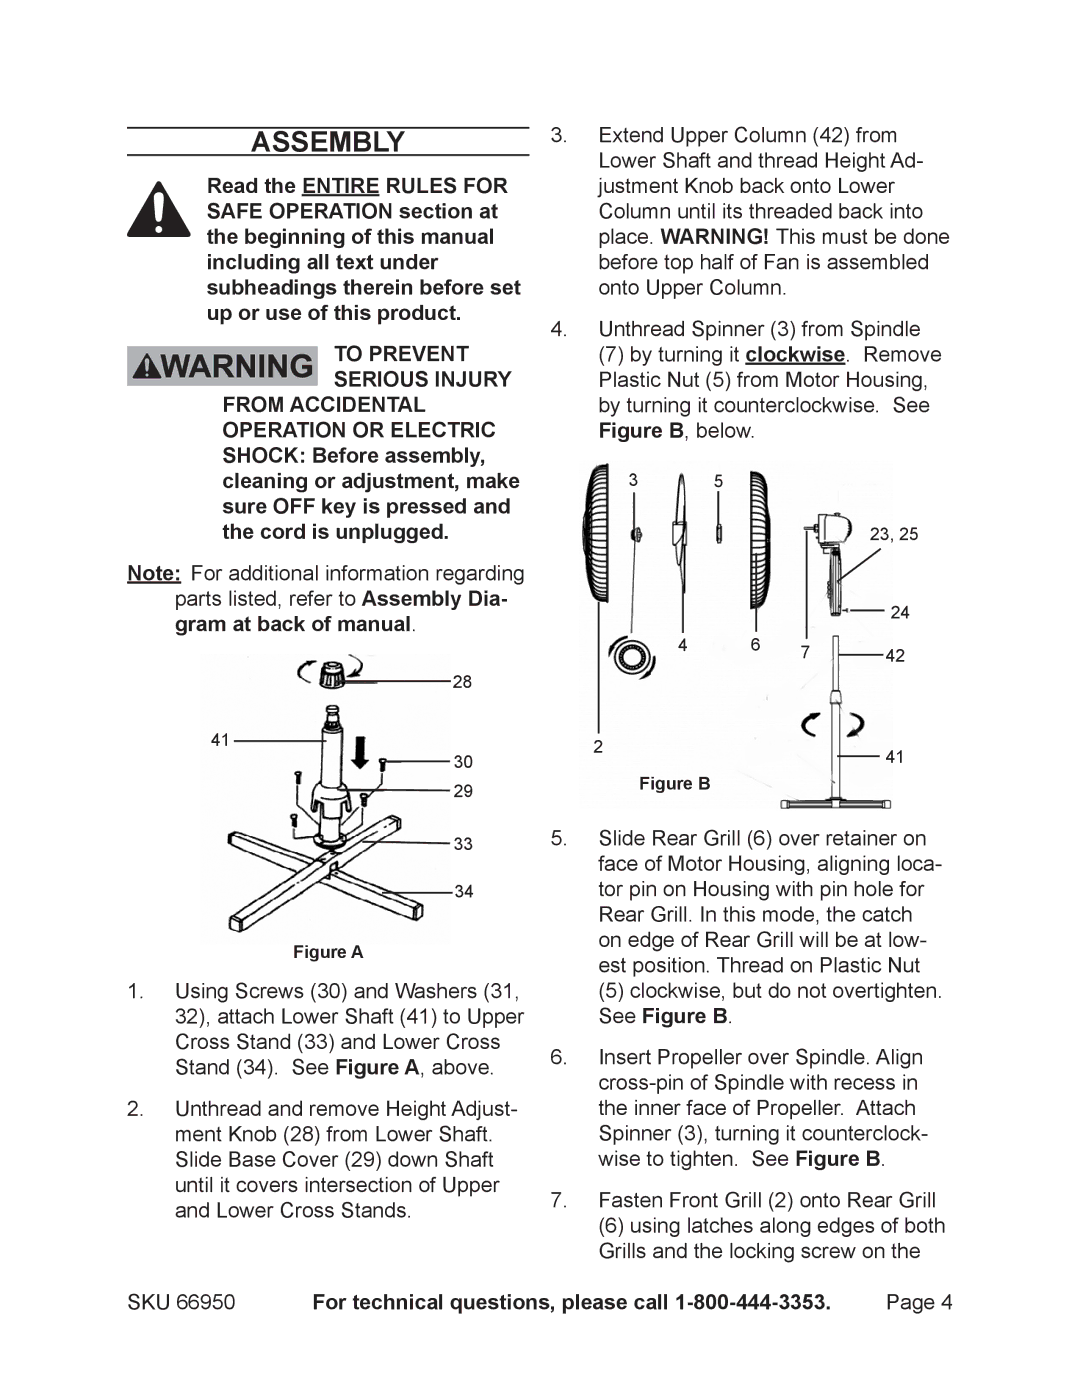
3.Extend Upper Column (42) from Lower Shaft and thread Height Ad- justment Knob back onto Lower Column until its threaded back into place. WARNING! This must be done before top half of Fan is assembled onto Upper Column.
4.Unthread Spinner (3) from Spindle
(7) by turning it clockwise. Remove Plastic Nut (5) from Motor Housing, by turning it counterclockwise. See Figure B, below.
3 5
|
|
|
|
|
| 23, 25 | |||
|
|
|
|
|
| ||||
|
|
|
|
|
| ||||
|
|
|
|
|
|
|
|
| 24 |
|
|
|
|
|
|
|
| ||
|
|
|
|
|
|
|
|
| |
|
|
|
|
|
|
| |||
|
|
|
|
|
|
|
|
|
|
4 | 6 |
|
|
|
|
|
| ||
7 |
|
| 42 | ||||||
|
|
|
|
|
| ||||
2 |
|
| 41 |
|
|
| |
| Figure B | ||
5.Slide Rear Grill (6) over retainer on face of Motor Housing, aligning loca- tor pin on Housing with pin hole for Rear Grill. In this mode, the catch on edge of Rear Grill will be at low- est position. Thread on Plastic Nut
(5)clockwise, but do not overtighten. See Figure B.
6.Insert Propeller over Spindle. Align
7.Fasten Front Grill (2) onto Rear Grill
(6)using latches along edges of both Grills and the locking screw on the
SKU 66950 | For technical questions, please call | Page 4 |
