2.WARNING! Do no lay flat panel TV face down; cover its surface with a towel or other soft material and tilt it against the wall or another solid surface.
3.WARNING! Some Flat Panel TVs are heavy; two people may be needed to lift and support the TV while it is being attached to the TV Bracket.
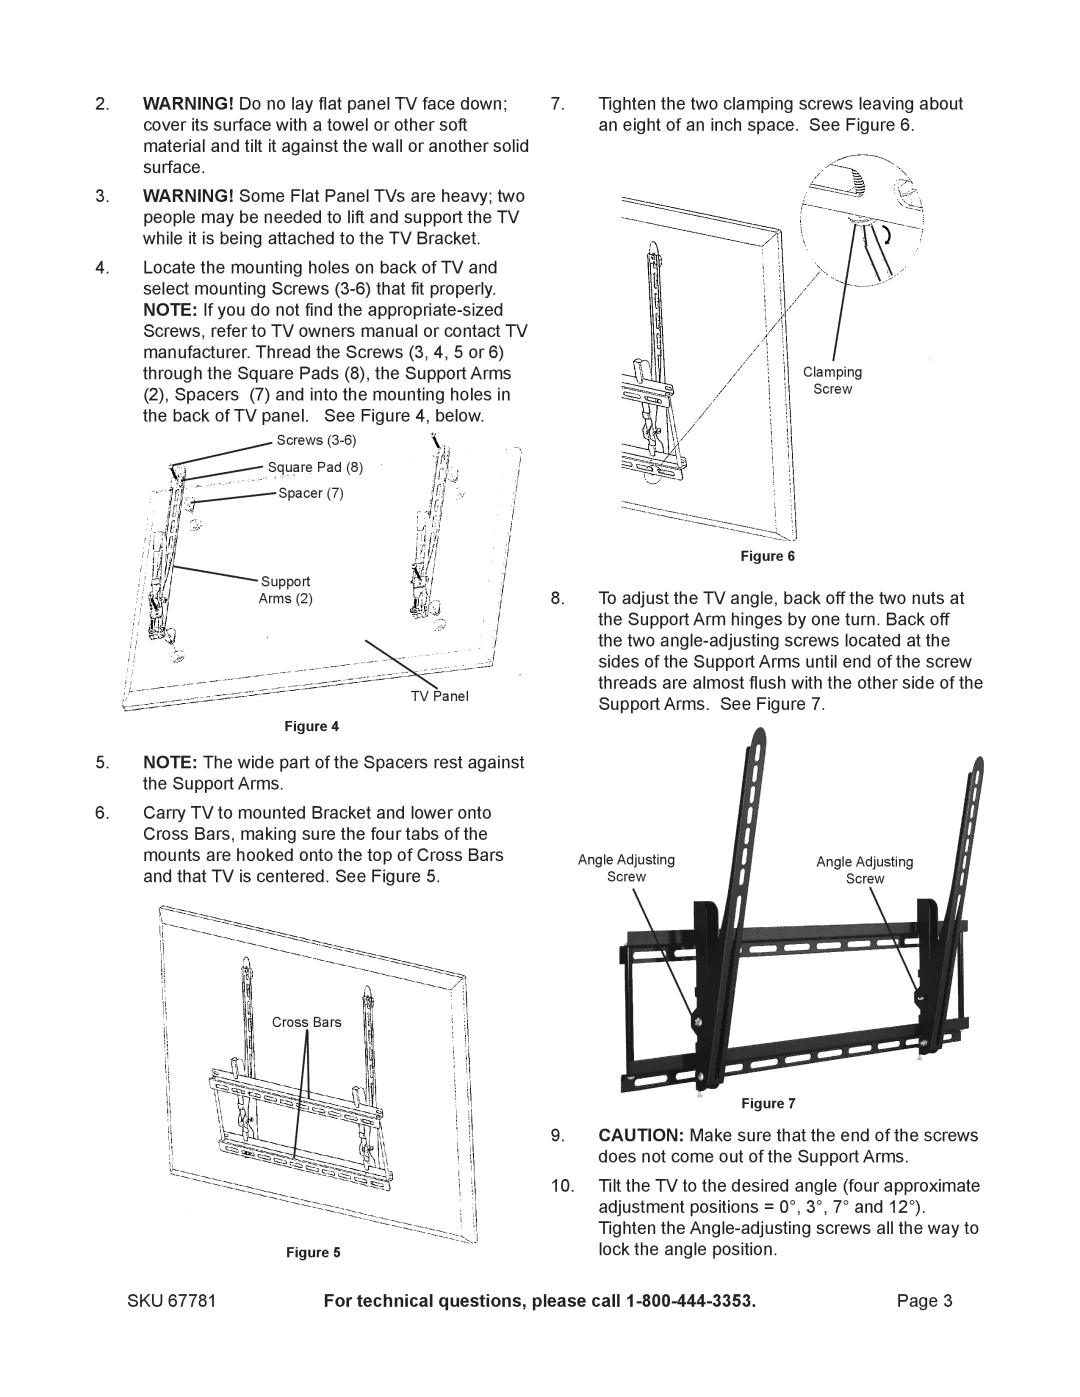
4.Locate the mounting holes on back of TV and select mounting Screws
Screws, refer to TV owners manual or contact TV manufacturer. Thread the Screws (3, 4, 5 or 6) through the Square Pads (8), the Support Arms (2), Spacers (7) and into the mounting holes in the back of TV panel. See Figure 4, below.
Screws (3-6)
Square Pad (8)
 Spacer (7)
 Support
Arms (2)
TV Panel
Figure 4
5.NOTE: The wide part of the Spacers rest against the Support Arms.
6.Carry TV to mounted Bracket and lower onto Cross Bars, making sure the four tabs of the mounts are hooked onto the top of Cross Bars and that TV is centered. See Figure 5.
Cross Bars
Figure 5
7.Tighten the two clamping screws leaving about an eight of an inch space. See Figure 6.
Clamping
Screw
Figure 6
8.To adjust the TV angle, back off the two nuts at the Support Arm hinges by one turn. Back off the two
Support Arms. See Figure 7.
Angle Adjusting | Angle Adjusting |
Screw | Screw |
Figure 7
9.CAUTION: Make sure that the end of the screws does not come out of the Support Arms.
10.Tilt the TV to the desired angle (four approximate adjustment positions = 0°, 3°, 7° and 12°). Tighten the
SKU 67781 | For technical questions, please call | Page 3 |
