
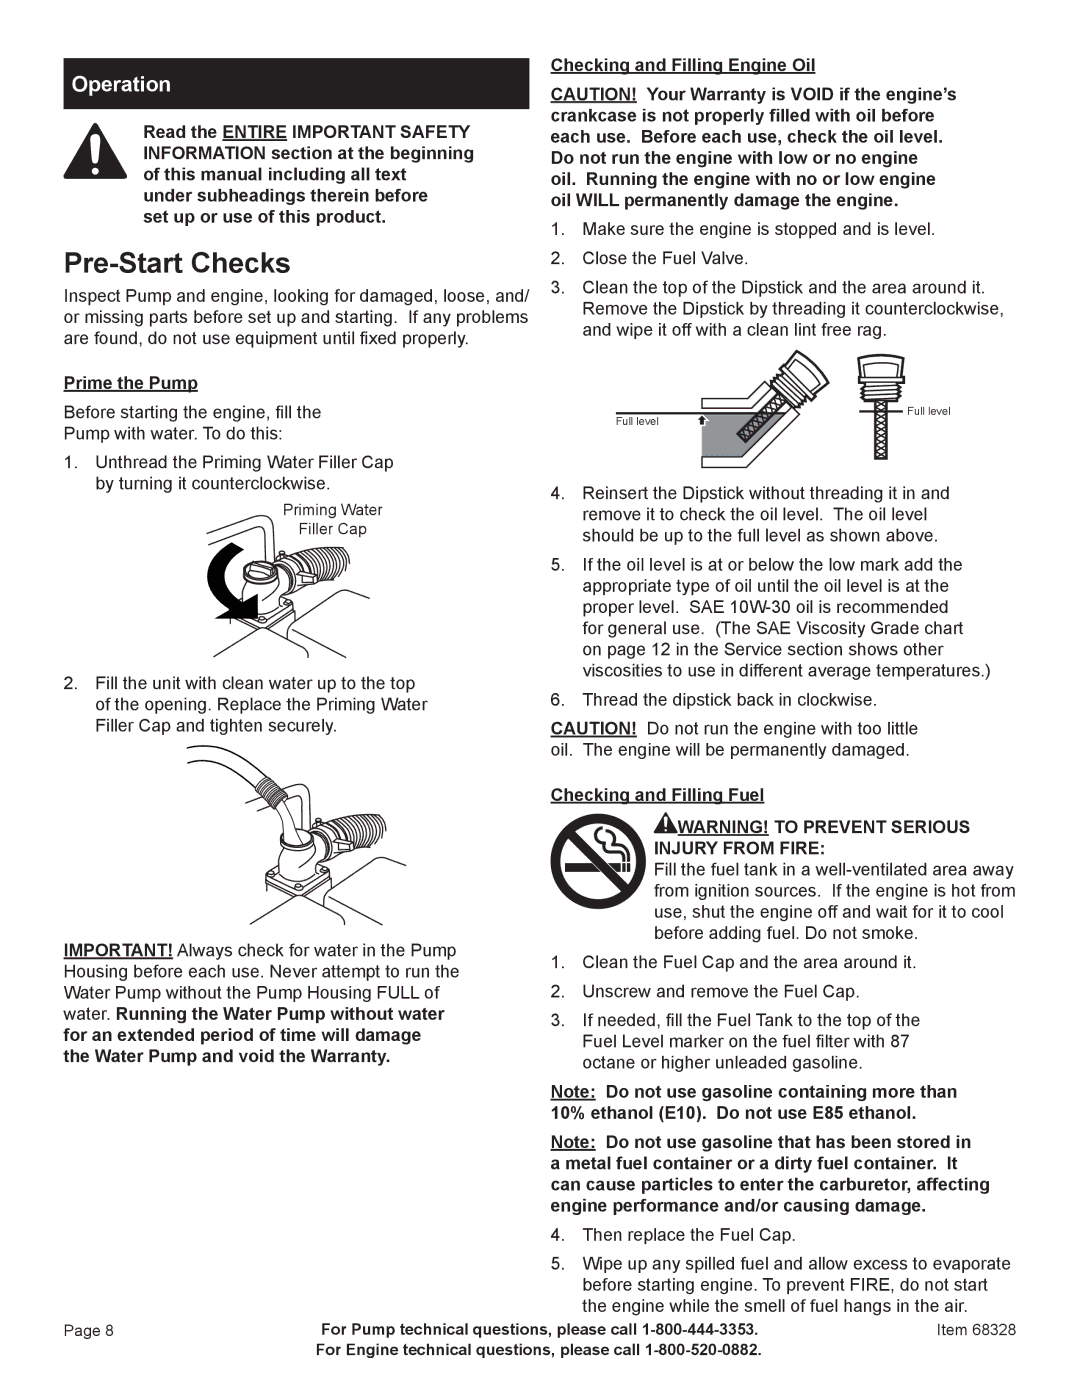
68328 specifications
Harbor Freight Tools has established itself as a reliable source for high-quality yet affordable tools and equipment, appealing to both casual DIY enthusiasts and professional tradespeople. One such product that has garnered attention is the Harbor Freight Tools 68328, a compact and efficient tool that embodies the spirit of innovation and practicality.The Harbor Freight Tools 68328 is primarily known for its portability and ease of use, making it an ideal option for those who require a dependable tool on the go. This model stands out with its robust structural design and lightweight framework, allowing users to handle it effortlessly without compromising on performance. Its size makes it suitable for tight spaces, enabling access to areas that might be challenging for larger tools.
One of the standout features of the Harbor Freight 68328 is its advanced motor technology, which delivers consistent power and torque. This capability ensures that users can tackle a variety of tasks, from basic home repairs to more complex projects, more efficiently. Additionally, the tool is designed with user comfort in mind. The ergonomic handle provides a secure grip, reducing the risk of slippage and fatigue during extended use.
The 68328 also showcases an impressive array of functionalities that cater to different working conditions. With multiple speed settings, users can adjust the tool's performance based on the specific demands of their project. This versatility is especially beneficial when transitioning between different materials or tasks, optimizing efficiency and effectiveness.
Durability is another hallmark of the Harbor Freight 68328. Constructed from high-quality materials, it is built to withstand rigorous use while maintaining its functionality over time. This durability is complemented by a user-friendly maintenance design, which allows for easy servicing and upkeep, ensuring long-term reliability.
Moreover, safety features such as automatic shut-off and overload protection add an extra layer of reassurance for users, allowing them to focus on their work without constant concern for potential hazards.
In summary, the Harbor Freight Tools 68328 is a standout product that combines portability, efficiency, and durability, making it a valuable addition to any toolbox. Its advanced motor technology, versatile features, and thoughtful design principles work in concert to provide users with a reliable and effective tool tailored to meet a wide range of needs. Whether for professional use or home improvement projects, the 68328 serves as a testament to Harbor Freight’s commitment to quality and affordability in the tool industry.