Operation
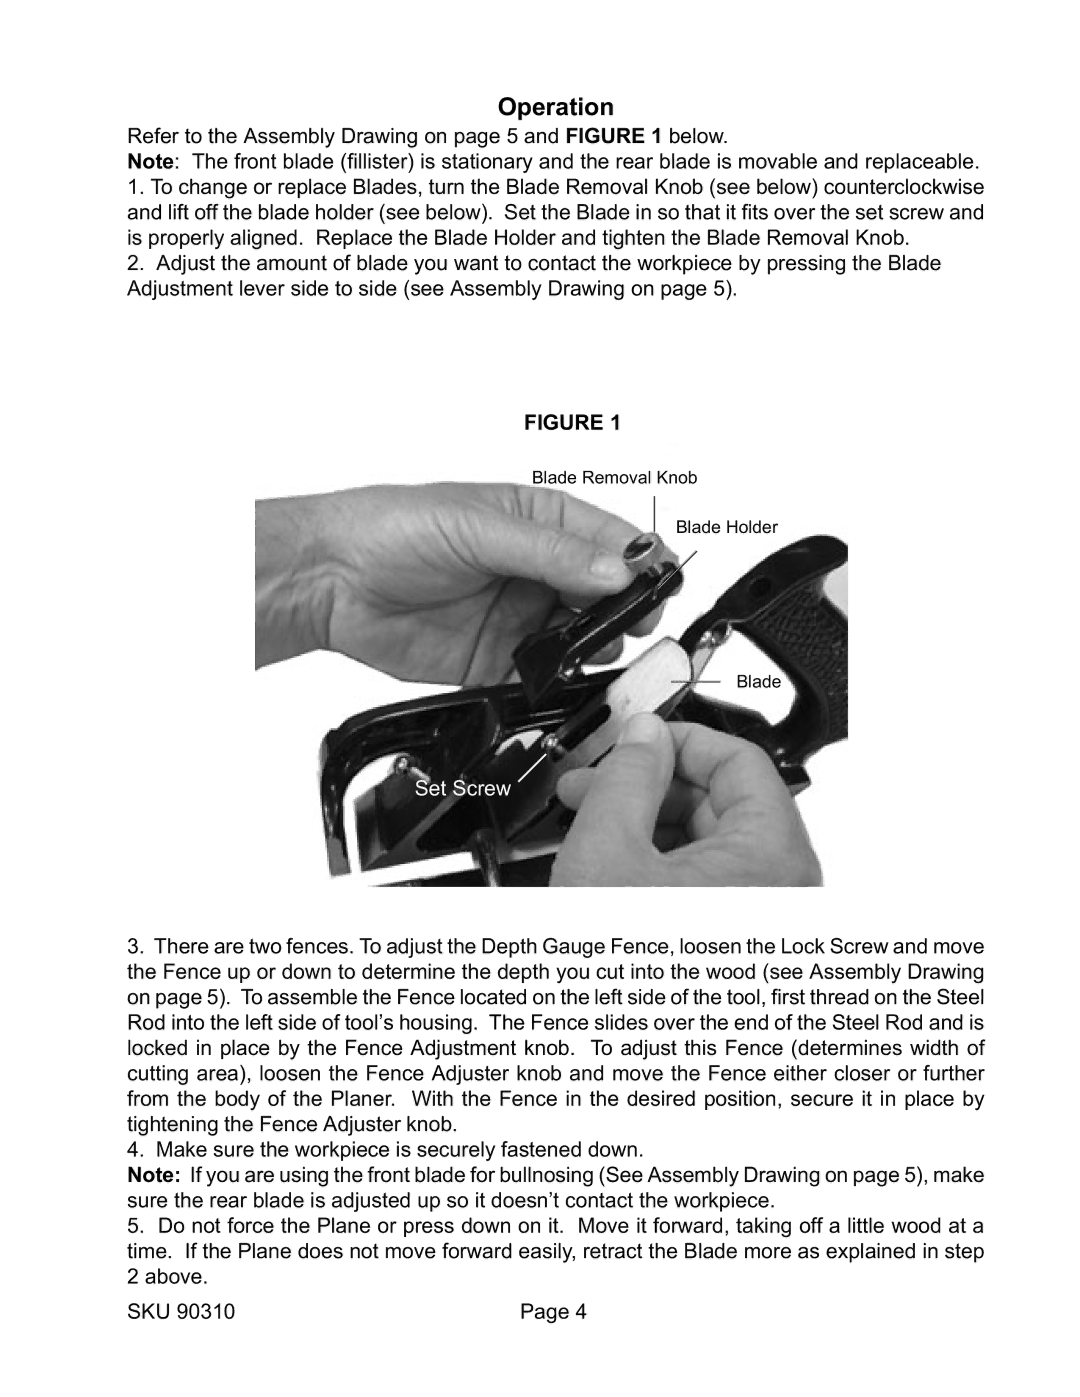
Refer to the Assembly Drawing on page 5 and FIGURE 1 below.
Note: The front blade (fillister) is stationary and the rear blade is movable and replaceable.
1.To change or replace Blades, turn the Blade Removal Knob (see below) counterclockwise and lift off the blade holder (see below). Set the Blade in so that it fits over the set screw and is properly aligned. Replace the Blade Holder and tighten the Blade Removal Knob.
2.Adjust the amount of blade you want to contact the workpiece by pressing the Blade Adjustment lever side to side (see Assembly Drawing on page 5).
FIGURE 1
Blade Removal Knob
Blade Holder
Blade
Set Screw
3.There are two fences. To adjust the Depth Gauge Fence, loosen the Lock Screw and move the Fence up or down to determine the depth you cut into the wood (see Assembly Drawing on page 5). To assemble the Fence located on the left side of the tool, first thread on the Steel Rod into the left side of tool’s housing. The Fence slides over the end of the Steel Rod and is locked in place by the Fence Adjustment knob. To adjust this Fence (determines width of cutting area), loosen the Fence Adjuster knob and move the Fence either closer or further from the body of the Planer. With the Fence in the desired position, secure it in place by tightening the Fence Adjuster knob.
4.Make sure the workpiece is securely fastened down.
Note: If you are using the front blade for bullnosing (See Assembly Drawing on page 5), make sure the rear blade is adjusted up so it doesn’t contact the workpiece.
5.Do not force the Plane or press down on it. Move it forward, taking off a little wood at a time. If the Plane does not move forward easily, retract the Blade more as explained in step 2 above.
SKU 90310 | Page 4 |
