
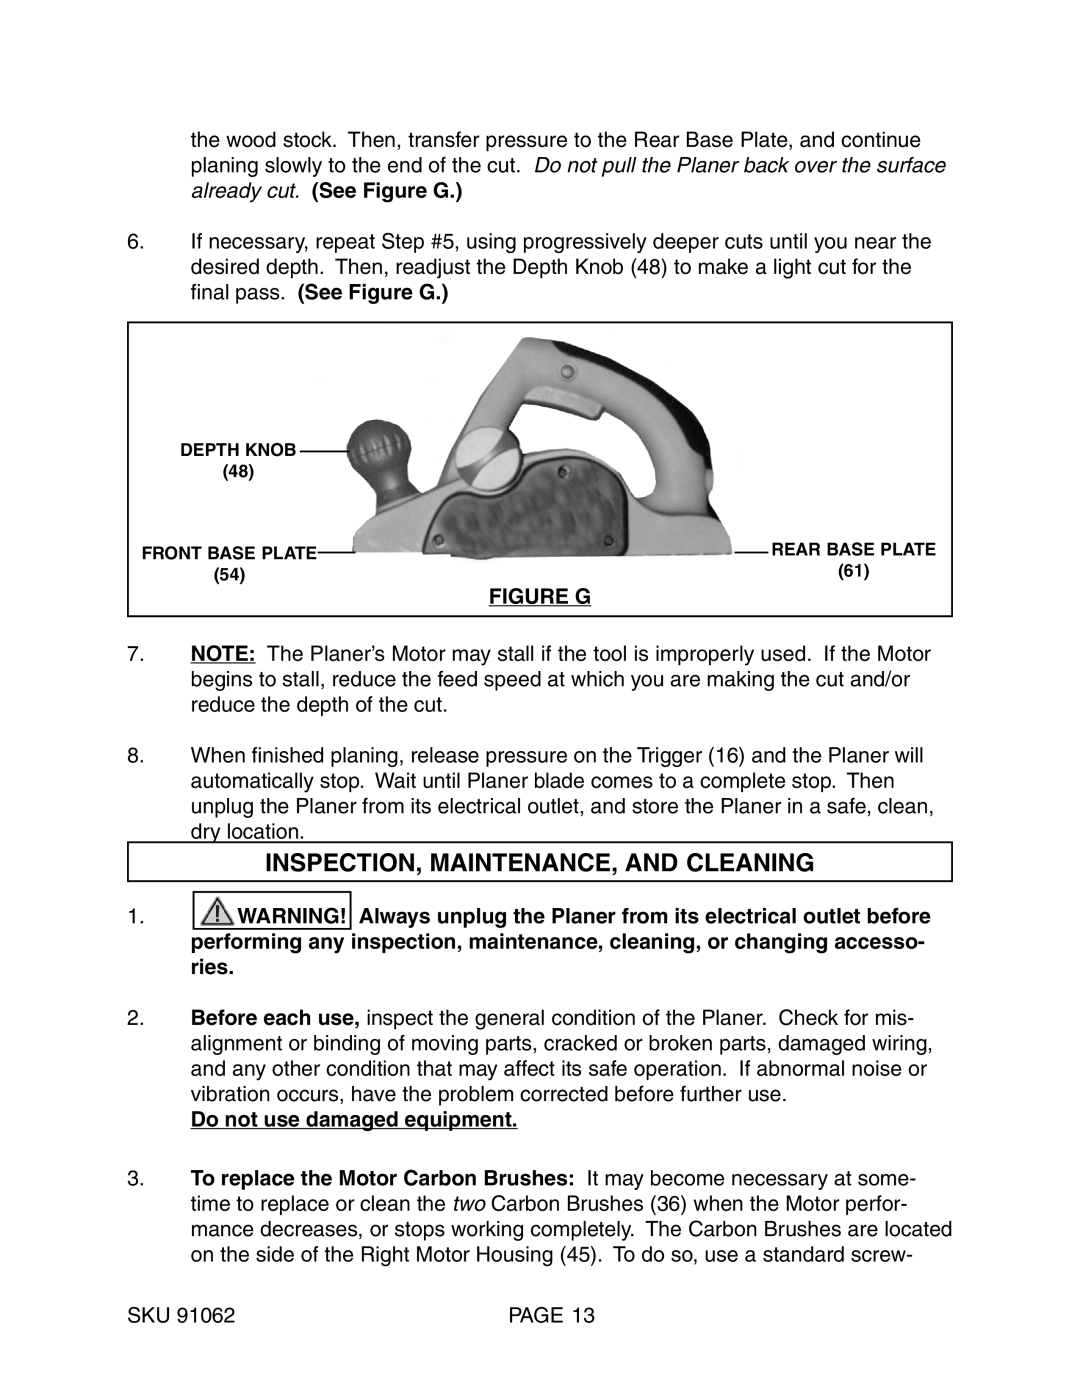
91062 specifications
Harbor Freight Tools is a well-known name in the world of industrial and DIY equipment, and among its impressive array of products, the 91062 model stands out for its robustness and efficiency. The Harbor Freight 91062 is a versatile portable tool chest that is designed to cater to both professional tradespeople and home enthusiasts who need reliable storage solutions for their tools and equipment.One of the main features of the Harbor Freight 91062 is its durable construction. Made from heavy-duty steel, this tool chest ensures longevity and resistance to wear and tear, making it suitable for various working environments. The powder-coated finish adds an extra layer of protection against rust and corrosion, ensuring that the tool chest maintains its aesthetic appeal and structural integrity over time.
Another significant characteristic of the 91062 is its organized storage system. Equipped with multiple drawers, this tool chest offers ample space for a wide range of tools, from hand tools to power tools. Each drawer is designed with ball-bearing slides, allowing for smooth and easy access. The chest also has a top compartment ideal for storing frequently used items, ensuring they are readily accessible when you need them.
Mobility is also a key feature of the Harbor Freight 91062. It comes with caster wheels that allow for easy movement across various surfaces, making it convenient to transport tools around your workspace or garage. The built-in handle adds to the ease of mobility, enabling users to push or pull the tool chest with minimal effort.
Safety is paramount when it comes to tool storage, and the 91062 has features that address this concern. Each drawer is equipped with a locking mechanism, providing security for your valuable tools. This feature is especially valuable in shared workspaces or homes with children, as it helps prevent unauthorized access.
In terms of technology, the Harbor Freight 91062 incorporates modern design principles that assist in maximizing storage potential while maintaining a compact form factor. Its sleek lines and intuitive organization layout help users efficiently store and retrieve tools without clutter.
In summary, the Harbor Freight Tools 91062 is a highly functional tool chest characterized by its durability, organized storage system, mobility, and safety features. It represents an excellent investment for anyone looking to keep their tools in order and readily available.