Maintenance
1.Always turn off the power and disconnect the unit when not in use.
2.Wipe all of the components to remove any moisture after each use.
3.Make sure the terminal contacts on the Battery (4) are clean and free of corrosion.
4.After six hours of use, charge the Battery (4) following the directions below.
5.Keep the Camera (1) lens clear of dirt or debris.
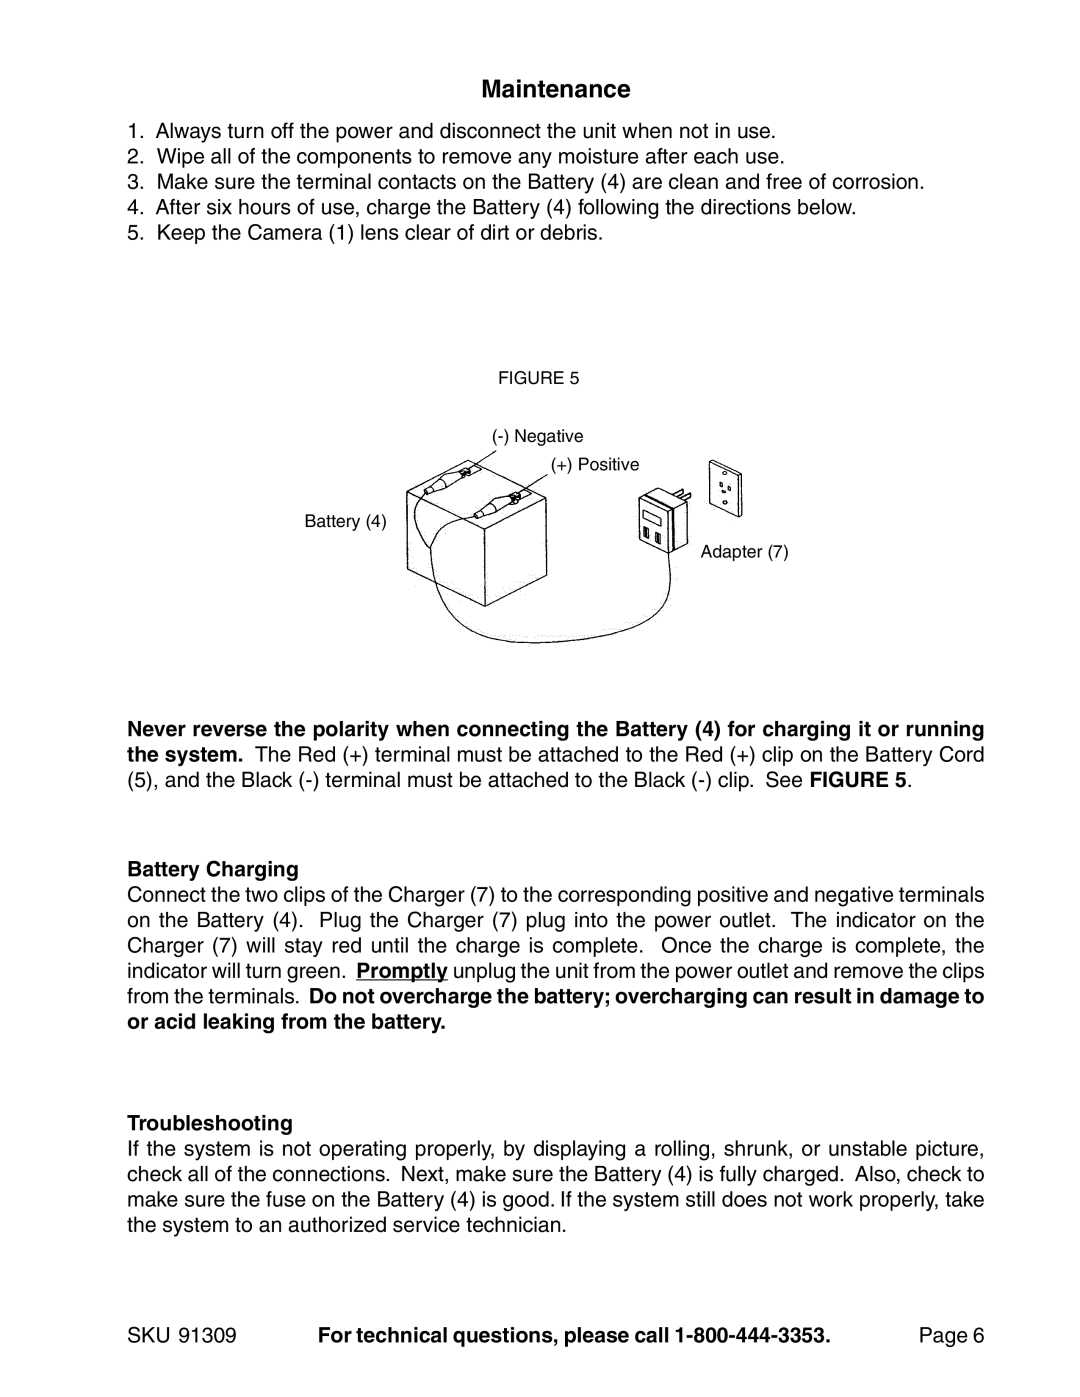
FIGURE 5
(+) Positive
Battery (4)
Adapter (7)
Never reverse the polarity when connecting the Battery (4) for charging it or running the system. The Red (+) terminal must be attached to the Red (+) clip on the Battery Cord (5), and the Black
Battery Charging
Connect the two clips of the Charger (7) to the corresponding positive and negative terminals on the Battery (4). Plug the Charger (7) plug into the power outlet. The indicator on the Charger (7) will stay red until the charge is complete. Once the charge is complete, the indicator will turn green. Promptly unplug the unit from the power outlet and remove the clips from the terminals. Do not overcharge the battery; overcharging can result in damage to or acid leaking from the battery.
Troubleshooting
If the system is not operating properly, by displaying a rolling, shrunk, or unstable picture, check all of the connections. Next, make sure the Battery (4) is fully charged. Also, check to make sure the fuse on the Battery (4) is good. If the system still does not work properly, take the system to an authorized service technician.
SKU 91309 | For technical questions, please call | Page 6 |
