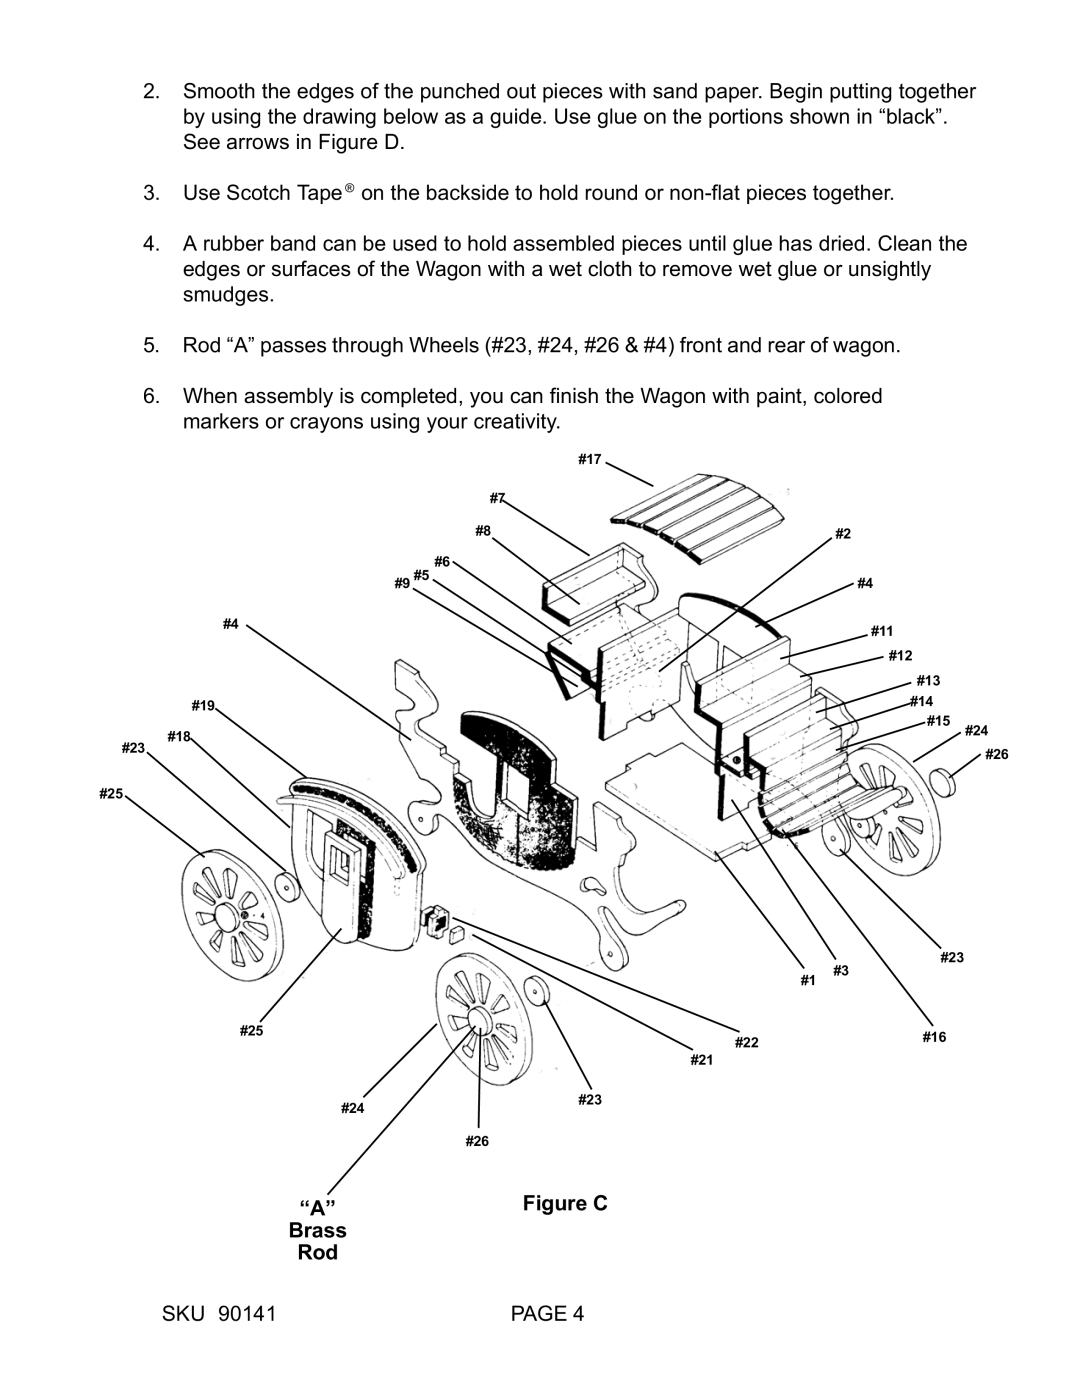
2.Smooth the edges of the punched out pieces with sand paper. Begin putting together by using the drawing below as a guide. Use glue on the portions shown in “black”. See arrows in Figure D.
3.Use Scotch Tape® on the backside to hold round or
4.A rubber band can be used to hold assembled pieces until glue has dried. Clean the edges or surfaces of the Wagon with a wet cloth to remove wet glue or unsightly smudges.
5.Rod “A” passes through Wheels (#23, #24, #26 & #4) front and rear of wagon.
6.When assembly is completed, you can finish the Wagon with paint, colored markers or crayons using your creativity.
#23
#25
| #17 |
|
#7 |
|
|
#8 | #2 |
|
#6 |
|
|
#9 #5 | #4 |
|
#4 | #11 |
|
|
| |
| #12 |
|
| #13 |
|
#19 | #14 |
|
|
| |
#18 | #15 | #24 |
|
|
#26
#23
| #1 | #3 |
#25 | #22 | #16 |
| ||
|
| |
| #21 |
|
#24 | #23 |
|
|
|
#26
“A” | Figure C |
| |
Brass |
|
Rod |
|
SKU 90141 | PAGE 4 |