Assembly
To assist in assembly, refer to the photo on the previous page and the Assembly Drawing at the end of this manual. When inserting screws, be careful that they thread correctly so they do not strip threads.
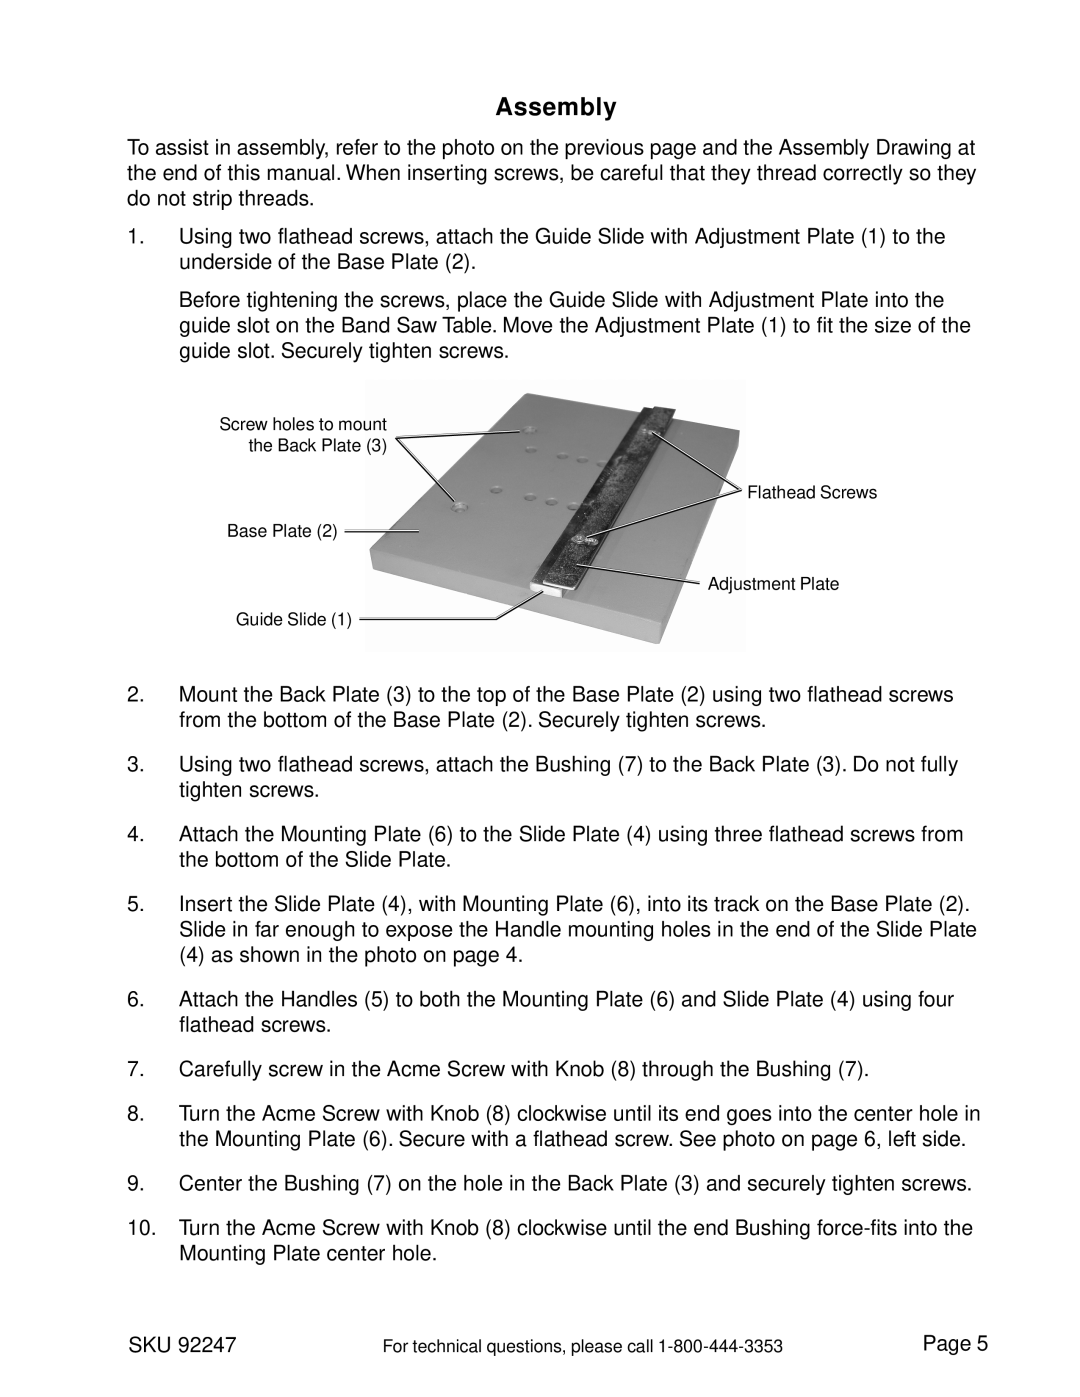
1.Using two flathead screws, attach the Guide Slide with Adjustment Plate (1) to the underside of the Base Plate (2).
Before tightening the screws, place the Guide Slide with Adjustment Plate into the guide slot on the Band Saw Table. Move the Adjustment Plate (1) to fit the size of the guide slot. Securely tighten screws.
Screw holes to mount the Back Plate (3)
Flathead Screws
Base Plate (2)
![]() Adjustment Plate
Adjustment Plate
Guide Slide (1)
2.Mount the Back Plate (3) to the top of the Base Plate (2) using two flathead screws from the bottom of the Base Plate (2). Securely tighten screws.
3.Using two flathead screws, attach the Bushing (7) to the Back Plate (3). Do not fully tighten screws.
4.Attach the Mounting Plate (6) to the Slide Plate (4) using three flathead screws from the bottom of the Slide Plate.
5.Insert the Slide Plate (4), with Mounting Plate (6), into its track on the Base Plate (2). Slide in far enough to expose the Handle mounting holes in the end of the Slide Plate
(4) as shown in the photo on page 4.
6.Attach the Handles (5) to both the Mounting Plate (6) and Slide Plate (4) using four flathead screws.
7.Carefully screw in the Acme Screw with Knob (8) through the Bushing (7).
8.Turn the Acme Screw with Knob (8) clockwise until its end goes into the center hole in the Mounting Plate (6). Secure with a flathead screw. See photo on page 6, left side.
9.Center the Bushing (7) on the hole in the Back Plate (3) and securely tighten screws.
10.Turn the Acme Screw with Knob (8) clockwise until the end Bushing
SKU 92247 | For technical questions, please call | Page 5 |