OPERATING INSTRUCTIONS
Note: For additional information regarding the parts listed in the following pages, refer to the Assembly Diagram on page 11.
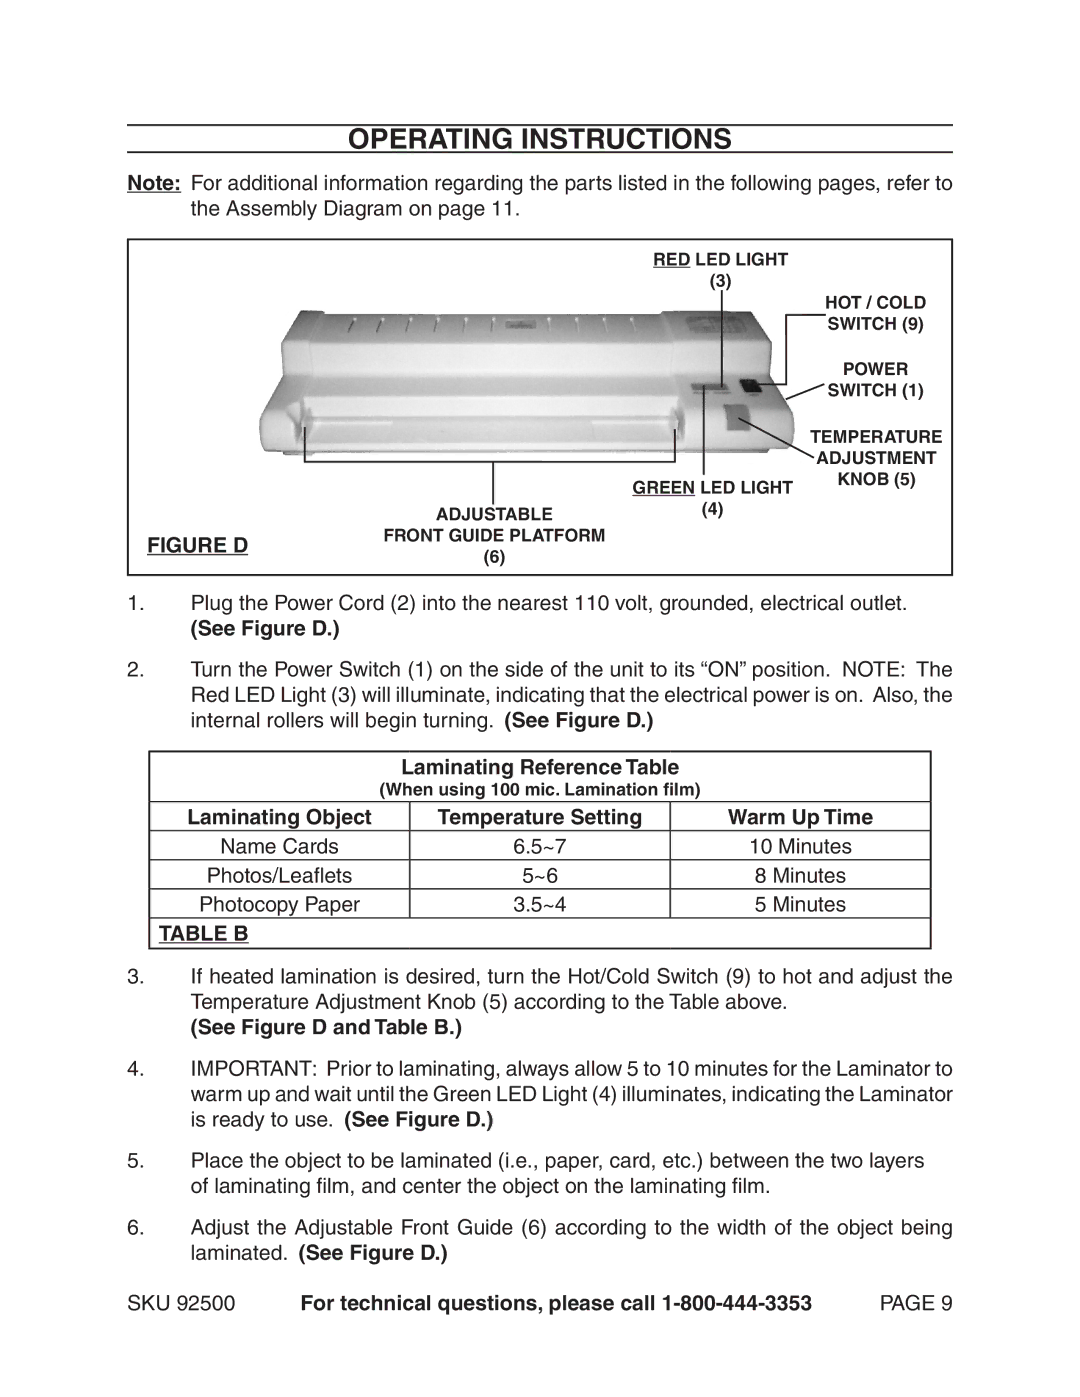
RED LED LIGHT
(3)
HOT / COLD
SWITCH (9)
POWER
![]() SWITCH (1)
SWITCH (1)
GREEN LED LIGHT
ADJUSTABLE(4)
FIGURE DFRONT GUIDE PLATFORM
(6)
TEMPERATURE ADJUSTMENT KNOB (5)
1.Plug the Power Cord (2) into the nearest 110 volt, grounded, electrical outlet.
(See Figure D.)
2.Turn the Power Switch (1) on the side of the unit to its “ON” position. NOTE: The Red LED Light (3) will illuminate, indicating that the electrical power is on. Also, the internal rollers will begin turning. (See Figure D.)
Laminating Reference Table
(When using 100 mic. Lamination film)
Laminating Object | Temperature Setting | Warm Up Time |
Name Cards | 6.5~7 | 10 Minutes |
Photos/Leaflets | 5~6 | 8 Minutes |
Photocopy Paper | 3.5~4 | 5 Minutes |
TABLE B
3.If heated lamination is desired, turn the Hot/Cold Switch (9) to hot and adjust the Temperature Adjustment Knob (5) according to the Table above.
(See Figure D and Table B.)
4.IMPORTANT: Prior to laminating, always allow 5 to 10 minutes for the Laminator to warm up and wait until the Green LED Light (4) illuminates, indicating the Laminator is ready to use. (See Figure D.)
5.Place the object to be laminated (i.e., paper, card, etc.) between the two layers of laminating film, and center the object on the laminating film.
6.Adjust the Adjustable Front Guide (6) according to the width of the object being laminated. (See Figure D.)
SKU 92500 | For technical questions, please call | PAGE 9 |