Operation (continued)
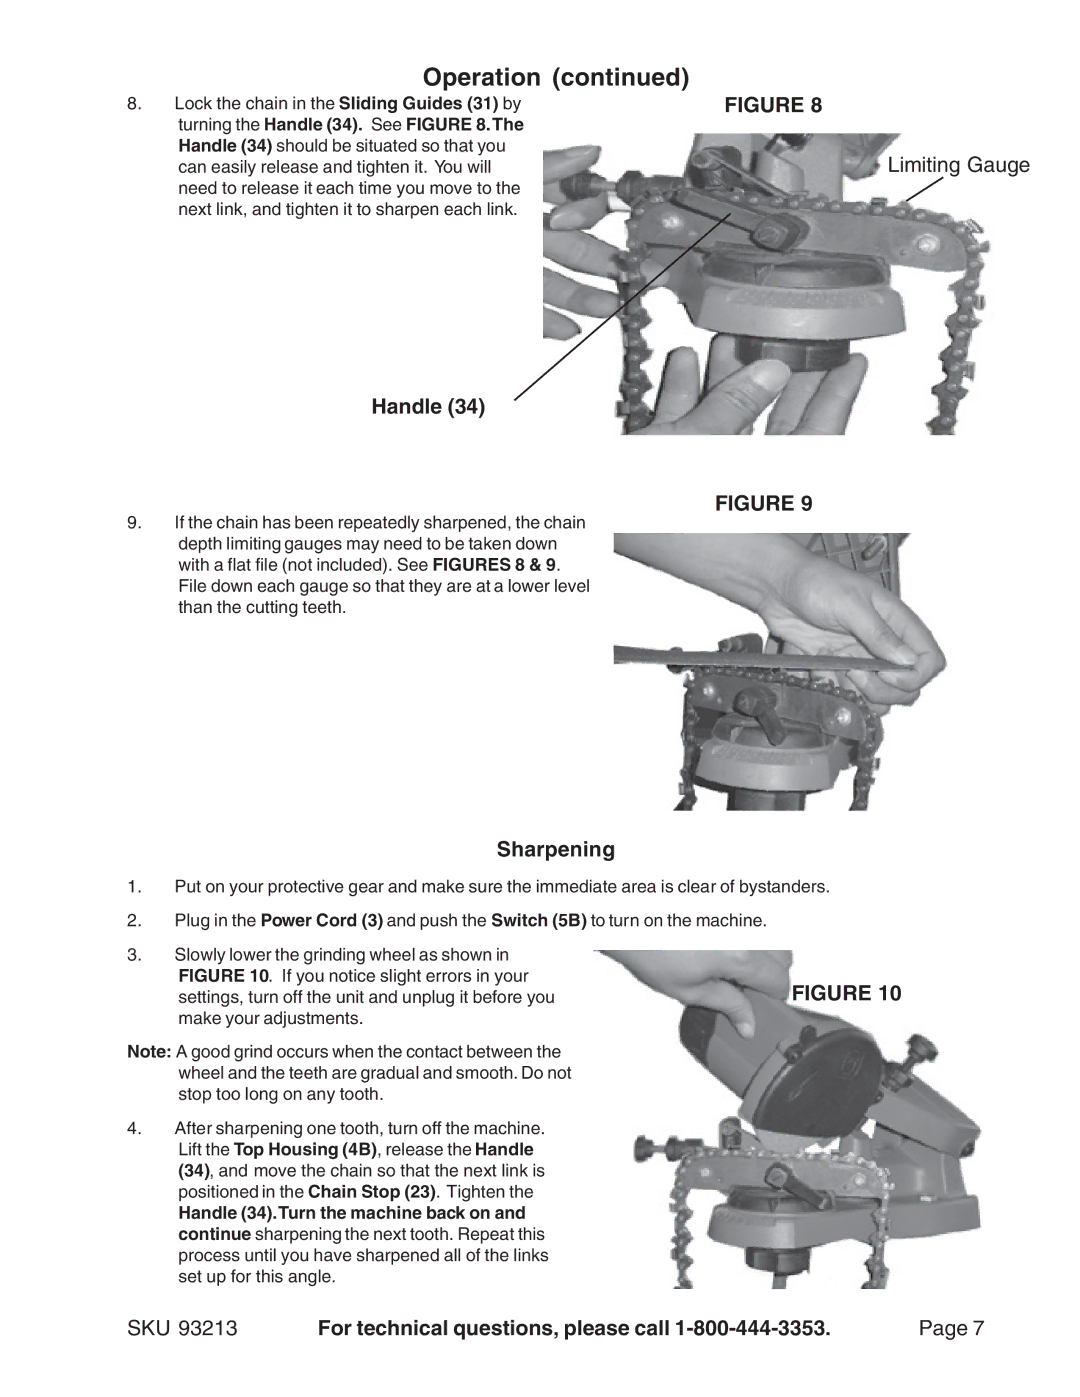
8. Lock the chain in the Sliding Guides (31) byFIGURE 8 turning the Handle (34). See FIGURE 8.The
Handle (34) should be situated so that you can easily release and tighten it. You will need to release it each time you move to the next link, and tighten it to sharpen each link.
Handle (34)
FIGURE 9
9.If the chain has been repeatedly sharpened, the chain depth limiting gauges may need to be taken down with a flat file (not included). See FIGURES 8 & 9. File down each gauge so that they are at a lower level than the cutting teeth.
Sharpening
1.Put on your protective gear and make sure the immediate area is clear of bystanders.
2.Plug in the Power Cord (3) and push the Switch (5B) to turn on the machine.
3.Slowly lower the grinding wheel as shown in
FIGURE 10. If you notice slight errors in your settings, turn off the unit and unplug it before you make your adjustments.
Note: A good grind occurs when the contact between the wheel and the teeth are gradual and smooth. Do not stop too long on any tooth.
4.After sharpening one tooth, turn off the machine. Lift the Top Housing (4B), release the Handle (34), and move the chain so that the next link is positioned in the Chain Stop (23). Tighten the
Handle (34).Turn the machine back on and continue sharpening the next tooth. Repeat this process until you have sharpened all of the links set up for this angle.
Limiting Gauge
SKU 93213 | For technical questions, please call | Page 7 |
