4.Connect the other end of the air hose to the air compressor system.
(See Figure A, page 4.)
5.Turn on the air compressor, and set its regulator to 90 PSI. Do not exceed 90 PSI.
6.Grip the Air Sander firmly with both hands.
7.Select an area on the workpiece to be sanded.
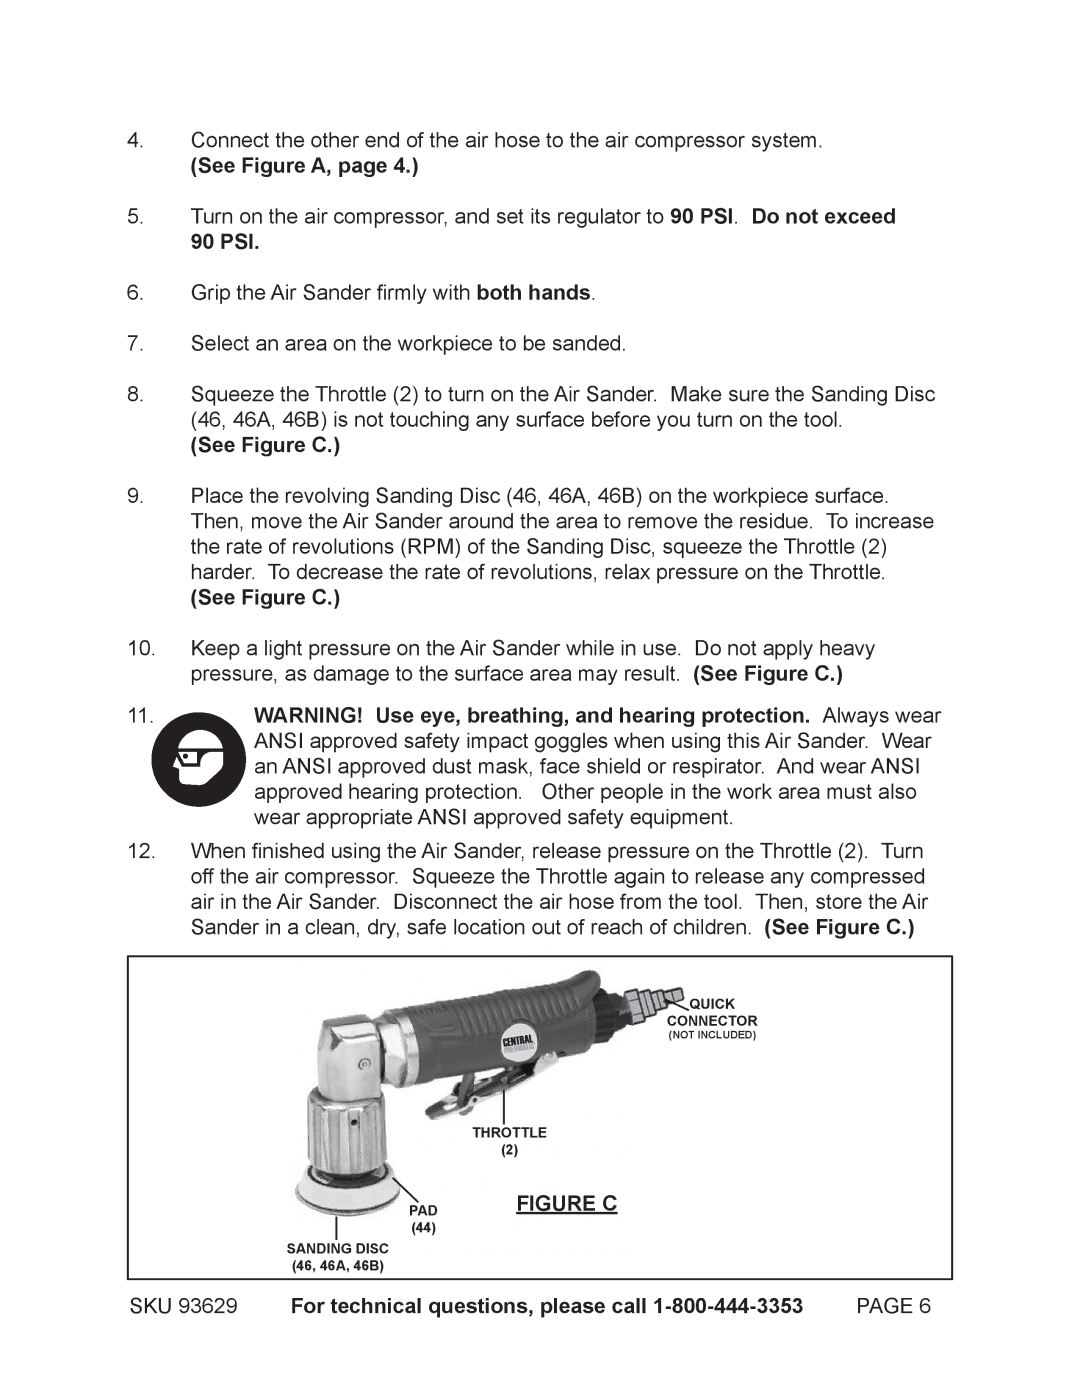
8.Squeeze the Throttle (2) to turn on the Air Sander. Make sure the Sanding Disc (46, 46A, 46B) is not touching any surface before you turn on the tool.
(See Figure C.)
9.Place the revolving Sanding Disc (46, 46A, 46B) on the workpiece surface. Then, move the Air Sander around the area to remove the residue. To increase the rate of revolutions (RPM) of the Sanding Disc, squeeze the Throttle (2) harder. To decrease the rate of revolutions, relax pressure on the Throttle.
(See Figure C.)
10.Keep a light pressure on the Air Sander while in use. Do not apply heavy pressure, as damage to the surface area may result. (See Figure C.)
11.WARNING! Use eye, breathing, and hearing protection. Always wear ANSI approved safety impact goggles when using this Air Sander. Wear an ANSI approved dust mask, face shield or respirator. And wear ANSI approved hearing protection. Other people in the work area must also wear appropriate ANSI approved safety equipment.
12.When finished using the Air Sander, release pressure on the Throttle (2). Turn off the air compressor. Squeeze the Throttle again to release any compressed air in the Air Sander. Disconnect the air hose from the tool. Then, store the Air Sander in a clean, dry, safe location out of reach of children. (See Figure C.)
![]() QUICK
QUICK
CONNECTOR
(NOT INCLUDED)
THROTTLE
(2)
PAD
(44)
FIGURE C
SANDING DISC (46, 46A, 46B)
SKU 93629 For technical questions, please call