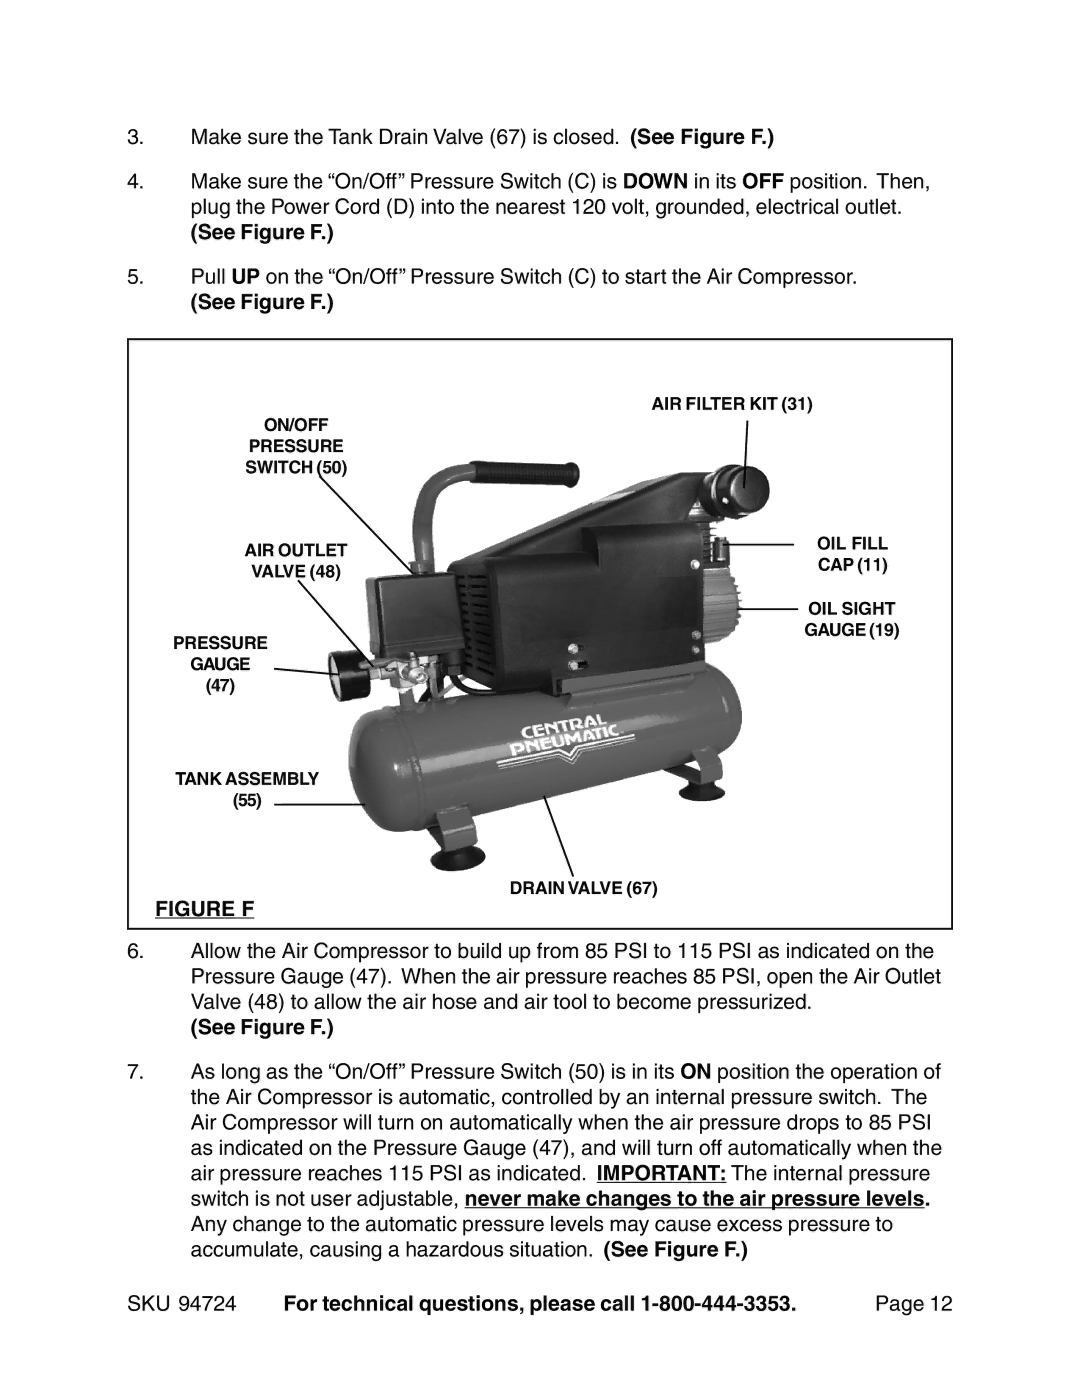
3.Make sure the Tank Drain Valve (67) is closed. (See Figure F.)
4.Make sure the “On/Off” Pressure Switch (C) is DOWN in its OFF position. Then, plug the Power Cord (D) into the nearest 120 volt, grounded, electrical outlet.
(See Figure F.)
5.Pull UP on the “On/Off” Pressure Switch (C) to start the Air Compressor.
(See Figure F.)
|
| AIR FILTER KIT (31) | ||||
ON/OFF |
|
|
|
|
| |
PRESSURE |
|
|
|
|
| |
SWITCH (50) |
|
|
|
|
| |
AIR OUTLET |
|
|
|
| OIL FILL | |
|
|
| ||||
|
|
|
| CAP (11) | ||
VALVE (48) |
|
|
|
| ||
|
|
|
|
| ||
|
|
|
|
|
| OIL SIGHT |
|
|
|
|
|
| |
PRESSURE |
|
|
|
| GAUGE (19) | |
|
|
|
|
| ||
GAUGE |
|
|
|
|
| |
(47) |
|
|
|
|
|
|
TANK ASSEMBLY |
|
|
|
|
| |
(55) |
|
|
|
|
|
|
|
|
|
|
|
| |
DRAIN VALVE (67)
FIGURE F
6.Allow the Air Compressor to build up from 85 PSI to 115 PSI as indicated on the Pressure Gauge (47). When the air pressure reaches 85 PSI, open the Air Outlet Valve (48) to allow the air hose and air tool to become pressurized.
(See Figure F.)
7.As long as the “On/Off” Pressure Switch (50) is in its ON position the operation of the Air Compressor is automatic, controlled by an internal pressure switch. The Air Compressor will turn on automatically when the air pressure drops to 85 PSI as indicated on the Pressure Gauge (47), and will turn off automatically when the air pressure reaches 115 PSI as indicated. IMPORTANT: The internal pressure switch is not user adjustable, never make changes to the air pressure levels. Any change to the automatic pressure levels may cause excess pressure to accumulate, causing a hazardous situation. (See Figure F.)
SKU 94724 | For technical questions, please call | Page 12 |