System Setup
Audio Settings | Video Settings | Video Adjustment |
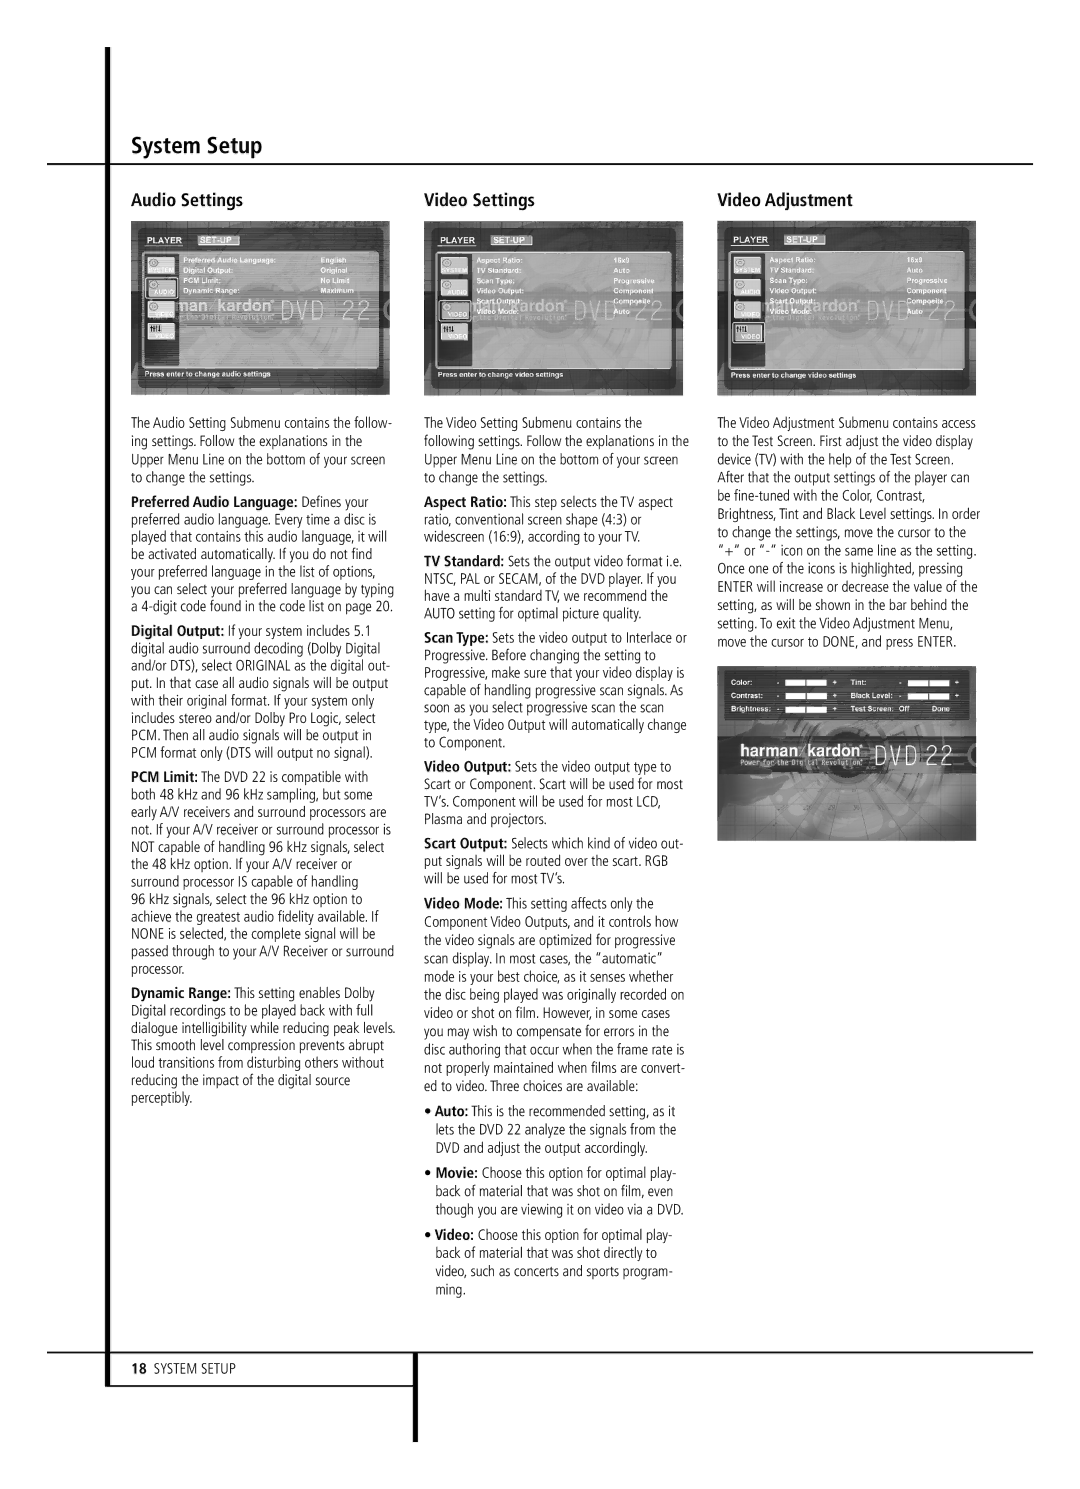
The Audio Setting Submenu contains the follow- ing settings. Follow the explanations in the Upper Menu Line on the bottom of your screen to change the settings.
Preferred Audio Language: Defines your preferred audio language. Every time a disc is played that contains this audio language, it will be activated automatically. If you do not find your preferred language in the list of options, you can select your preferred language by typing a
Digital Output: If your system includes 5.1 digital audio surround decoding (Dolby Digital and/or DTS), select ORIGINAL as the digital out- put. In that case all audio signals will be output with their original format. If your system only includes stereo and/or Dolby Pro Logic, select PCM. Then all audio signals will be output in PCM format only (DTS will output no signal).
PCM Limit: The DVD 22 is compatible with both 48 kHz and 96 kHz sampling, but some early A/V receivers and surround processors are not. If your A/V receiver or surround processor is NOT capable of handling 96 kHz signals, select the 48 kHz option. If your A/V receiver or surround processor IS capable of handling
96 kHz signals, select the 96 kHz option to achieve the greatest audio fidelity available. If NONE is selected, the complete signal will be passed through to your A/V Receiver or surround processor.
Dynamic Range: This setting enables Dolby Digital recordings to be played back with full dialogue intelligibility while reducing peak levels. This smooth level compression prevents abrupt loud transitions from disturbing others without reducing the impact of the digital source perceptibly.
The Video Setting Submenu contains the following settings. Follow the explanations in the Upper Menu Line on the bottom of your screen to change the settings.
Aspect Ratio: This step selects the TV aspect ratio, conventional screen shape (4:3) or widescreen (16:9), according to your TV.
TV Standard: Sets the output video format i.e. NTSC, PAL or SECAM, of the DVD player. If you have a multi standard TV, we recommend the AUTO setting for optimal picture quality.
Scan Type: Sets the video output to Interlace or Progressive. Before changing the setting to Progressive, make sure that your video display is capable of handling progressive scan signals. As soon as you select progressive scan the scan type, the Video Output will automatically change to Component.
Video Output: Sets the video output type to Scart or Component. Scart will be used for most TV’s. Component will be used for most LCD, Plasma and projectors.
Scart Output: Selects which kind of video out- put signals will be routed over the scart. RGB will be used for most TV’s.
Video Mode: This setting affects only the Component Video Outputs, and it controls how the video signals are optimized for progressive scan display. In most cases, the “automatic” mode is your best choice, as it senses whether the disc being played was originally recorded on video or shot on film. However, in some cases you may wish to compensate for errors in the disc authoring that occur when the frame rate is not properly maintained when films are convert- ed to video. Three choices are available:
•Auto: This is the recommended setting, as it lets the DVD 22 analyze the signals from the DVD and adjust the output accordingly.
•Movie: Choose this option for optimal play- back of material that was shot on film, even though you are viewing it on video via a DVD.
•Video: Choose this option for optimal play- back of material that was shot directly to video, such as concerts and sports program- ming.
The Video Adjustment Submenu contains access to the Test Screen. First adjust the video display device (TV) with the help of the Test Screen.
After that the output settings of the player can be