If you have any questions regarding our products, call our
Tri-Beam® Arc Hammock Stand
Congratulations on your purchase of the
We believe that you will find it a product of unsurpassed quality and durability.
Parts included to assemble your
2 - Foot poles |
| |
2 - End sections |
| |
1 - Center section |
| |
Hardware Included: |
| |
4 | - Bolts - 1/4” | 4 - Nuts with Nylon Threadlocker - 1/4” |
4 | - Flat Washers | 2 - “Z” Hooks |
2 - 1” Washers
Tools needed to assemble your
NOTE: Two people may be needed for assembly.
ASSEMBLY INSTRUCTIONS:
1.Lay all hammock stand pieces on a flat surface.
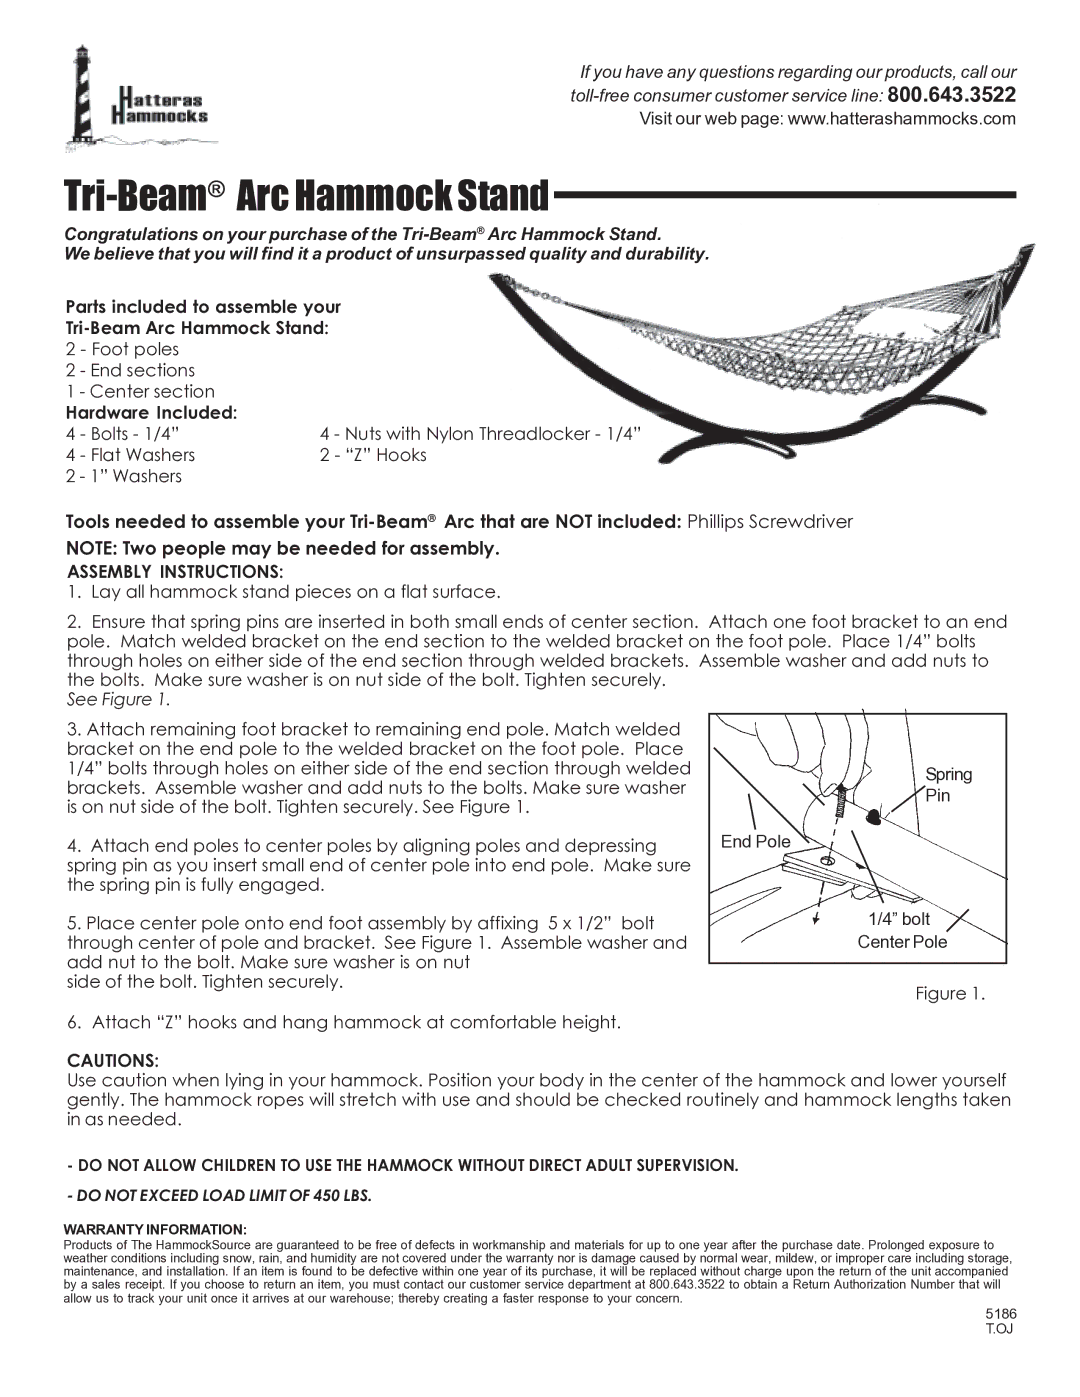
2.Ensure that spring pins are inserted in both small ends of center section. Attach one foot bracket to an end pole. Match welded bracket on the end section to the welded bracket on the foot pole. Place 1/4” bolts through holes on either side of the end section through welded brackets. Assemble washer and add nuts to the bolts. Make sure washer is on nut side of the bolt. Tighten securely.
See Figure 1.
3.Attach remaining foot bracket to remaining end pole. Match welded bracket on the end pole to the welded bracket on the foot pole. Place 1/4” bolts through holes on either side of the end section through welded brackets. Assemble washer and add nuts to the bolts. Make sure washer is on nut side of the bolt. Tighten securely. See Figure 1.
4.Attach end poles to center poles by aligning poles and depressing spring pin as you insert small end of center pole into end pole. Make sure the spring pin is fully engaged.
5.Place center pole onto end foot assembly by affixing 5 x 1/2” bolt through center of pole and bracket. See Figure 1. Assemble washer and add nut to the bolt. Make sure washer is on nut
side of the bolt. Tighten securely.
6.Attach “Z” hooks and hang hammock at comfortable height.
Spring
Pin
End Pole
1/4” bolt ![]() Center Pole
Center Pole
Figure 1.
CAUTIONS:
Use caution when lying in your hammock. Position your body in the center of the hammock and lower yourself gently. The hammock ropes will stretch with use and should be checked routinely and hammock lengths taken in as needed.
-DO NOT ALLOW CHILDREN TO USE THE HAMMOCK WITHOUT DIRECT ADULT SUPERVISION.
-DO NOT EXCEED LOAD LIMIT OF 450 LBS.
WARRANTY INFORMATION:
Products of The HammockSource are guaranteed to be free of defects in workmanship and materials for up to one year after the purchase date. Prolonged exposure to weather conditions including snow, rain, and humidity are not covered under the warranty nor is damage caused by normal wear, mildew, or improper care including storage, maintenance, and installation. If an item is found to be defective within one year of its purchase, it will be replaced without charge upon the return of the unit accompanied by a sales receipt. If you choose to return an item, you must contact our customer service department at 800.643.3522 to obtain a Return Authorization Number that will allow us to track your unit once it arrives at our warehouse; thereby creating a faster response to your concern.
5186
T.OJ