Set Up
Tools Needed – 5mm Hex Driver, Phillips Screwdriver,
Materials Included –
1. | 2. |
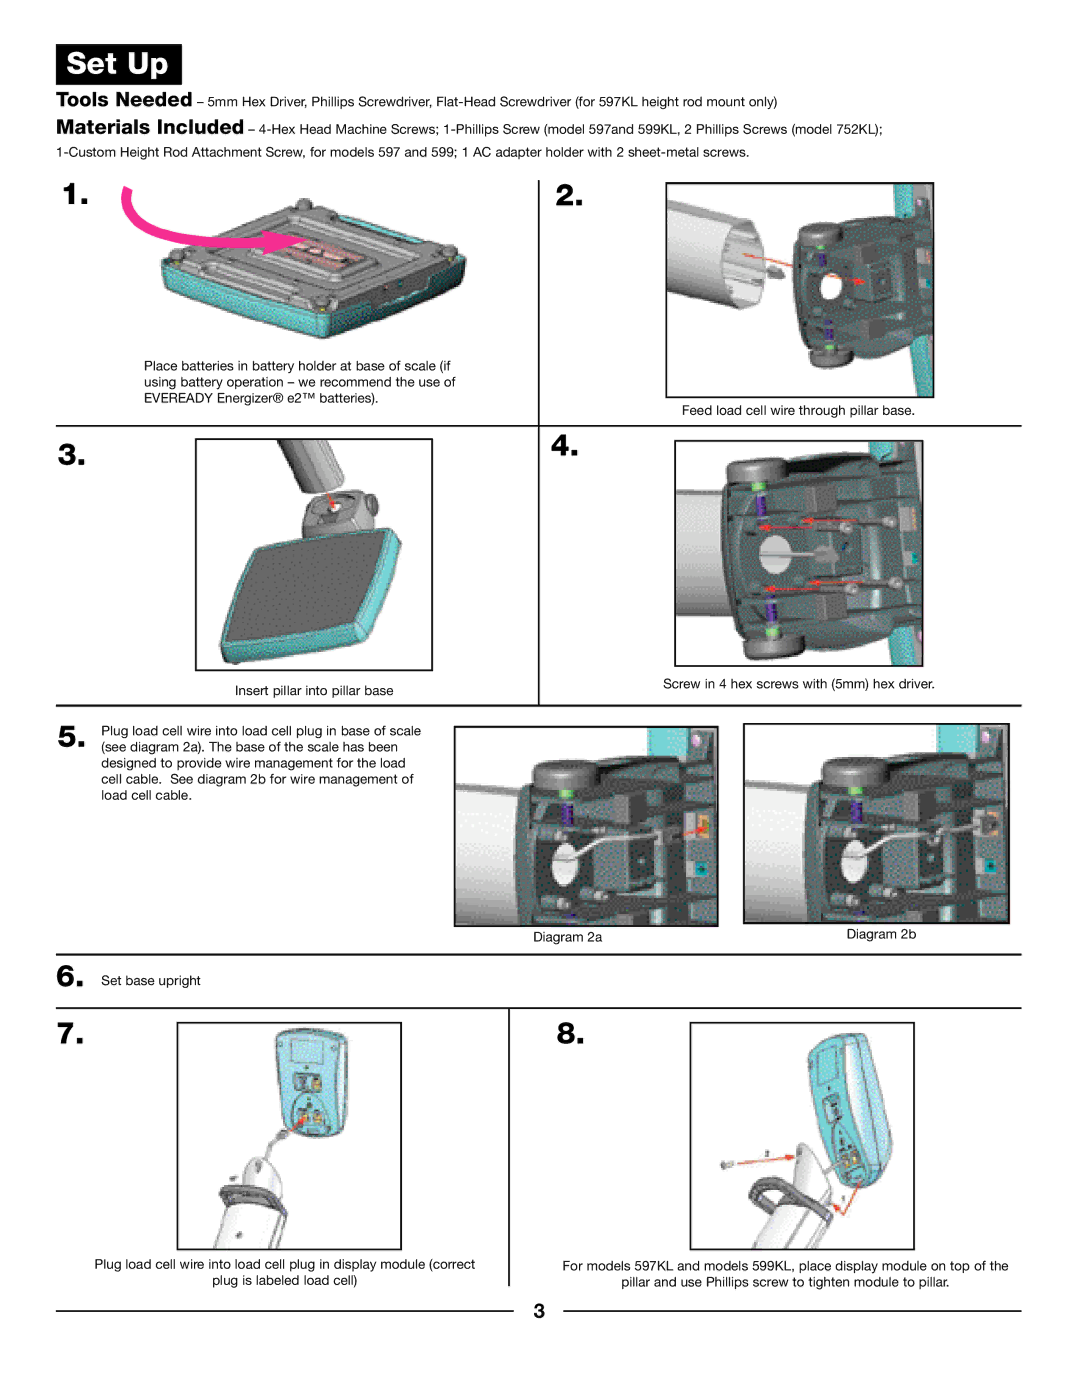
Place batteries in battery holder at base of scale (if using battery operation – we recommend the use of
EVEREADY Energizer® e2™ batteries).
Feed load cell wire through pillar base.
3. | 4. |
Insert pillar into pillar base
Screw in 4 hex screws with (5mm) hex driver.
5. Plug load cell wire into load cell plug in base of scale (see diagram 2a). The base of the scale has been designed to provide wire management for the load cell cable. See diagram 2b for wire management of load cell cable.
6. Set base upright
7.
Diagram 2a | Diagram 2b |
8.
Plug load cell wire into load cell plug in display module (correct
plug is labeled load cell)
For models 597KL and models 599KL, place display module on top of the
pillar and use Phillips screw to tighten module to pillar.
3
