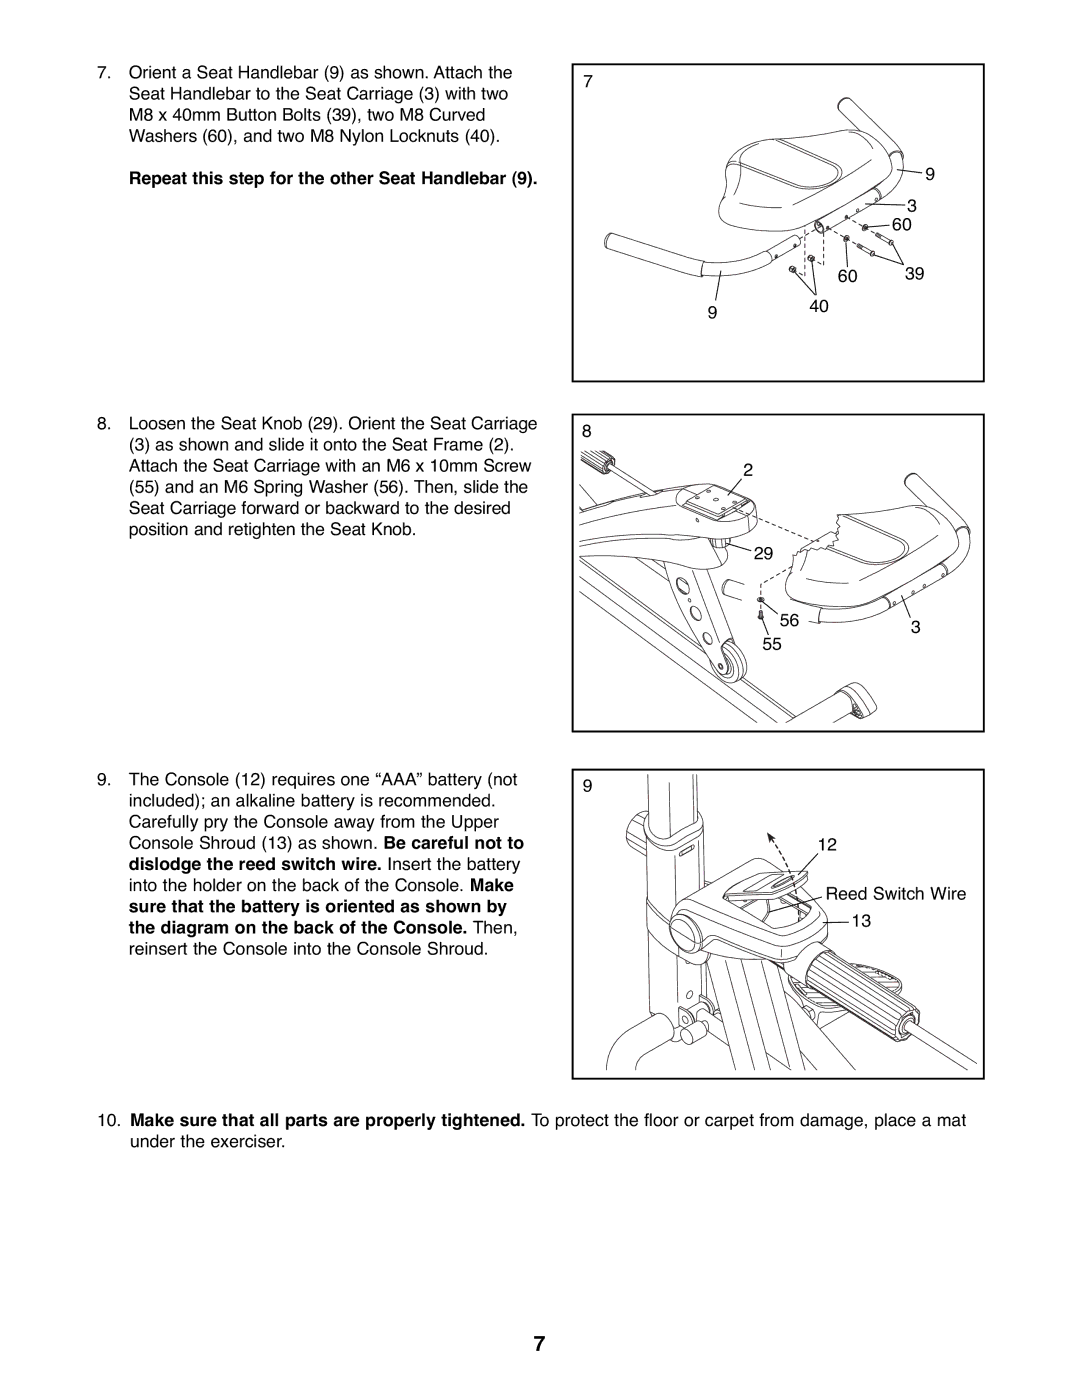
7. Orient a Seat Handlebar (9) as shown. Attach the | 7 |
|
|
Seat Handlebar to the Seat Carriage (3) with two |
|
| |
|
|
| |
M8 x 40mm Button Bolts (39), two M8 Curved |
|
|
|
Washers (60), and two M8 Nylon Locknuts (40). |
|
|
|
Repeat this step for the other Seat Handlebar (9). |
|
| 9 |
|
|
| 3 |
|
|
| 60 |
|
| 60 | 39 |
| 9 | 40 |
|
|
|
| |
8. Loosen the Seat Knob (29). Orient the Seat Carriage | 8 |
|
|
(3) as shown and slide it onto the Seat Frame (2). |
|
| |
|
|
| |
Attach the Seat Carriage with an M6 x 10mm Screw |
| 2 |
|
(55) and an M6 Spring Washer (56). Then, slide the |
|
|
|
Seat Carriage forward or backward to the desired |
|
|
|
position and retighten the Seat Knob. |
|
|
|
|
| 29 |
|
|
| 56 | 3 |
|
| 55 | |
|
|
| |
9. The Console (12) requires one “AAA” battery (not | 9 |
|
|
included); an alkaline battery is recommended. |
|
| |
|
|
| |
Carefully pry the Console away from the Upper |
|
|
|
Console Shroud (13) as shown. Be careful not to |
| 12 |
|
dislodge the reed switch wire. Insert the battery |
|
|
|
into the holder on the back of the Console. Make |
| Reed Switch Wire | |
sure that the battery is oriented as shown by |
| ||
| 13 |
| |
the diagram on the back of the Console. Then, |
|
| |
|
|
| |
reinsert the Console into the Console Shroud. |
|
|
|
10.Make sure that all parts are properly tightened. To protect the floor or carpet from damage, place a mat under the exerciser.
7