ASSEMBLY
Before beginning assembly, carefully read the | • | Read each assembly step carefully before you |
following information and instructions: |
| begin. |
• Place all parts in a cleared area and remove the | • | During assembly, make sure that all parts are |
packing materials; do not dispose of the packing |
| oriented as shown in the drawings. |
materials until assembly is completed. |
|
|
|
|
|
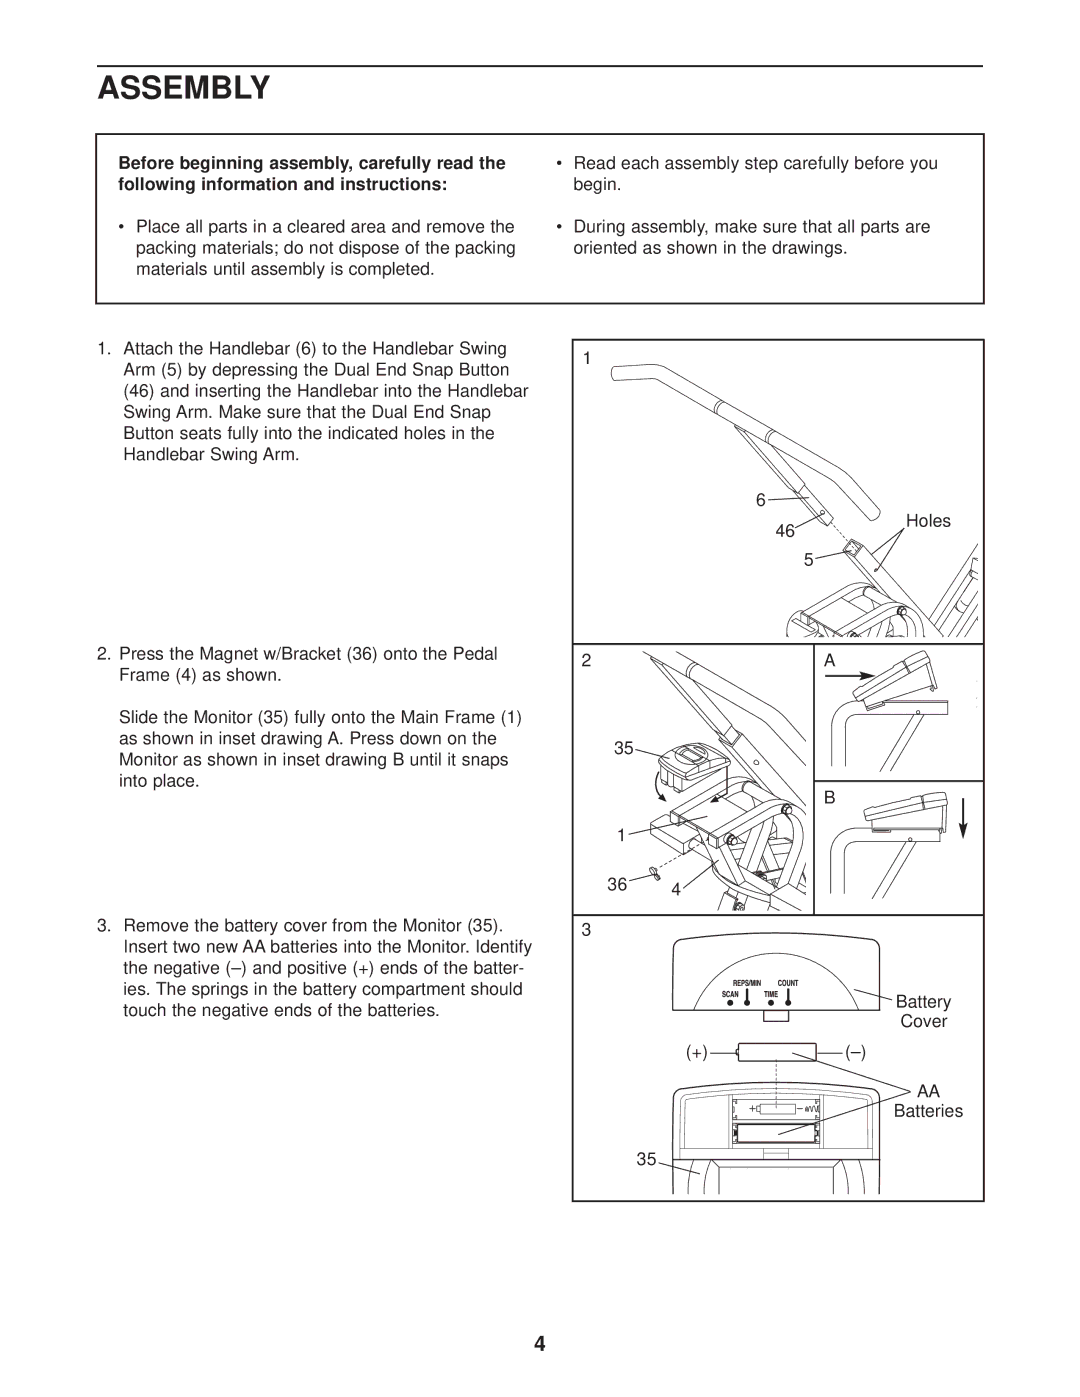
1.Attach the Handlebar (6) to the Handlebar Swing Arm (5) by depressing the Dual End Snap Button (46) and inserting the Handlebar into the Handlebar Swing Arm. Make sure that the Dual End Snap Button seats fully into the indicated holes in the Handlebar Swing Arm.
2.Press the Magnet w/Bracket (36) onto the Pedal Frame (4) as shown.
Slide the Monitor (35) fully onto the Main Frame (1) as shown in inset drawing A. Press down on the Monitor as shown in inset drawing B until it snaps into place.
3.Remove the battery cover from the Monitor (35). Insert two new AA batteries into the Monitor. Identify the negative
1 |
|
|
|
|
| 6 |
|
|
| 46 | Holes |
|
|
| |
|
|
| 5 |
2 |
|
| A |
35 |
|
|
|
|
|
| B |
1 |
|
|
|
36 | 4 |
|
|
|
|
| |
3 |
|
|
|
|
|
| Battery |
|
|
| Cover |
| (+) |
| |
|
|
| AA |
|
|
| Batteries |
| 35 |
|
|
4