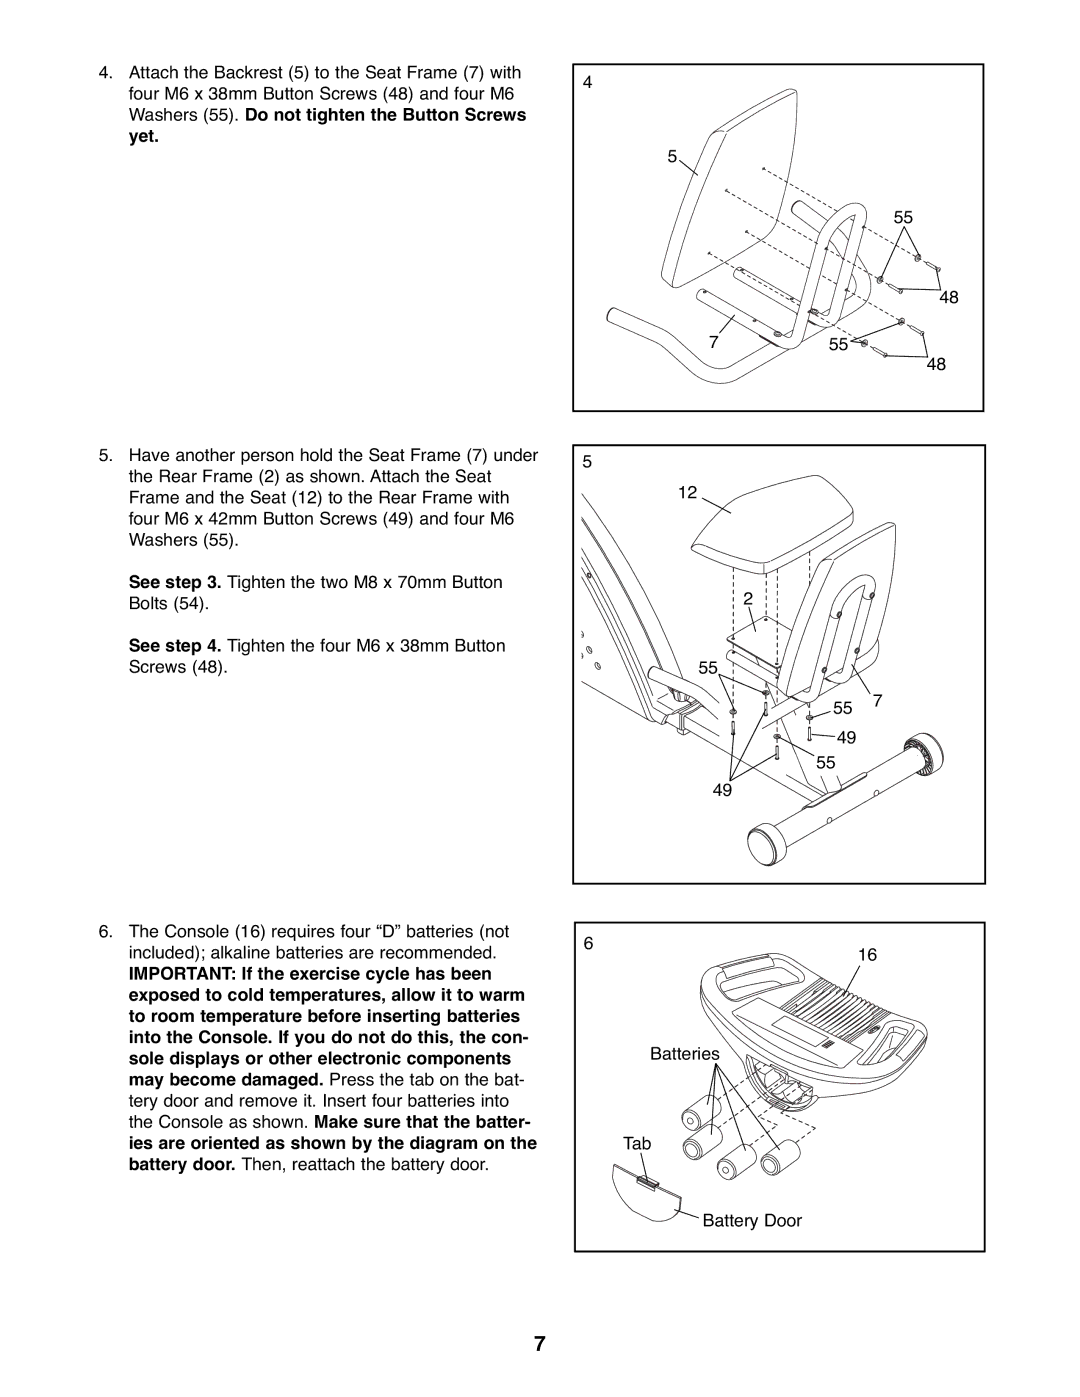
4.Attach the Backrest (5) to the Seat Frame (7) with four M6 x 38mm Button Screws (48) and four M6 Washers (55). Do not tighten the Button Screws yet.
5.Have another person hold the Seat Frame (7) under the Rear Frame (2) as shown. Attach the Seat Frame and the Seat (12) to the Rear Frame with four M6 x 42mm Button Screws (49) and four M6 Washers (55).
See step 3. Tighten the two M8 x 70mm Button Bolts (54).
See step 4. Tighten the four M6 x 38mm Button Screws (48).
6.The Console (16) requires four “D” batteries (not included); alkaline batteries are recommended.
IMPORTANT: If the exercise cycle has been exposed to cold temperatures, allow it to warm to room temperature before inserting batteries into the Console. If you do not do this, the con- sole displays or other electronic components may become damaged. Press the tab on the bat- tery door and remove it. Insert four batteries into the Console as shown. Make sure that the batter- ies are oriented as shown by the diagram on the battery door. Then, reattach the battery door.
4 |
|
|
5 |
|
|
|
| 55 |
|
| 48 |
7 | 55 | 48 |
|
| |
5 |
|
|
12 |
|
|
| 2 |
|
55 |
|
|
| 55 | 7 |
| 49 |
|
| 55 |
|
49 |
|
|
6 |
| 16 |
|
| |
Batteries |
|
|
Tab |
|
|
 Battery Door
7
